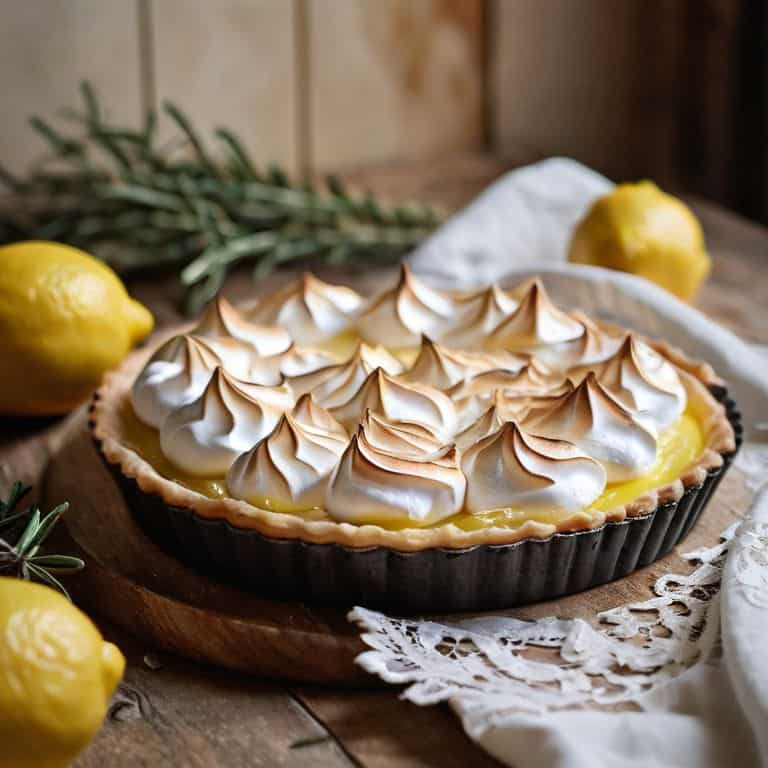
As I stood in my Parisian pastry kitchen, surrounded by the whispers of _sugar and citrus_, I couldn’t help but think of the countless times I’ve been asked to create the perfect a classic lemon tart with meringue recipe. It’s a dish that’s often shrouded in mystery, with many believing it to be a complicated and temperamental beast. But, I’m here to tell you that this couldn’t be further from the truth. With a few simple techniques and a deep understanding of the ingredients, you can create a show-stopping lemon tart with meringue that’s sure to impress even the most discerning palates.
In this article, I promise to guide you through the process of creating a truly exceptional a classic lemon tart with meringue recipe, one that’s rooted in the principles of traditional French patisserie. I’ll share with you my _hard-won secrets_ for crafting a flaky, buttery crust, a tart and tangy lemon curd, and a golden, toasted meringue that’s sure to elevate your baking to new heights. Whether you’re a seasoned pastry chef or a curious beginner, I invite you to join me on this journey as we explore the art of creating a truly unforgettable lemon tart with meringue.
Table of Contents
Recipe Details
Ingredients
- 1 1/2 cups all-purpose flour (sifted)
- 1/2 cup confectioners' sugar
- 1/4 teaspoon salt
- 1/2 cup unsalted butter, chilled and cut into small pieces
- 2 large egg yolks
- 1/2 cup granulated sugar
- 2 tablespoons freshly squeezed lemon juice
- 1/4 cup grated lemon zest
- 3 large egg whites (at room temperature)
- 1 cup granulated sugar (for meringue)
Tools & Supplies
- Large mixing bowl
- Pastry blender or food processor
- 9-inch tart pan with removable bottom
- Electric mixer
- Whisk
- Rubber spatula
- Oven thermometer
Recipe Instructions
Step 1
First, let’s start with the foundation of our masterpiece: the pastry crust. To make the crust, combine 2 1/4 cups of all-purpose flour, 1/2 cup of confectioners’ sugar, and 1/2 teaspoon of salt in a large bowl. Add 1/2 cup of high-quality unsalted butter, chilled and cut into small pieces, and use a pastry blender or your fingertips to work the butter into the flour mixture until it resembles coarse crumbs. As you do this, remember that the key to a flaky crust is to keep the butter cold and not overwork the dough.
Step 2
Next, we’ll add the liquid ingredients to bring the dough together. In a small bowl, whisk together 1/4 cup of ice-cold water and 1 tablespoon of egg, beaten. Gradually pour the liquid mixture into the flour mixture, stirring with a fork until the dough starts to come together in a smooth, pliable ball. Be careful not to add too much liquid, as this can lead to a tough crust. Once the dough is formed, wrap it in plastic wrap and refrigerate for at least 30 minutes to allow the gluten to relax.
Step 3
Now, it’s time to roll out the chilled dough and shape it into our tart pan. On a lightly floured surface, roll out the dough to a thickness of about 1/8 inch, using long, smooth strokes to maintain an even texture. Carefully transfer the rolled-out dough to a 9-inch tart pan with a removable bottom, pressing it into the corners and up the sides of the pan. Trim any excess dough from the edges and use a fork to create a decorative border around the rim of the tart. This is where your attention to detail will truly pay off.
Step 4
With our crust in place, we can move on to the filling. In a medium bowl, whisk together 3 large egg yolks, 1/2 cup of granulated sugar, and 1/2 cup of freshly squeezed lemon juice until well combined. Add 1/4 cup of unsalted butter, melted, and 1 teaspoon of grated lemon zest, whisking until smooth. This lemon curd is the heart of our tart, and its silky texture is what will set it apart from other desserts.
Step 5
To assemble the tart, pour the lemon curd into the baked pastry shell and smooth the top with a spatula. Don’t worry if it’s not perfect – we’ll be covering it with a layer of meringue soon. To make the meringue, beat 3 large egg whites and 1 cup of granulated sugar in a clean bowl until stiff peaks form. Add 1 teaspoon of cream of tartar and continue beating until the meringue is smooth and glossy. Spread the meringue over the filling, making sure to seal the edges of the meringue to the pastry crust to prevent filling from escaping during baking.
Step 6
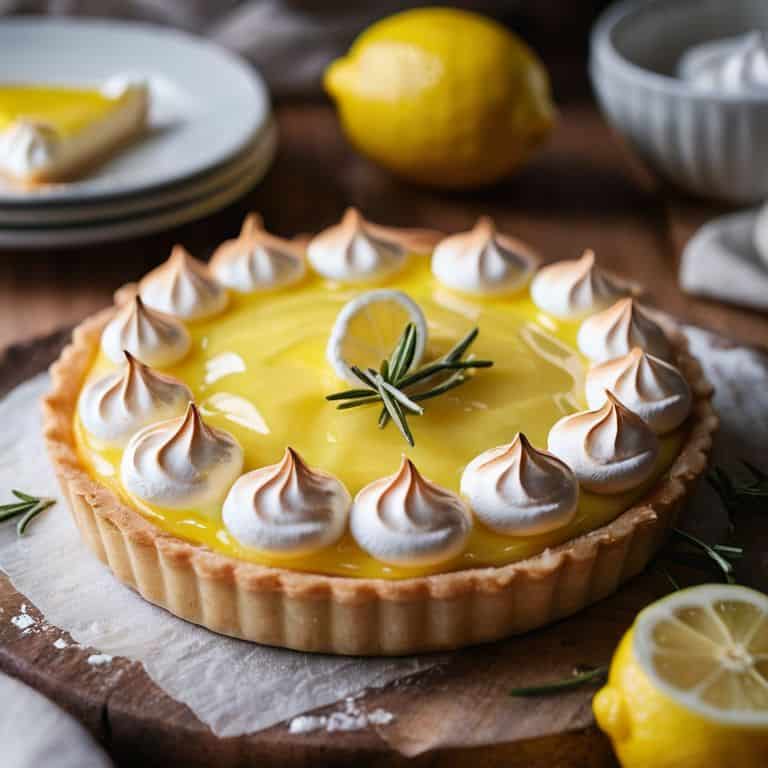
Finally, it’s time to add the finishing touches to our masterpiece. Use a kitchen torch to carefully brown the meringue, or place the tart under the broiler for 1-2 minutes, watching carefully to avoid burning. Once the meringue is golden brown, remove the tart from the oven and let it cool to room temperature on a wire rack. As you slice into the tart and reveal the vibrant yellow lemon curd beneath, you’ll know that all your hard work has paid off.
Mastering a Classic Lemon Tart With Meringue Recipe
As I delve into the world of lemon tarts, I’m reminded of the importance of lemon curd filling techniques. A perfectly balanced curd can make all the difference in the overall flavor and texture of the tart. To achieve this, I always use a combination of freshly squeezed lemon juice, sugar, eggs, and butter, cooking it gently over low heat until it thickens to a silky smooth consistency. This attention to detail is what sets a truly exceptional lemon tart apart from a good one.
When it comes to the meringue topping, I believe it’s essential to understand the science behind its formation. By slowly pouring hot sugar syrup into egg whites while whipping, we create a stable foam that can be shaped and baked to a golden brown perfection. For a classic look, I opt for a smooth, rounded meringue topping, but feel free to get creative with torching meringue safely to add a beautifully caramelized finish.
To take your lemon tart to the next level, consider experimenting with different lemon meringue pie variations. You could try adding a hint of citrus zest or a sprinkle of powdered sugar to the meringue topping for extra flavor and texture. Alternatively, focus on baking a flaky pastry crust to provide a satisfying crunch beneath the creamy lemon curd and toasted meringue. Whatever variation you choose, remember that the key to a stunning lemon tart lies in the harmony of its components.
Elevating Lemon Curd Filling Techniques
To elevate our lemon curd filling, we must focus on balancing flavors and textures. I like to use a combination of freshly squeezed lemon juice and high-quality, unsalted butter to create a rich, velvety smoothness. A crucial step is tempering the eggs, which ensures a stable and creamy curd. By slowly pouring the warm lemon mixture into the eggs, we prevent scrambling and achieve a beautiful, even consistency.
By mastering this technique, we can create a truly exceptional lemon tart with meringue. The key is to not rush the process, allowing each component to shine. With a little patience and practice, you’ll be crafting a lemon curd that’s nothing short of sublime, providing a stunning foundation for our show-stopping dessert.
Torching Meringue Topping for a Golden Glow
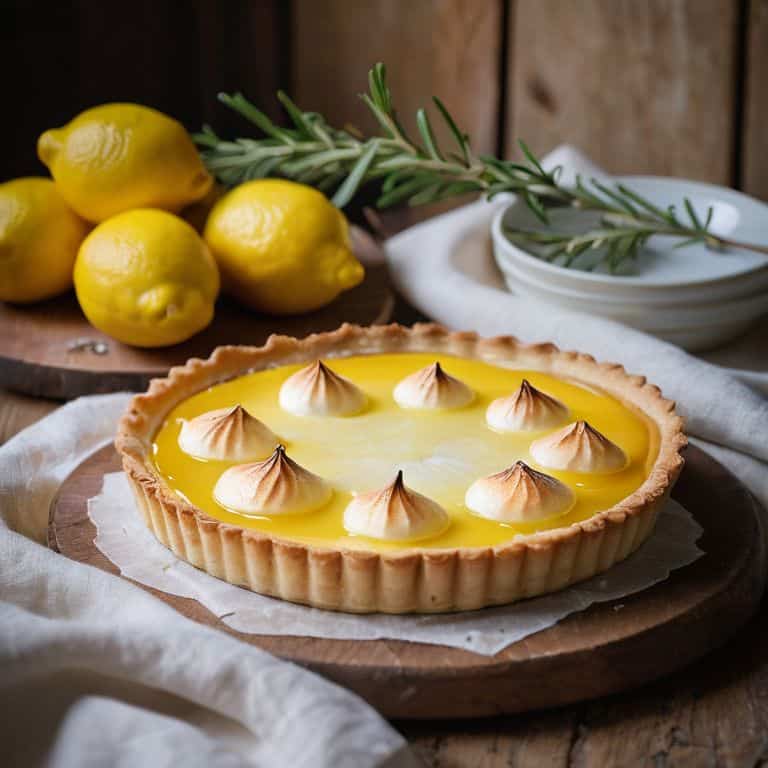
To achieve that perfect golden glow on our meringue topping, I swear by the gentle touch of a kitchen torch. It’s an art that requires a bit of finesse, but trust me, the end result is well worth the extra effort. By carefully caramelizing the meringue’s surface, we add a depth of flavor and texture that elevates our tart to new heights.
With a steady hand, move the flame slowly back and forth, watching as the meringue transforms into a beautifully bronzed crown. It’s a moment of magic, really – the aroma of toasted sugar, the crunch of the meringue giving way to a fluffy interior. Remember, the key is to be gentle; you want to coax out that golden color, not scorch the meringue.
Bringing Sunshine to Your Bakes: 5 Expert Tips for a Classic Lemon Tart with Meringue
- Ensure your lemons are at room temperature before juicing to maximize their flavor and oil release, making your lemon curd filling more vibrant and aromatic
- Use a high-quality, European-style butter for the pastry crust, as it contains less water than regular butter, resulting in a flakier and more tender base for your tart
- Temper your eggs before adding them to the lemon curd mixture to prevent scrambling, guaranteeing a smooth and silky texture that’s essential for a professional finish
- Don’t over-torch the meringue topping, as this can lead to a bitter flavor; instead, aim for a golden brown color with subtle caramelized spots to add depth and visual appeal
- Allow your tart to cool completely on a wire rack before serving to prevent the meringue from shrinking or cracking, ensuring your masterpiece remains intact and impresses your guests with its elegance and beauty
Key Takeaways for a Stunning Lemon Tart
By mastering the art of making a classic lemon tart with meringue, you’ll elevate your baking skills and impress your loved ones with a show-stopping dessert that combines the brightness of lemon curd with the golden crunch of torched meringue
Perfecting the lemon curd filling requires attention to detail, from using high-quality ingredients like farm-fresh eggs and real vanilla to carefully balancing the acidity and sweetness, ensuring a smooth, velvety texture that’s both tangy and sweet
Achieving a perfectly golden meringue topping involves understanding the science behind torched meringue, including the ideal temperature, distance, and technique for caramelizing the sugar to a beautiful, even golden brown, adding a satisfying textural element and visual appeal to your tart
A Timeless Masterpiece
A classic lemon tart with meringue is more than just a dessert, it’s a symphony of textures and flavors that awakens the senses and transports us to a world of elegance and refinement, where every bite is a testament to the beauty of simplicity and the joy of creating something truly sublime.
Alison Lawson
Bringing It All Together: The Perfect Lemon Tart

As we conclude our journey through the classic lemon tart with meringue recipe, let’s take a moment to reflect on the techniques we’ve mastered along the way. From the delicate balance of our lemon curd filling, where the right amount of sugar and acidity comes together in perfect harmony, to the art of torching our meringue topping for a golden glow, each step has been a crucial part of creating a truly show-stopping dessert. By focusing on the quality of our ingredients, especially the richness of our butter and the depth of our vanilla, and by taking the time to meticulously prepare each component, we’ve elevated this tart from a simple dessert to a work of edible art.
So, the next time you’re in the kitchen, I encourage you to think of baking not just as a chore, but as an opportunity for creativity. Let the precision of pastry making be a meditation, and the presentation of your final piece a statement of beauty and joy. Remember, the true magic happens not just in the eating, but in the making. As you share your masterpiece with others, watch how it brings people together, and know that you’ve created something truly special – a taste of happiness that will linger long after the last bite is savored.
Frequently Asked Questions
How do I prevent my lemon curd from becoming too runny or too thick?
To achieve the perfect consistency, I recommend carefully tempering your eggs and monitoring the curd’s temperature, aiming for a smooth, silky texture. If it becomes too runny, a little more cooking will help; if too thick, a splash of lemon juice or water will restore balance.
What's the best way to achieve a evenly toasted meringue topping without burning it?
To achieve a perfectly toasted meringue, I swear by the gentle kiss of a kitchen torch. Hold it 2-3 inches away, moving it slowly and steadily to avoid hot spots. You can also try baking at 375°F for 5-7 minutes, watching closely to prevent burning. The key is patience and attention to that golden glow.
Can I make individual mini lemon tarts with meringue using this same recipe?
Absolutely, my lovelies! To create individual mini lemon tarts, simply scale down the recipe and adjust the baking time. Use pre-made mini tart shells or bake your own, then fill and top with a dollop of meringue. Torch to perfection for a golden glow. I adore this format for dinner parties or gatherings – it’s a delightful, bite-sized twist on the classic dessert.