I still remember the day I realized that using a kitchen thermometer was the secret to taking my baked goods from good to great. It was a revelation that changed the way I approached baking, and it’s a lesson I’ve been eager to share with my students ever since. The truth is, many of us have been taught to rely on guesswork when it comes to temperature, but I’m here to tell you that how to use a kitchen thermometer is not just a useful skill – it’s a game-changer. By mastering this simple tool, you’ll be able to achieve consistent results and take the guesswork out of your baking.
In this article, I’ll show you the no-nonsense approach to using a kitchen thermometer, and provide you with the practical advice you need to get started. You’ll learn how to choose the right thermometer for your needs, how to calibrate it for accuracy, and how to use it to achieve perfect temperatures every time. Whether you’re a beginner or an experienced baker, you’ll find that using a kitchen thermometer is easier than you think, and it’s a skill that will pay dividends in the quality of your baked goods. So let’s get started, and discover the difference that precise temperature control can make in your baking.
Table of Contents
Guide Overview: What You'll Need
Total Time: 10 minutes
Estimated Cost: $5 – $20
Difficulty Level: Easy
Tools Required
- Kitchen Thermometer (digital or analog)
Supplies & Materials
- Food or Liquid for Testing to calibrate and test thermometer accuracy
Step-by-Step Instructions
- 1. First, let’s start with the basics: investing in a good quality kitchen thermometer is essential for accurate temperature readings. When selecting a thermometer, consider the type of baking you’ll be doing most often and choose one that suits your needs. I always recommend a digital thermometer for its precision and ease of use.
- 2. Next, it’s crucial to calibrate your thermometer to ensure it’s providing accurate readings. This step is often overlooked, but trust me, it’s a game-changer. To calibrate, simply submerge the thermometer in a mixture of ice and water, and adjust the temperature reading to 32°F (0°C). This simple step will give you peace of mind knowing your thermometer is reliable.
- 3. Now, let’s talk about placement: where you position your thermometer in the oven or mixture can significantly affect the reading. When using your thermometer in the oven, place it in the center, away from walls and racks, to get an accurate reading of the oven’s temperature. For mixtures, insert the thermometer into the center, making sure not to touch the bottom or sides of the container.
- 4. The next step is to understand the temperature ranges for different types of baking. Each type of bake, whether it’s a delicate meringue or a hearty bread, has an optimal temperature range. Familiarize yourself with these ranges to ensure your bakes turn out perfectly. I’ve found that having a reference chart handy can be incredibly helpful.
- 5. Once you’ve got your thermometer in place and understand the temperature ranges, it’s time to monitor the temperature. Keep a close eye on the thermometer, especially during critical phases like proofing or the initial baking stages. This is where the magic happens, and slight temperature adjustments can make all the difference in the final product.
- 6. Now that you’re comfortable with using your thermometer, let’s talk about interpreting the readings. It’s not just about reaching a specific temperature; it’s also about understanding how that temperature affects your bake. For instance, if you’re making a cake, you’ll want to ensure the oven is at the correct temperature to prevent overcooking or undercooking. I always say, temperature is key to a perfect bake.
- 7. Finally, maintaining your thermometer is crucial for its longevity and accuracy. Regularly clean your thermometer with soap and water, and store it in a dry place. For digital thermometers, check the battery levels regularly to avoid any unexpected surprises during critical baking moments. By following these simple steps, you’ll be well on your way to becoming a thermometer pro and baking like a professional.
Mastering Thermometer Basics
To truly master the art of temperature control, it’s essential to understand the basics of your kitchen thermometer. This includes knowing how to properly calibrate it, as well as being aware of potential oven temperature fluctuations that can affect your readings. I always recommend checking your thermometer against a known temperature reference point to ensure you’re getting an accurate temperature reading.
When it comes to choosing between digital vs analog thermometers, I personally prefer digital models for their ease of use and precision. However, analog thermometers can still provide reliable results if used correctly. It’s also important to familiarize yourself with safe internal meat temperatures to ensure that your dishes are not only delicious but also safe to eat.
In addition to understanding your thermometer, it’s crucial to develop a sense of temperature awareness in your baking and cooking. This means being mindful of the temperature ranges required for specific techniques, such as candy making, and being able to adjust your thermometer accordingly. By doing so, you’ll be well on your way to becoming a temperature control expert and taking your culinary creations to the next level.
Accurate Readings Matter
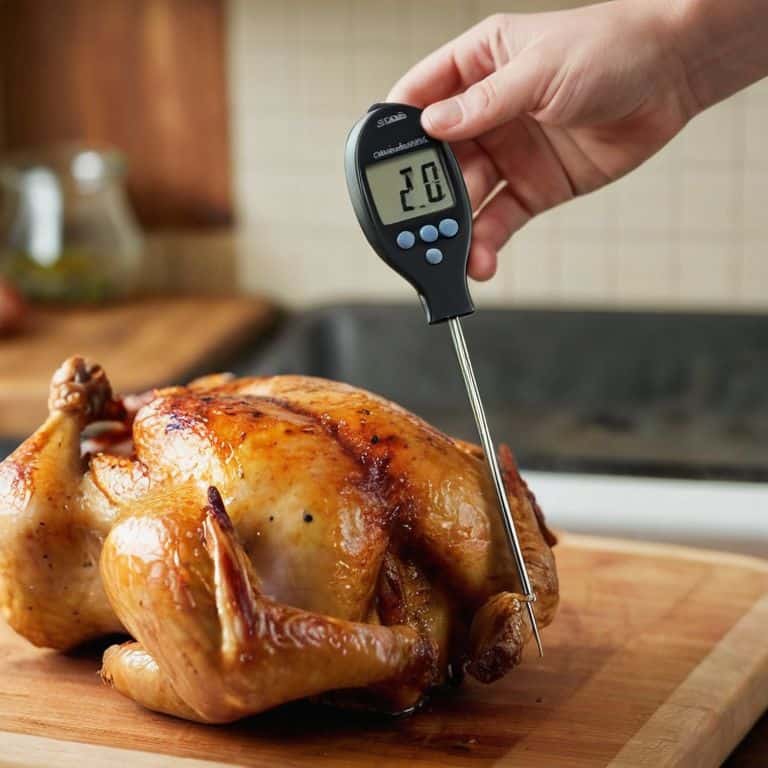
To get accurate readings, it’s crucial to place your thermometer correctly. For liquids, insert the probe about 2-3 inches deep, avoiding the bottom and sides of the container. For solids, like roasts or bread, insert the probe into the thickest part, avoiding any bones or fat. This ensures you’re measuring the internal temperature, not the surface.
I always say, a degree or two can make all the difference in a bake. That’s why I stress the importance of calibrating your thermometer regularly. It’s a simple step that can save you from overcooked or undercooked disasters. By taking the time to get it just right, you’ll be rewarded with consistent, reliable results that will make your baked goods truly exceptional.
Calibrating for Precision
To ensure your thermometer is providing accurate readings, calibration is key. I always say, it’s not just about having a thermometer, it’s about trusting its readings. Calibration is a simple process that verifies your thermometer’s accuracy. For most digital thermometers, this involves submerging the probe in a mixture of ice and water, then adjusting the reading to 32°F (0°C).
Regular calibration is essential, especially if you’re using your thermometer frequently. I recommend calibrating your thermometer every few months to maintain precision. This simple step can make all the difference in your baking, allowing you to trust your thermometer and achieve consistent results.
Thermometer Tips to Take Your Baking to the Next Level
- Always preheat your oven and let it sit for at least 10 minutes before taking a temperature reading to ensure accuracy
- Insert the thermometer probe into the thickest part of the food or liquid, avoiding any bone or fat for precise readings
- Use a thermometer with a quick-response time to get instant readings, especially when working with sensitive ingredients like yeast or eggs
- Never leave a thermometer in the oven or near a heat source for an extended period, as this can damage the device and give false readings
- Invest in a digital thermometer with a high level of precision, such as 0.1-degree increments, to guarantee consistent results in your baked goods
Key Takeaways for Mastering Your Kitchen Thermometer
Using a kitchen thermometer is crucial for achieving consistent and precise results in baking, as it helps to eliminate guesswork and ensures that ingredients are at the perfect temperature for optimal chemical reactions.
Calibrating your thermometer regularly is vital for maintaining accuracy, and understanding how to interpret temperature readings can make all the difference between a successful bake and a failed one.
By incorporating a kitchen thermometer into your baking routine and mastering its use, you’ll be empowered to experiment with new recipes, troubleshoot common baking issues, and develop a deeper understanding of the science behind the baking process.
Thermometer Wisdom
A kitchen thermometer is not just a tool, it’s a guardian of consistency, a whisperer of secrets, and a guarantor of perfection – use it wisely and it will elevate your bakes from guesswork to greatness.
Beatrice Quinn
Conclusion: Bringing It All Together
As we’ve explored the world of kitchen thermometers, it’s clear that accurate temperature control is the backbone of successful baking. From mastering thermometer basics to ensuring calibrated precision, each step builds upon the last to create a foundation for consistent, high-quality results. By following these guidelines and practicing with your thermometer, you’ll be well on your way to baking with confidence and precision. Remember, the key to unlocking your full baking potential lies in understanding the science behind the recipes, and temperature control is a crucial part of that equation.
As you continue on your baking journey, keep in mind that practice makes perfect. Don’t be discouraged by initial setbacks or inconsistencies – they’re an opportunity to learn and refine your skills. With time and patience, you’ll develop a keen sense of how temperature, ingredients, and technique intersect to produce truly exceptional baked goods. So, go ahead, take the leap, and watch your baking transform from a guessing game to a precise, enjoyable art form that brings joy to you and those you share your creations with.
Frequently Asked Questions
What is the ideal placement for a kitchen thermometer in the oven to ensure accurate temperature readings?
For accurate temperature readings, place your kitchen thermometer in the center of the oven, away from walls and racks. This ensures you’re measuring the air temperature, not radiated heat. I like to position mine about 2-3 inches from the oven floor, and always make sure it’s not touching any surfaces.
How often should I calibrate my kitchen thermometer to maintain its precision?
To keep your thermometer in top shape, I recommend calibrating it every 1-2 months, or after a significant drop or sudden change in temperature. You should also recalibrate after cleaning or storing it for an extended period. Trust me, this simple habit will ensure your thermometer remains accurate and your bakes turn out perfectly.
Can I use a kitchen thermometer to measure the internal temperature of baked goods, and if so, how do I do it correctly?
Absolutely, you can use a kitchen thermometer to measure the internal temperature of baked goods. Simply insert the thermometer into the center of the item, avoiding any fillings or edges, and wait for the temperature to stabilize. This ensures your baked goods are cooked to a safe and perfect temperature, every time.