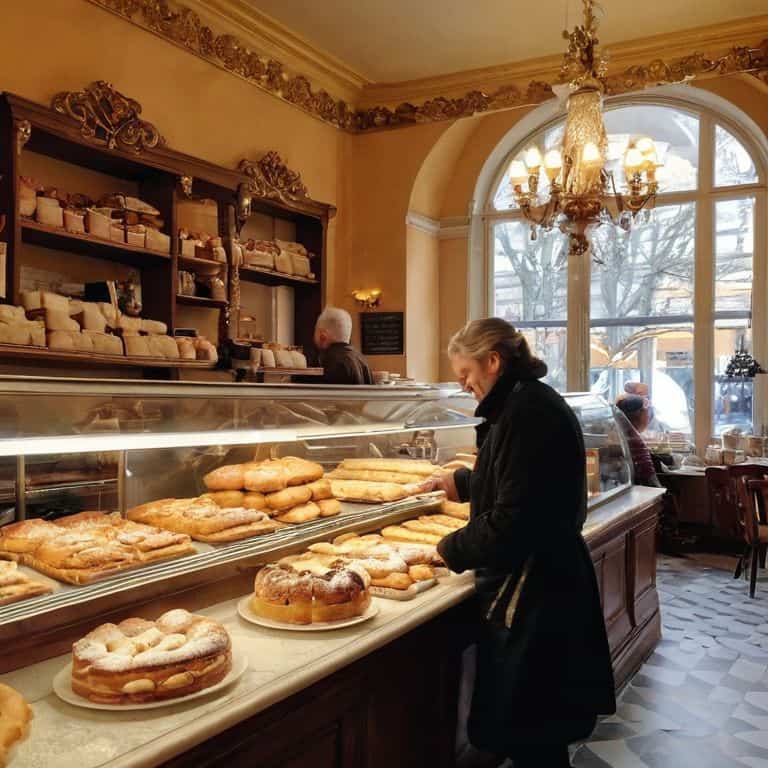
As I stand in my kitchen, surrounded by the warm, golden light of morning, I am reminded of the countless times I’ve been asked about the secrets to how to make croissants. It’s a question that never gets old, and one that I’m passionate about answering. For years, I’ve heard people say that making croissants is a tedious, impossible task, reserved only for the most skilled pastry chefs. But I’m here to tell you that this couldn’t be further from the truth. With a little patience, practice, and attention to detail, anyone can master the art of making flaky, buttery croissants.
In this article, I’ll share my no-nonsense approach to how to make croissants, learned from my years of training at Le Cordon Bleu and working in Michelin-starred restaurants. I’ll walk you through every step of the process, from mixing and laminating the dough to baking the perfect, golden-brown croissant. My goal is to empower you with the knowledge and confidence to create beautiful, delicious pastries that will impress even the most discerning palates. By the end of this guide, you’ll be equipped with the skills and techniques necessary to make croissants that are truly magical.
Table of Contents
Guide Overview: What You'll Need
Total Time: 2 hours 30 minutes
Estimated Cost: $15 – $30
Difficulty Level: Intermediate
Tools Required
- Stand Mixer (with a dough hook attachment)
- Measuring Cups
- Measuring Spoons
- Rolling Pin (at least 12 inches long)
- Baking Sheet (lined with parchment paper)
Supplies & Materials
- All-Purpose Flour 3 cups
- Granulated Sugar 1/4 cup
- Active Dry Yeast 1 packet (2 1/4 teaspoons)
- Unsalted Butter 1 cup (softened)
- Whole Milk 1 cup (warm)
- Egg 1 large (beaten, for egg wash)
- Salt 1/2 teaspoon
Step-by-Step Instructions
- 1. First, let’s start with the foundation of our croissants: the dough. To create this, we’ll need to combine warm milk, yeast, and a touch of sugar in a small bowl, stirring gently to dissolve the yeast. It’s essential to let this mixture sit for about 5-10 minutes, or until it becomes frothy, as this activation of yeast is crucial for the rise of our croissants.
- 2. While our yeast mixture is activating, we can begin preparing the dry ingredients. In a large mixing bowl, whisk together flour, salt, and a small amount of sugar. The quality of the flour is paramount here; I always opt for a high-protein flour to ensure the best texture in our final product. Next, we’ll add cold, cubed butter to the dry ingredients and use a pastry blender or our fingertips to work the butter into the flour mixture until it resembles coarse crumbs with some larger pea-sized pieces of butter remaining.
- 3. Now, we’ll add the yeast mixture to the dry ingredients and mix until a shaggy dough forms. It’s important not to overmix at this stage; we’re just looking to combine the ingredients until they come together in a cohesive mass. Turn the dough out onto a lightly floured surface and knead for about 10 minutes, or until the dough becomes smooth and elastic. This process can be quite therapeutic, and I find that focusing on the feel of the dough helps to ensure it’s kneaded to perfection.
- 4. After kneading, we’ll shape the dough into a ball, place it in a lightly oiled bowl, cover it with plastic wrap, and let it rise in a warm, draft-free place for about 1-2 hours, or until it has doubled in size. This first rise is critical for developing the flavor and texture of our croissants. Once risen, we’ll punch down the dough to release any air bubbles and prepare it for the next stage.
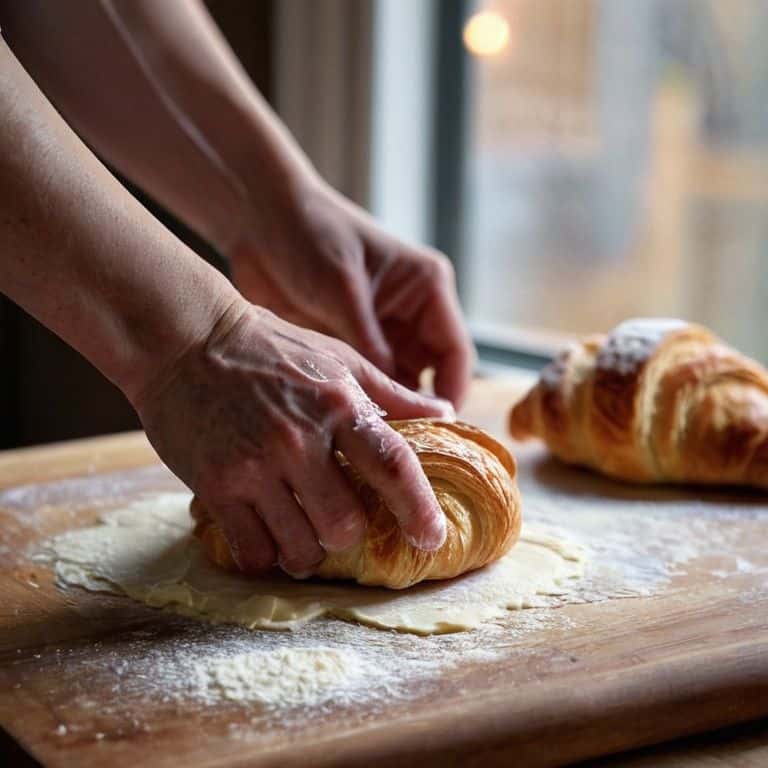
- 5. The next step involves rolling out the dough to a thickness of about 1/4 inch (6 mm). This is where the magic of layering begins. We’ll spread a generous amount of softened butter evenly over the center of the dough, leaving a 1-inch (2.5 cm) border on either side. Then, we’ll fold the dough like a letter: first, fold the two sides over the butter, then fold the top and bottom over, so that the dough is folded into thirds. This process, known as a single turn, is what creates the layered, flaky texture of our croissants.
- 6. With our dough folded, we’ll give it a brief rest in the refrigerator for about 30 minutes to allow the gluten to relax and the butter to firm up. After this rest, we’ll roll out the dough again to a larger rectangle, about 1/4 inch thick. It’s essential to maintain an even thickness to ensure that our croissants bake uniformly. Now, we’ll cut the dough into long, thin triangles. The size of these triangles will determine the size of our croissants, so cut them according to your preference.
- 7. To shape the croissants, we’ll cut a small notch at the base of each triangle, then roll each one into a croissant shape, curling the ends towards each other. Place the shaped croissants on a parchment-lined baking sheet, leaving about 1 inch (2.5 cm) of space between each to allow for even expansion during proofing and baking. Cover them with plastic wrap or a damp towel and let them rise for another 1-2 hours, or until they have puffed up slightly.
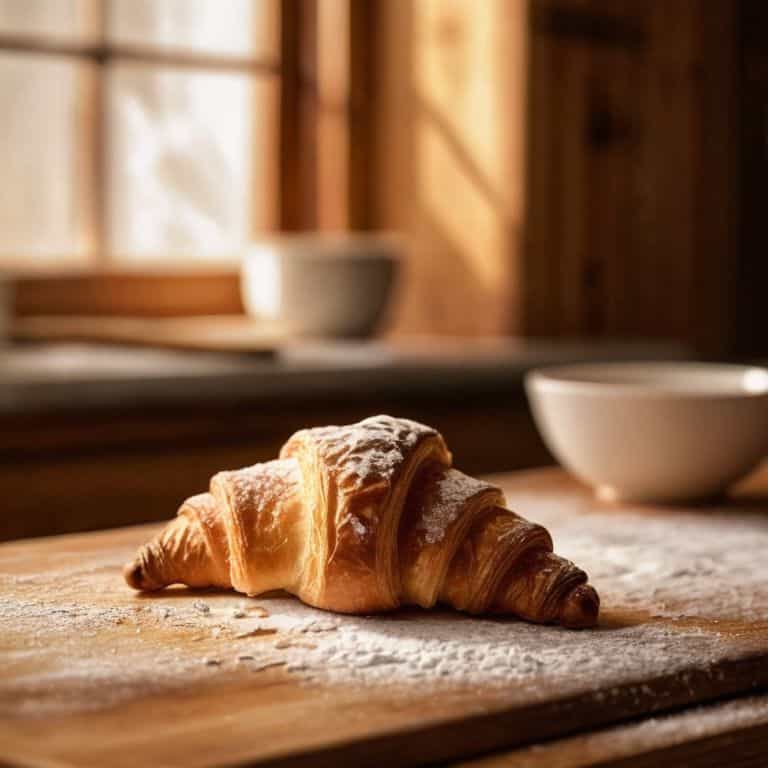
- 8. Finally, we’ll brush the tops of our croissants with a beaten egg for a golden glaze and bake them in a preheated oven at 400°F (200°C) for about 15-20 minutes, or until they are golden brown. The aroma of freshly baked croissants is one of the most satisfying parts of this process. Once baked, let the croissants cool on a wire rack for at least 30 minutes before serving. This patience will be rewarded with a crispy, golden exterior and a soft, airy interior, the perfect culmination of our baking journey.
Mastering How to Make Croissants
As I reflect on my journey to mastering the art of croissant creation, I realize that flaky pastry techniques are truly the backbone of this delicate craft. It’s all about understanding how to layer the dough, allowing the butter to shine through in every tender, golden bite. To achieve this, I always make sure to keep my butter block preparation precise, ensuring that the butter is at the perfect temperature and consistency to be effortlessly rolled into the dough.
When it comes to croissant dough proofing times, patience is indeed a virtue. Allowing the dough to rest and rise at its own pace is crucial, as rushing this process can lead to a dense, rather than airy, texture. I’ve found that a gentle touch and a watchful eye are essential in this stage, as the dough begins to transform into the light, fluffy masterpiece we all know and love.
In the world of viennoiserie pastry types, croissants stand out for their unique blend of simplicity and complexity. To avoid common croissant baking mistakes, such as overmixing or underproofing, it’s essential to develop a sense of instinct and trust in the process. By focusing on the nuances of layering dough for croissants, and taking the time to perfect each fold and roll, you’ll be well on your way to creating truly exceptional pastries that are sure to impress even the most discerning palates.
Butter Block Preparation Secrets
Now that we’ve covered the foundational steps, let’s refine our technique with the butter block. This is where the magic happens, and our croissants transform from good to sublime. I always say, the quality of your butter is paramount – I only use the finest, European-style butter with a high fat content. When preparing the butter block, make sure it’s at room temperature and pliable, but not too soft. You want to be able to fold it effortlessly into the dough, creating those signature layers.
To achieve the perfect butter block, I recommend beating the butter until it’s just softened, then shaping it into a precise rectangle. This will ensure even distribution and a beautiful, flaky texture. Don’t overwork the butter – you want to maintain its delicate structure. With these simple yet crucial steps, you’ll be well on your way to crafting croissants that rival those found in a Parisian patisserie.
Layering Dough for Flaky Pastry
To achieve the perfect flaky pastry, layering the dough is an art form that requires patience and precision. I like to think of it as a delicate dance between the dough and the butter, where each fold and roll brings us closer to croissant nirvana. As you begin to layer, remember that the key is to maintain a consistent temperature and to handle the dough gently, yet firmly.
With each fold, you’re creating the layers that will eventually puff up into those beautiful, golden croissant layers. It’s a mesmerizing process, really – the way the dough and butter meld together, forming a harmonious union that’s both crispy and tender. As you work, take your time and focus on the sensation of the dough beneath your hands, feeling the layers form and the pastry come alive.
Elevating Your Croissant Game: 5 Essential Tips

- The Right Butter Matters: Choose a high-quality, European-style butter with a high fat content for the flakiest, most tender croissants
- Respect the Rest: Allow your dough to rest and relax, as this step is crucial for developing the gluten and creating the perfect layers
- Layer with Precision: Keep your butter block and dough at the right temperature, and fold with patience and precision to achieve the signature croissant layers
- Temperature Control is Key: Maintain a consistent temperature throughout the proofing and baking process to ensure your croissants rise and bake evenly
- Don’t Overwork the Dough: Mix and fold your dough just until the ingredients come together, then let the magic happen – overworking can lead to tough, dense croissants
Essential Croissant Creation Takeaways
Layering is everything: mastering the art of folding and rotating your dough is crucial for achieving those signature flaky layers in your croissants
Quality of ingredients matters: using high-grade butter and ensuring your ingredients are at the right temperature can make all the difference in the texture and taste of your final product
Practice makes perfect pastry: don’t be discouraged if your first batch of croissants doesn’t turn out exactly as you hoped – with time and practice, you’ll develop the skills and intuition to craft truly exceptional, professionally-baked croissants at home
The Heart of Croissant Creation
The art of making croissants is not just about following a recipe, but about understanding the gentle dance between butter and dough, where each delicate layer unfolds into a masterpiece of flaky, golden pastry.
Alison Lawson
The Flaky, Butterly Truth: A Conclusion
As we conclude our journey through the world of croissants, let’s recap the essential elements that make these pastries truly unforgettable. From the careful preparation of the butter block to the meticulous layering of dough, each step is a testament to the beauty of patience and precision in baking. We’ve delved into the secrets of creating flaky, tender pastry that shatters in your mouth, releasing a cascade of buttery flavors. Whether you’re a seasoned baker or just starting out, the art of making croissants is a rewarding challenge that promises to elevate your baking skills to new heights.
So, as you embark on your own croissant-making adventure, remember that the true magic lies not just in the recipe, but in the process itself. The gentle fold of the dough, the soft whisper of the butter as it melts, and the golden glow of the finished pastry as it emerges from the oven – all these moments are a reminder that baking is an art form, a sensory journey that weaves together technique, creativity, and love. With every layer, every fold, and every delicious bite, you’ll be crafting something truly extraordinary, a testament to the power of patience, passion, and perfection.
Frequently Asked Questions
What is the ideal temperature and humidity for proofing croissant dough to achieve the perfect layers?
For flawless layers, I recommend proofing your croissant dough at a temperature between 75°F to 78°F (24°C to 25°C) and a humidity level of around 75% to 80%. This environment allows the yeast to ferment slowly, resulting in a delicate, airy texture and those signature, flaky layers we all adore.
How do I prevent my croissants from becoming too dark or burnt during the baking process?
To prevent those gorgeous layers from turning too dark, keep a watchful eye on your croissants during the last 5-7 minutes of baking. If necessary, cover the edges with foil or parchment paper to shield them from excess heat, ensuring a beautifully golden, not burnt, finish.
Can I use a substitute for high-quality European butter, or is it essential for creating authentic, flaky croissants?
While substitutes can work, I must confess that high-quality European butter is the heart of authentic croissants. Its high fat content and rich flavor are unparalleled, yielding a tender, flaky pastry that’s worth the investment. If you must substitute, look for a high-fat, cultured butter, but know that the result will be slightly different.