As I sit in my studio, surrounded by half-finished cakes and scraps of fondant, I’m reminded of the common myth that working with fondant is a daunting task, only suited for experienced decorators. But the truth is, with the right techniques and a little patience, anyone can master the art of fondant. I’ve seen it time and time again in my online tutorials – students who thought they’d never be able to achieve a smooth, even finish with fondant, only to surprise themselves with their own creations. That’s why I’m excited to share my own journey with you in this guide to fondant, and show you that with practice and dedication, you can create stunning cakes that rival those of professional decorators.
In this article, I’ll be sharing my honest, no-hype advice on how to work with fondant, from the basics of coloring and shaping, to more advanced techniques like creating realistic textures and patterns. You’ll learn how to troubleshoot common problems, like fondant that’s too sticky or too dry, and how to achieve a professional-looking finish on your cakes. Whether you’re a beginner or an experienced decorator looking to improve your skills, this guide is designed to give you the confidence and knowledge you need to take your cake decorating to the next level. So, let’s dive in and explore the wonderful world of fondant together!
Table of Contents
Guide Overview: What You'll Need
Total Time: 2 hours 30 minutes
Estimated Cost: $20 – $40
Difficulty Level: Intermediate
Tools Required
- Electric Mixer (for mixing and kneading fondant)
- Rolling Pin (for rolling out fondant)
- Smoothing Tool (for smoothing out fondant)
- Fondant Cutter (for cutting fondant into desired shapes)
- Turntable (optional, for displaying and working with fondant)
Supplies & Materials
- Fondant (available in various colors and flavors)
- Confectioners Sugar (for dusting and preventing sticking)
- Shortening (for kneading and softening fondant)
- Food Coloring (optional, for custom coloring)
- Gum Paste (optional, for creating intricate designs)
Step-by-Step Instructions
- 1. To begin working with fondant, start by preparing your workspace, which includes clearing a large, flat area and covering it with a dust-free cloth or a silicone mat. This will prevent your fondant from sticking or collecting dust and other debris.
- 2. Next, you’ll need to condition your fondant by kneading it until it becomes pliable and easy to work with. This step is crucial as it ensures the fondant will be smooth and even, allowing you to achieve a professional finish on your cake.
- 3. Now, it’s time to color your fondant, if desired. To do this, add a small amount of fondant coloring to the fondant and knead until the color is evenly distributed. Be careful not to add too much color, as this can affect the texture and consistency of the fondant.
- 4. Once your fondant is ready, you can start to roll it out to the desired thickness. Use a fondant smoother or a large, flat surface to achieve an even thickness, which is usually around 1/8 inch for most cake decorating projects.
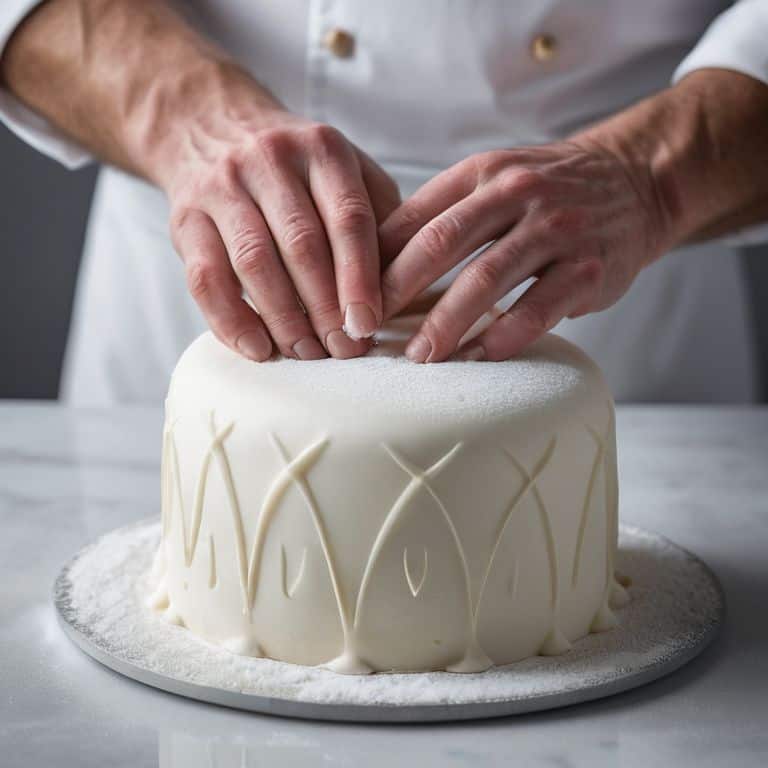
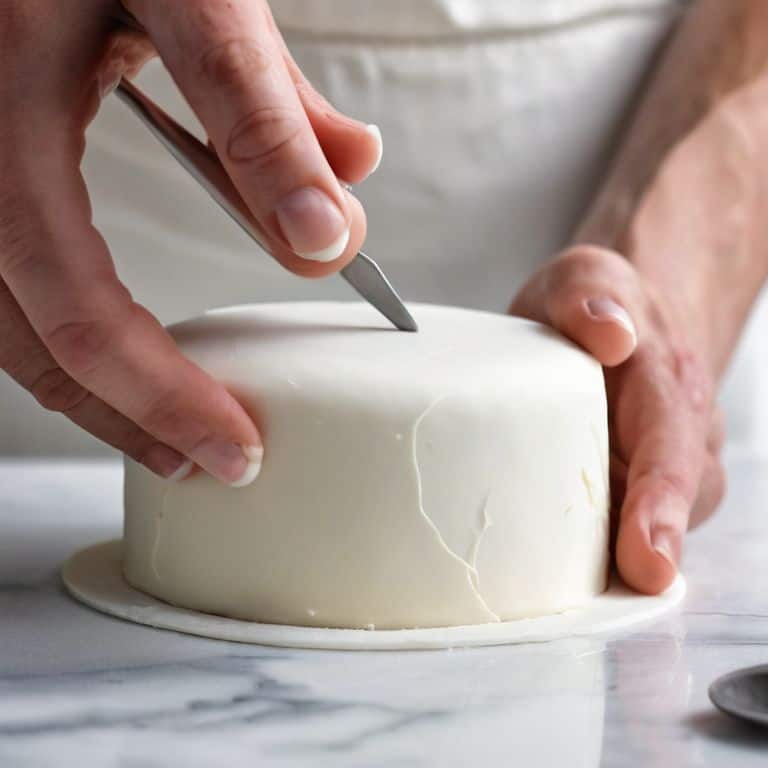
- 5. With your fondant rolled out, you can now apply it to your cake. To do this, place the fondant over the cake and smooth it out, starting from the top and working your way down. Use a fondant smoother or your hands to remove any air pockets and achieve a smooth finish.
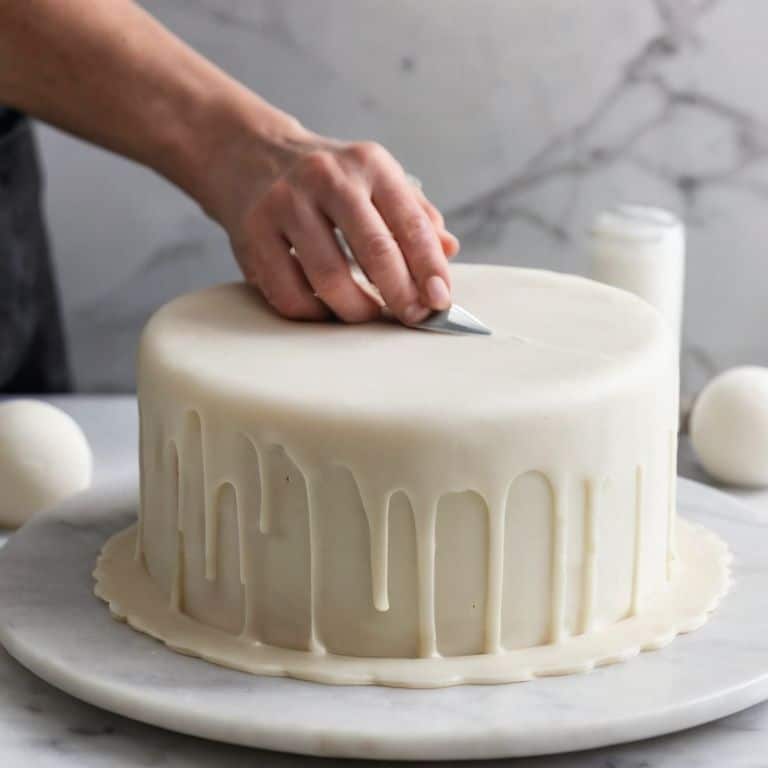
- 6. After applying the fondant, use fondant tools or molds to create intricate designs and patterns. This can include making borders, creating textures, or even molding small fondant decorations to add to your cake.
- 7. To add a finishing touch, seal your fondant with a small amount of shortening or corn syrup to protect it from drying out and to give it a glossy appearance. This step is especially important if you plan to display your cake for an extended period.
- 8. Finally, add any final decorations, such as sugar flowers, piped borders, or small fondant decorations, to complete your cake. This is where you can really let your creativity shine and add a personal touch to your design.
Unleash Fondant Magic
As I continue to explore the world of fondant, I’m reminded of the importance of fondant cake decorating techniques in bringing a design to life. One of my favorite tips is to use a combination of fondant smoothing tools to achieve a flawless finish. I’ve had the chance to review several fondant smoothing tools, and I must say, some of them have become essential in my decorating process.
When it comes to working with fondant, it’s essential to understand the different types of fondant for beginners. Some fondants are better suited for intricate designs, while others are perfect for covering large surfaces. I’ve found that using a high-quality fondant can make all the difference in the outcome of my designs. For those who prefer a more DIY approach, I’ve also experimented with a homemade fondant recipe easy to make, which can be a fun and cost-effective alternative.
To take your fondant skills to the next level, I recommend exploring fondant figure modeling tutorials. These tutorials can help you create intricate designs and characters that will add an extra touch of magic to your cakes. Additionally, mastering fondant covering tips and tricks can help you achieve a smooth, even finish that’s perfect for showcasing your designs. With practice and patience, you’ll be able to create stunning fondant masterpieces that will impress anyone.
Fondant Cake Decorating Secrets
As I delve deeper into the world of fondant, I want to share with you my most treasured secrets for creating truly show-stopping cakes. One of my favorite techniques is to add subtle texture and dimension to the fondant using gentle, sweeping motions with my modeling tool. This creates a soft, organic look that’s perfect for rustic or whimsical designs.
By experimenting with different fondant colors and layering techniques, you can achieve a depth and visual interest that will elevate your cakes to the next level. I also love to incorporate delicate, hand-painted details to add a touch of elegance and sophistication. Remember, the key to mastering fondant is to practice, experiment, and have fun – don’t be afraid to try new things and make mistakes!
Mastering Fondant Smoothing Tools
To achieve a flawless finish, I rely on a few trusty fondant smoothing tools. My favorites include the fondant smoothers, which come in various shapes and sizes, and the precision modeling tool. These tools allow me to gently coax and smooth out any air pockets or imperfections, ensuring a sleek and even surface. With a light touch and a bit of patience, I can create a canvas that’s perfect for adding intricate details and designs.
By using these smoothing tools in conjunction with a gentle dusting of cornstarch or powdered sugar, I can prevent the fondant from sticking to my tools and achieve a truly professional finish. With practice, you’ll find that mastering these tools becomes second nature, and you’ll be able to create stunning, smooth fondant surfaces that elevate your cakes to the next level.
Elevating Your Fondant Skills: 5 Essential Tips
- Choose the right fondant for your project, considering factors like texture, color, and brand to ensure a smooth and pliable working material
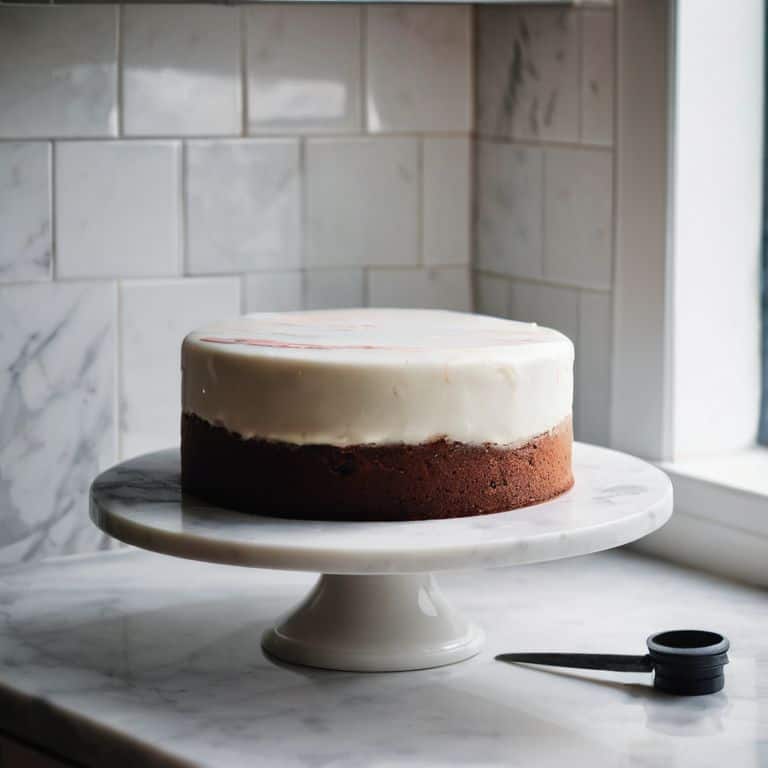
- Prepare your cake surface by applying a thin layer of buttercream or ganache, creating a strong bond between the cake and fondant for a flawless finish
- Knead your fondant until it reaches a perfect consistency, neither too soft nor too firm, allowing for effortless molding and shaping
- Invest in quality fondant smoothing tools, such as a fondant smoother or a turntable, to achieve a professional-looking finish with minimal effort and maximum precision
- Practice, practice, practice – don’t be discouraged by initial mistakes, as mastering fondant is a skill that develops over time with patience, experimentation, and a willingness to learn and adapt
Key Takeaways for a Flawless Fondant Finish
As you embark on your fondant journey, remember that practice makes perfect, and it’s essential to be patient with yourself as you develop your skills
Combining the right tools, such as fondant smoothers and sharp knives, with techniques like gentle stretching and precise trimming, will elevate your cake designs to professional levels
Experimenting with different fondant types, colors, and textures, and not being afraid to try new things, will help you unlock your unique style and voice in the world of cake decorating
The Art of Fondant
As I always say, fondant is not just a medium, it’s a canvas waiting for your brushstrokes of creativity, where every smooth fold and delicate detail tells a story of love, patience, and the unrelenting pursuit of beauty.
Chloé Dubois
Bringing Your Fondant Creations to Life
As we conclude this journey through the world of fondant, remember that mastering the art of fondant cake decorating is all about precision and patience. From the initial steps of preparing your cake and fondant, to the intricate details of smoothing and shaping, each stage requires a careful and gentle touch. Don’t be discouraged if your first attempts don’t yield the desired results – with consistent practice, you’ll find your skills evolving, and your creations becoming more refined and beautiful. The key to success lies in understanding the properties of fondant, choosing the right tools, and dedicating time to perfecting your technique.
Now, as you embark on your own fondant adventures, I hope you’re filled with creative excitement and a sense of possibility. Whether you’re a seasoned baker or just starting out, remember that fondant is a versatile medium that can help you bring any cake design to life. Don’t be afraid to experiment, try new things, and push the boundaries of what’s possible. With fondant, the only limit is your imagination, and I have no doubt that you’ll create stunning masterpieces that will inspire and delight everyone who sees them.
Frequently Asked Questions
What are some common mistakes to avoid when working with fondant?
When working with fondant, I’ve found that common mistakes include overworking the fondant, which leads to tears and cracks, and not preparing the cake surface properly, causing air pockets and uneven finishes. Also, be gentle when smoothing, as excessive pressure can create unwanted indentations.
How do I achieve a smooth, even finish when covering a cake with fondant?
To achieve a smooth, even finish, I gently knead my fondant until it’s pliable, then drape it over the cake. Using a fondant smoother or my hands, I work from the top down, easing out air pockets and wrinkles. It’s all about patience and gentle pressure – remember, it’s okay to take your time, as a flawless finish is worth the extra minutes.
Can I color fondant myself, or is it better to buy pre-colored fondant for specific designs?
While pre-colored fondant is convenient, I love the creative freedom of coloring my own. You can achieve unique shades by mixing fondant with gel or paste colors, allowing for endless design possibilities. Just be sure to knead thoroughly for an even tone.