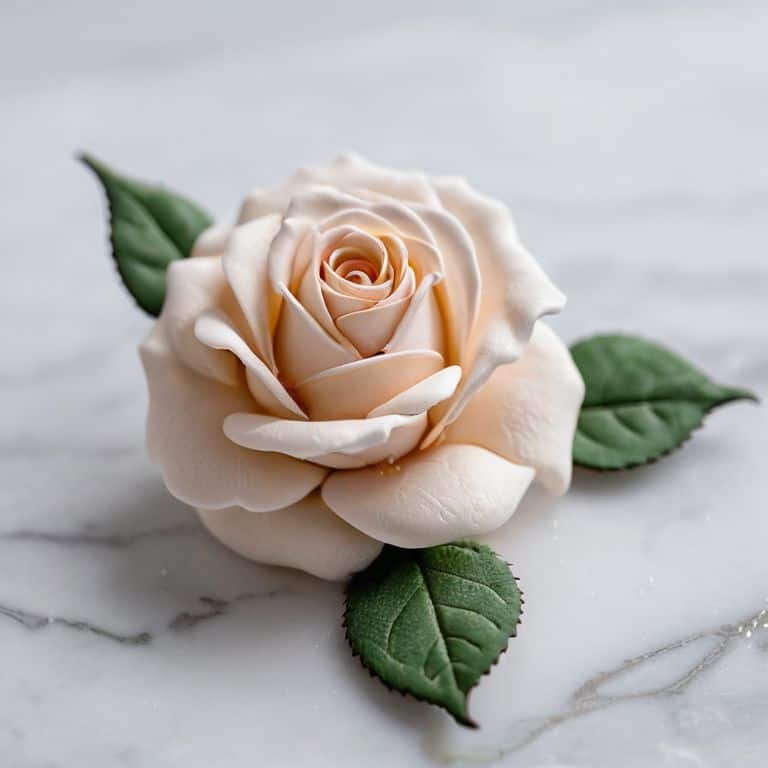
As I stand in my kitchen, surrounded by the sweet aroma of sugar and the gentle hum of my mixer, I’m reminded of the countless times I’ve been asked about how to make a simple sugar rose. It’s a question that never fails to bring a smile to my face, because I know that with a few simple techniques and a bit of patience, anyone can create these delicate, edible flowers. The myth that sugar roses are only for experienced pastry chefs is one that I’m eager to dispel, and I’m excited to share my own approach to crafting these beautiful decorations.
In this article, I’ll walk you through the step-by-step process of creating a stunning sugar rose, from preparing the sugar dough to shaping the delicate petals. You’ll learn the importance of temperature and texture in achieving the perfect sugar rose, and I’ll share my own tips and tricks for avoiding common mistakes. By the end of this guide, you’ll be equipped with the knowledge and confidence to create your own simple sugar rose, and to use it as a gorgeous decoration for cakes, pastries, and other sweet treats. Whether you’re a beginner or an experienced baker, I invite you to join me on this journey into the world of sugar art, and to discover the joy of creating something truly beautiful and delicious.
Table of Contents
Guide Overview: What You'll Need
Total Time: 1 hour 15 minutes
Estimated Cost: $10 – $20
Difficulty Level: Easy
Tools Required
- Piping bag (with small round tip)
- Wax paper (for shaping rose)
- Scissors (for trimming excess fondant)
- Rolling pin (for thinning out fondant)
Supplies & Materials
- Fondant (white or colored)
- Gum paste (optional for added realism)
- Water (for thinning fondant)
- Food coloring (optional for tinting fondant)
- Confectioners sugar (for dusting workspace)
Step-by-Step Instructions
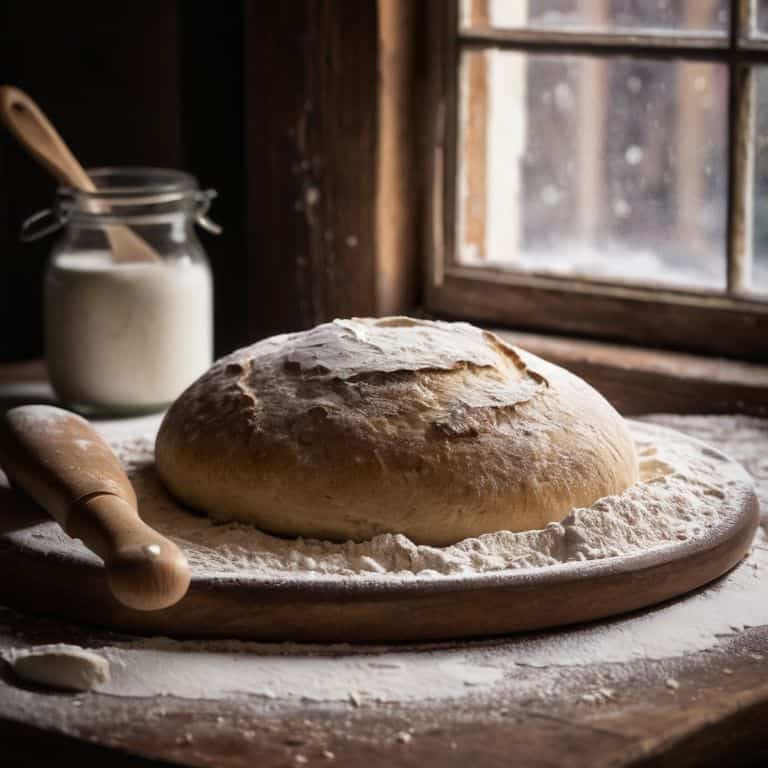
- 1. First, let’s start by preparing our sugar dough, which is the foundation of our beautiful rose. I always say that temperature control is key when working with sugar, so make sure your workspace is at a comfortable room temperature. Now, combine 1 cup of granulated sugar, 1/2 cup of water, and 1 tablespoon of corn syrup in a small saucepan. Place the saucepan over medium heat and stir until the sugar has dissolved, then bring the mixture to a boil.
- 2. Once the sugar mixture has reached 300°F on a candy thermometer, remove it from the heat and let it cool slightly. This is a crucial step, as we want the mixture to be _slightly warm_ to the touch, but not hot. Now, add a few drops of food coloring to tint your rose – I prefer a soft pink or peach color for a realistic look.
- 3. Next, we’ll be kneading our sugar dough to make it pliable and easy to shape. To do this, pour the cooled sugar mixture onto a silicone mat or a lightly oiled surface. Knead the mixture until it forms a smooth, pliable ball – this should take about 5-7 minutes. Be patient, as overworking the dough can lead to a dense, brittle rose.
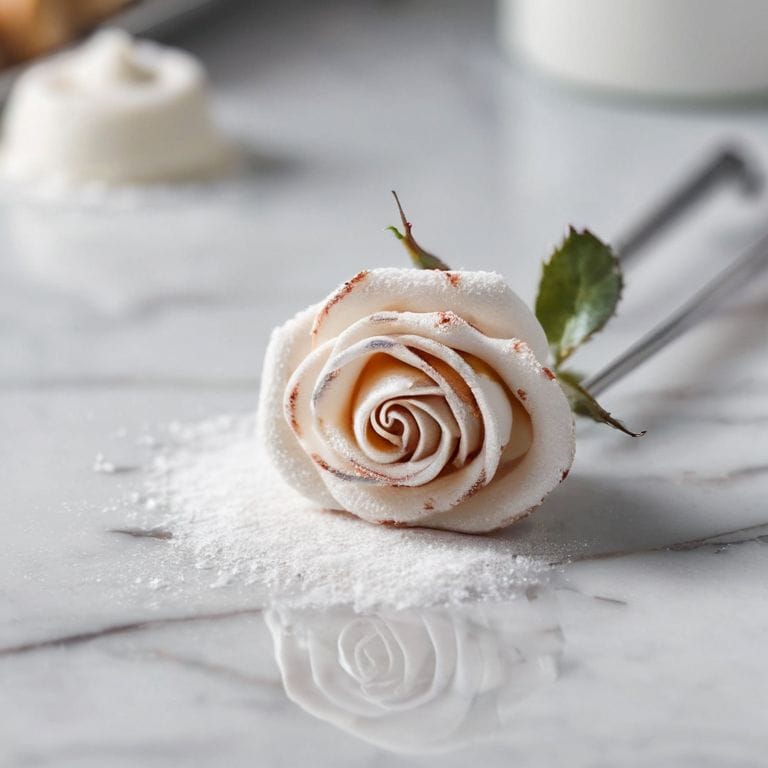
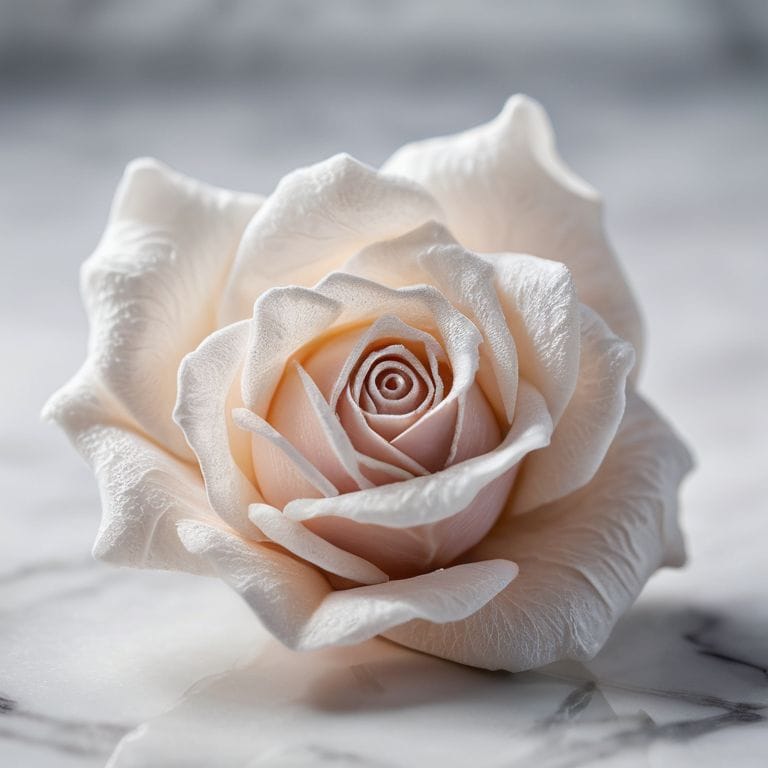
- 4. Now that our dough is ready, let’s start shaping our rose. Begin by dividing the dough into 5-7 equal pieces, depending on how large you want your rose to be. Roll each piece into a thin sheet, about 1/16 inch thick. I like to use a _pasta machine_ to get an even thickness, but you can also use a rolling pin.
- 5. To create the rose petals, cut out teardrop shapes from each sheet of sugar dough. You’ll need about 10-12 petals for a full rose. Make sure to cut the petals in varying sizes, as this will help create a natural, layered look. I always say that attention to detail is what sets a professional pastry chef apart from a hobbyist.
- 6. To assemble the rose, start by placing the largest petal on a flat surface. Apply a small amount of _edible glue_ or water to the center of the petal, then place the next largest petal on top, slightly offset. Continue adding petals, working your way around the center of the rose. Make sure to leave a small amount of space between each petal to create a natural, relaxed shape.
- 7. Once you’ve added all the petals, use a small amount of sugar dough to attach the rose to a wire stem or a cake pick. You can also use a dab of _royal icing_ to secure the rose in place. Finally, use a pair of tweezers to gently shape and arrange the petals, creating a beautiful, realistic rose. With a little practice, you’ll be creating exquisite sugar roses like a pro!
Crafting Sugar Roses
As I delve into the world of sugar crafting tools, I’m reminded that creating beautiful sugar roses is not just about following a recipe, but about understanding the nuances of working with sugar. Gumpaste flower techniques require patience, precision, and a gentle touch. To achieve delicate, lifelike petals, it’s essential to use the right tools and to handle the gumpaste with care.
When it comes to shaping the petals, I find that using a combination of molding and shaping techniques yields the most realistic results. Edible flower decoration ideas can be used to add a personal touch to your sugar roses, whether you’re using them to decorate a cake or as a standalone centerpiece. By experimenting with different colors and shapes, you can create unique and intricate designs that showcase your creativity.
To take your sugar roses to the next level, consider investing in a gumpaste recipe for sugar flowers that includes ingredients like gum tragacanth and cornstarch. These ingredients will help you achieve a more pliable and durable gumpaste that can be molded and shaped with ease. With practice and patience, you’ll be able to create stunning sugar roses that will adorn any cake or dessert with elegance and sophistication.
Gumpaste Flower Techniques Uncovered
As I delve deeper into the world of sugar roses, I’m reminded of the importance of gumpaste flower techniques. To create realistic petals, it’s essential to understand how to thin, color, and shape this versatile medium. I recall my days in Belgium, where I spent hours perfecting the art of gumpaste manipulation. With the right consistency and a delicate touch, you can coax gumpaste into delicate, lifelike blooms.
By mastering gumpaste flower techniques, you’ll unlock a world of possibilities for your sugar roses. From subtle color gradations to intricate textures, the possibilities are endless. I’ll share my expertise on how to achieve these effects, from the initial preparation of the gumpaste to the final shaping and placement of the petals. With practice and patience, you’ll be crafting exquisite sugar roses that rival those found in the finest patisseries.
Sugar Crafting Tools for Perfect Petals
To craft perfect petals, I rely on a few essential sugar crafting tools. My favorite is a high-quality, precision-crafted veiner, which adds delicate texture and realism to each petal. I also use a range of ball tools in different sizes to shape and curve the sugar paste, creating a natural, organic look. A sharp, flexible blade is also a must-have for refining the edges and achieving a smooth, even finish.
With these tools, I can create sugar roses that are almost indistinguishable from real ones. The key is to use each tool with precision and finesse, applying just the right amount of pressure and movement to coax the sugar paste into the desired shape. By combining these tools with the right techniques, you’ll be able to craft sugar roses with perfect, delicate petals that will elevate any dessert to new heights.
Petals of Precision: 5 Expert Tips for Crafting a Simple Sugar Rose
- Ensure your gum paste is at room temperature, as this will make it more pliable and easier to shape into delicate rose petals
- Use a combination of ball tools and veiners to create realistic texture and depth on your sugar rose petals, just like the ones I admired on my visits to the cacao plantations
- Invest in a high-quality, sharp pastry brush to apply precise amounts of water or gum glue, helping your petals adhere smoothly and naturally, much like the precision required in tempering chocolate
- Practice, practice, practice – the key to mastering the sugar rose is in the repetition, so don’t be discouraged if your first attempts don’t turn out perfectly, just as my own journey to mastering the art of sculpting with chocolate took time and dedication
- Pay attention to the ambient temperature and humidity of your workspace, as these factors can greatly affect the stability and longevity of your sugar rose, a detail that’s crucial in my own pastry kitchen and one that I emphasize in all my masterclasses
Essential Tips for Sugar Rose Mastery
Always ensure your gum paste is at room temperature and pliable before shaping, as this will make it more receptive to molding and less prone to cracking
Use the right tools for the job – a combination of ball tools, veining tools, and petal shapers will help you achieve realistic and delicate petals
Practice makes perfect: don’t be discouraged if your first sugar roses don’t turn out as expected – with time and patience, you’ll develop the skills and technique to craft gorgeous, realistic sugar roses that will elevate any dessert
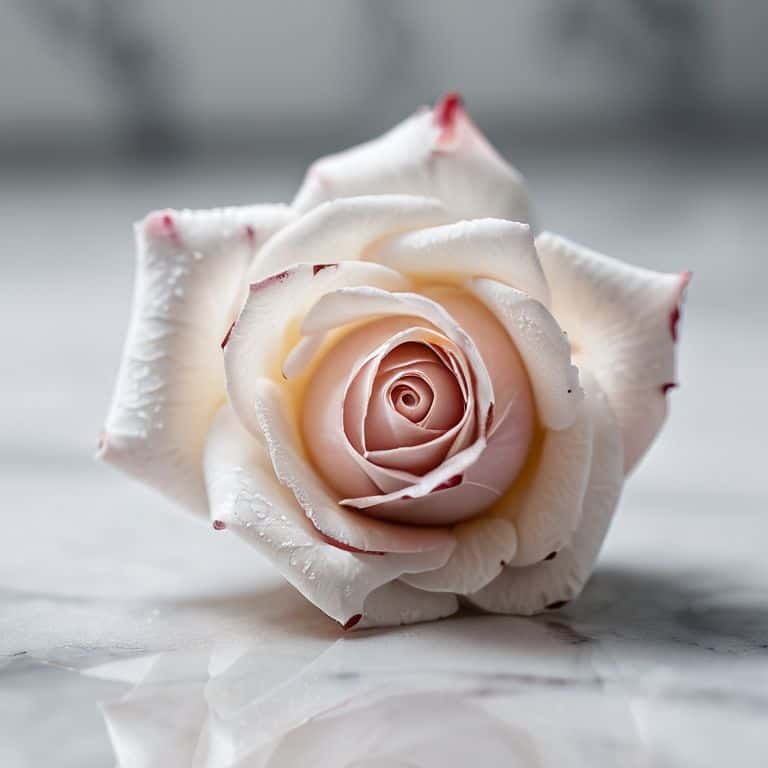
The Delicate Art of Sugar Rose Creation
A simple sugar rose is not just about following steps, it’s about understanding the delicate dance of sugar, water, and temperature – with every petal, you’re not just crafting a decoration, you’re telling a story of precision and patience.
Juliette Le Roux
The Sweet Taste of Success
As we conclude our journey to create a simple sugar rose, let’s recap the essential elements that have brought us to this point. We’ve covered the step-by-step instructions, delved into the world of gumpaste flower techniques, and explored the sugar crafting tools necessary for perfect petals. By mastering these skills and understanding the importance of precision, patience, and practice, you’ll be well on your way to crafting sugar roses that are truly breathtaking. Remember, the key to success lies in the details, from the initial preparation to the final delicate touches.
Now, as you embark on your own sugar rose journey, I encourage you to embrace the pursuit of perfection. Don’t be discouraged by initial setbacks or imperfections – they are an integral part of the learning process. With time and dedication, you’ll find that your creations become increasingly refined, and the sense of accomplishment will be incredibly rewarding. So, go ahead, take the first step, and watch your sugar roses blossom into edible works of art that showcase your skill, creativity, and attention to detail.
Frequently Asked Questions
What is the ideal consistency for gum paste when crafting sugar roses?
For me, the ideal gum paste consistency is like silk – pliable, yet firm. It should hold its shape, but still yield to pressure. Think of it as the perfect balance between clay and playdough. When you touch it, it should feel smooth, with just a hint of give. That’s when you know it’s ready to be shaped into those gorgeous, delicate petals.
How do I achieve a natural, delicate curve for the petals of my sugar rose?
To achieve a natural, delicate curve for your sugar rose petals, gently stretch and thin the gumpaste with your fingers or a modeling tool, then use a delicate touch to shape and curve each petal, allowing them to set before assembling the rose.
Can I use alternative materials or colors to create a unique or personalized sugar rose design?
Absolutely, my friends! While traditional sugar roses are stunning, I love experimenting with alternative materials and colors to create one-of-a-kind designs. Try using colored sugar, edible dust, or even natural ingredients like beet juice or turmeric to add a personal touch. The key is to balance creativity with technique, so don’t be afraid to push boundaries and make that sugar rose truly yours.