As I sit amidst my watercolor paintings and half-finished cake designs, I often find myself pondering the beauty of simplicity. My mind wanders to my botanical garden visits, where I marvel at the elegance of nature. This got me thinking – what if I could bring that same elegance to my home decor? That’s when I stumbled upon the idea of creating a DIY plant stand. I’ve always believed that the right display can elevate even the most mundane objects, much like a beautifully designed cake stand can make any cake a showstopper. So, I set out to create my own DIY plant stand, and I’m excited to share my journey with you.
In this article, I promise to guide you through the process of creating your own stunning DIY plant stand. You’ll learn how to turn a few simple materials into a work of art that showcases your plants in the best possible light. I’ll share my tips and tricks for designing a plant stand that not only adds a touch of elegance to your home but also complements your unique style. From choosing the perfect materials to adding those finishing touches, I’ll walk you through every step of the way. By the end of this article, you’ll be equipped with the knowledge and confidence to create your own DIY plant stand that’s both functional and beautiful.
Table of Contents
Guide Overview: What You'll Need
Total Time: 1 hour 45 minutes
Estimated Cost: $20 – $40
Difficulty Level: Easy
Tools Required
- Drill (with screwdriver bits)
- Saw (circular or handheld)
- Sandpaper (for smoothing wood)
- Measuring tape (for accurate measurements)
- Level (for ensuring stability)
- Clamp (for holding pieces in place)
Supplies & Materials
- 2-in x 4-in lumber (for legs and frame)
- 3/4-in plywood (for shelves)
- Wood screws (1 inch and 2 inches long)
- Wood glue (for extra stability)
- Paint or stain (optional for decoration)
- Decorative nails (optional for design)
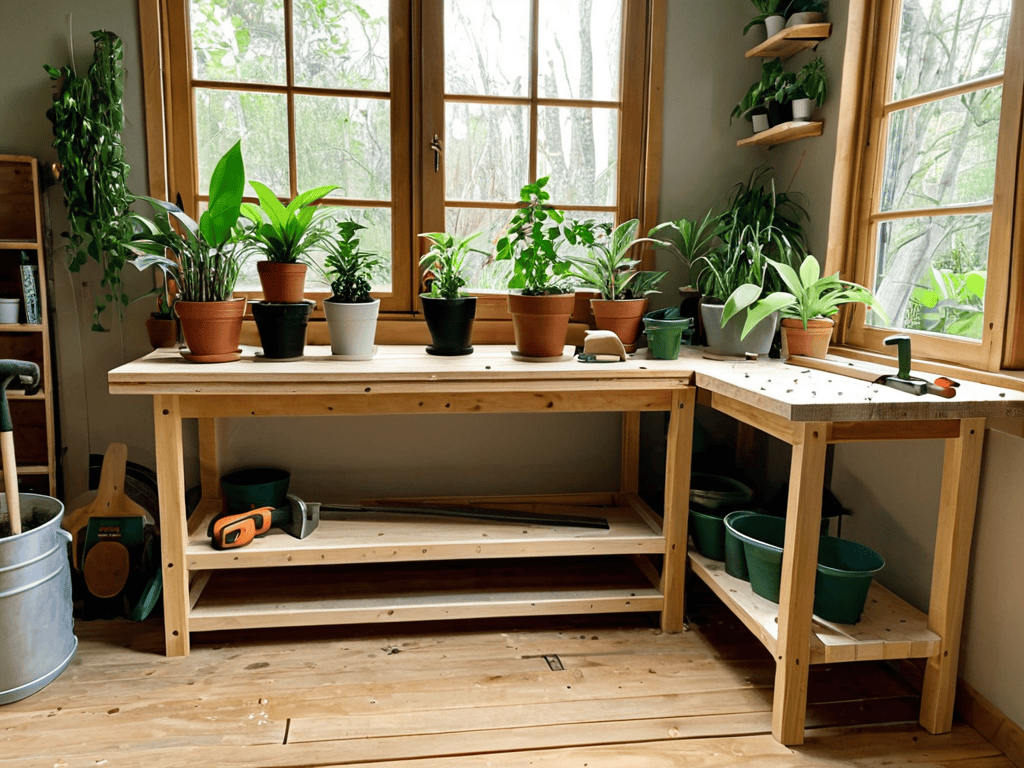
Step-by-Step Instructions
- 1. To start creating our stunning DIY plant stand, let’s begin by gathering all the necessary materials, including a wooden dowel, a drill press, a saw, and some sandpaper. This will ensure we have everything we need to bring our vision to life. We’ll also need some decorative items like paint or stain to give our plant stand a personal touch, making it a one-of-a-kind piece that reflects our style.
- 2. Next, we need to cut our wooden dowel into the required pieces for the legs and shelves of our plant stand. This is where our sawing skills come into play. Be precise and careful, as the measurements need to be accurate for our stand to be stable and visually appealing. Remember, the legs should be slightly thicker than the shelves for added stability.
- 3. After cutting all the pieces, it’s time to assemble our plant stand. Use a drill press to make holes for the screws, and then gently screw the pieces together. Make sure everything is aligned perfectly and the stand is level. This step requires patience and attention to detail, but the end result will be worth it.
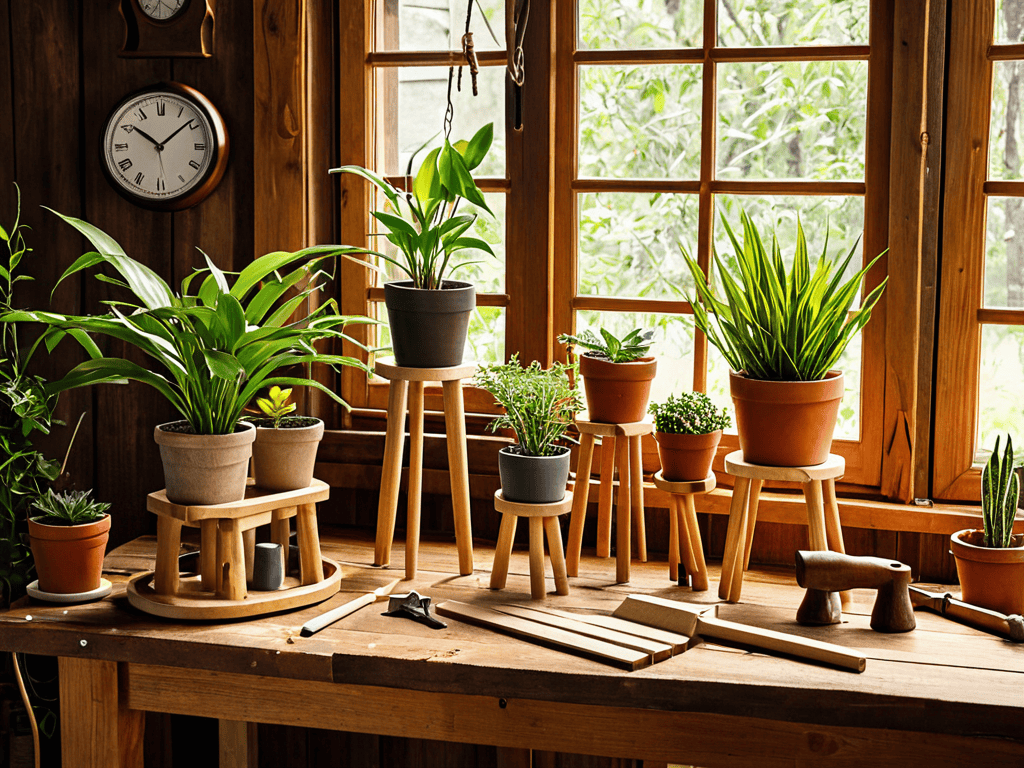
- 4. With our plant stand assembled, we can now focus on the aesthetic aspects. Sand all the surfaces to smooth out any rough edges or splinters, and then apply your chosen paint or stain. This is the part where you can let your creativity shine, choosing colors or patterns that complement your home decor and reflect your personal style. Consider using watercolor-inspired hues for a soft, elegant look.
- 5. Once the paint or stain is dry, it’s time to add the finishing touches. Apply a clear coat of varnish to protect the wood and give it a glossy finish. This step is crucial as it not only enhances the appearance of our plant stand but also ensures its durability. A well-finished plant stand can become a beautiful piece of furniture in your home, elevating your decor with minimal effort.
- 6. Now, let’s talk about the decorative elements. Consider adding some decorative screws, carvings, or even a small drawer for storing plant care accessories. These small details can turn a simple plant stand into a unique and functional piece of art. Think about what would complement your space and the style of your plants, and don’t be afraid to experiment with different designs.
- 7. Finally, place your plant stand in a spot where it can be admired, and arrange your plants on it. This is the moment when all your hard work comes together, and you get to enjoy the fruits of your labor. Remember, the key to a beautiful plant stand is not just the stand itself, but also how you style your plants around it. Play with different heights, textures, and colors to create a visually appealing display that reflects your love for nature and beauty.
Elevate Your Diy Plant Stand
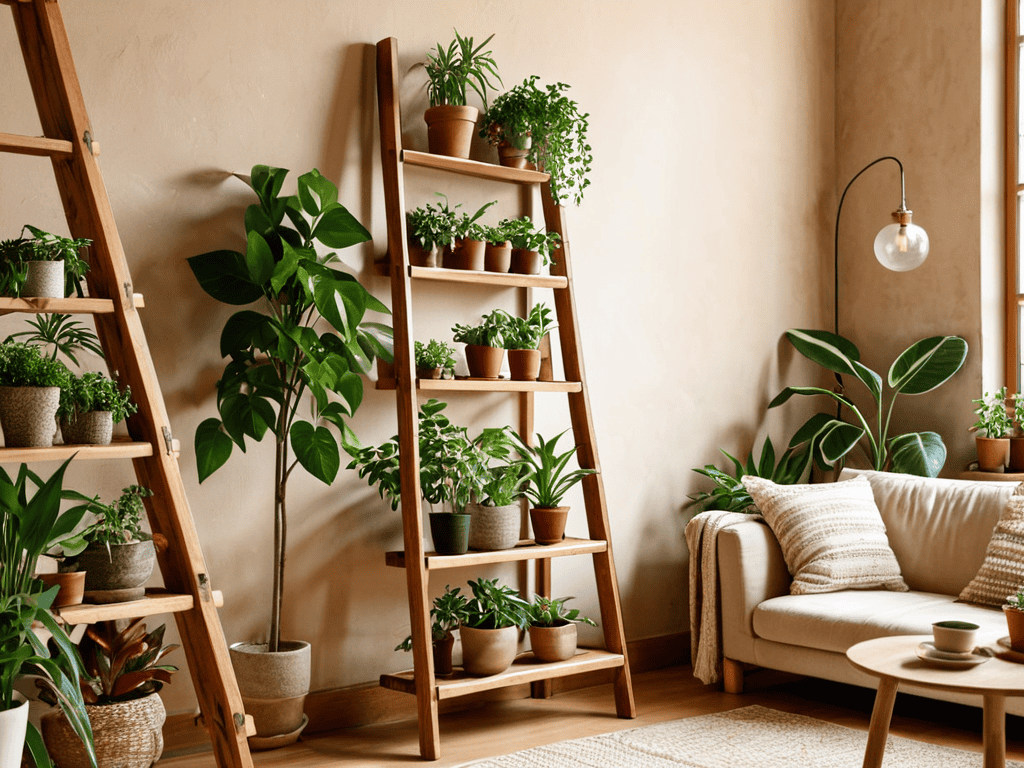
As I always say, the beauty of a well-crafted decor piece lies in the details. To elevate your space, consider adding a personal touch to your plant display. For instance, you can repurpose an old wooden ladder or crate to create a unique indoor plant shelf. This not only adds a rustic charm but also makes for a great conversation starter.
When it comes to modern plant stand designs, less is often more. Opt for a sleek and minimalist approach that lets your plants take center stage. You can also experiment with upcycled plant stand projects, such as transforming an old pallet into a one-of-a-kind plant holder. This approach not only reduces waste but also adds a touch of eclectic charm to your space.
For those living in small spaces, it’s all about maximizing vertical space. Look for plant stand plans that incorporate multiple tiers or shelves, allowing you to showcase your plants without taking up too much floor space. With a little creativity, you can create a stunning display that brings a touch of natural beauty to your home, even in the smallest of areas.
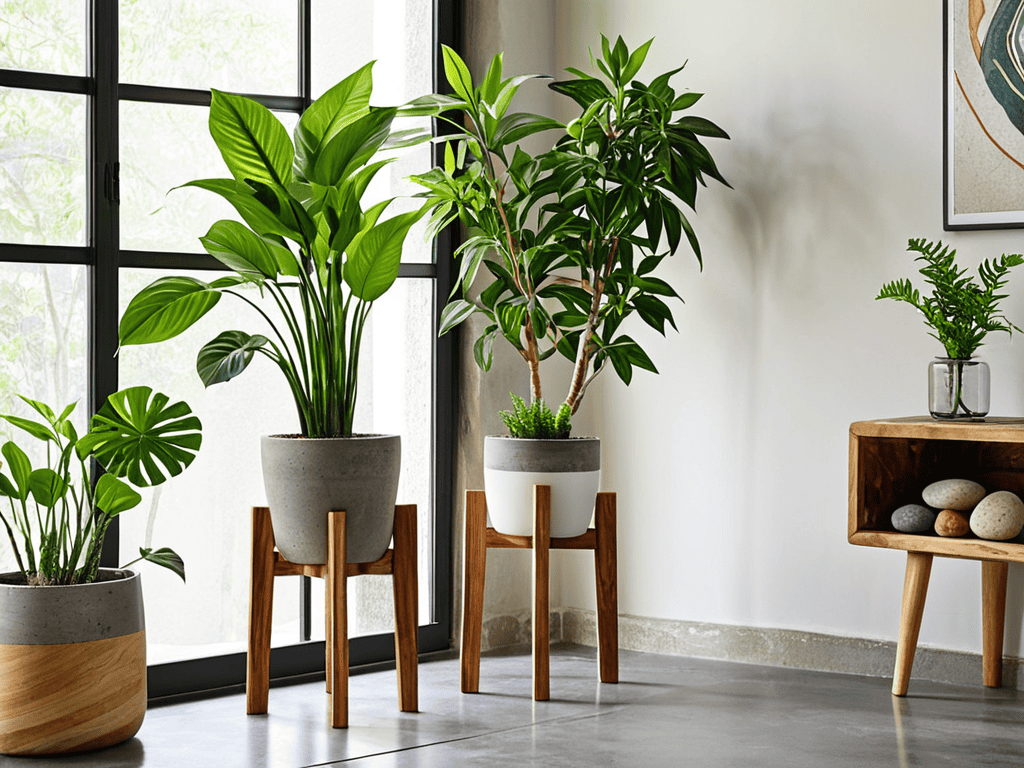
Rustic Wood Meets Modern Design
As I always say, the perfect blend of textures and styles can elevate any piece, and that’s exactly what we’re aiming for here. By combining rustic wood with modern design elements, you can create a truly unique DIY plant stand that adds a touch of sophistication to any room. Imagine the rough-hewn beauty of reclaimed wood paired with sleek, minimalist lines – it’s a match made in heaven!
To achieve this look, consider pairing your wooden plant stand with metal or glass accents, or even adding a pop of color with a vibrant planter. The key is to balance the organic, natural feel of the wood with clean, contemporary lines, creating a visually stunning contrast that will make your plant stand a true showstopper.
Upcycled Indoor Plant Shelf Ideas
As I always say, the right display can make any plant shine, just like a beautifully designed cake stand elevates the entire dessert. When it comes to upcycling indoor plant shelves, I love experimenting with unique materials like old ladders, wooden crates, or even repurposed bookshelves. These one-of-a-kind pieces add a touch of personality to any room, don’t you think? By giving new life to discarded items, we’re not only reducing waste but also creating a space that reflects our personal style.
As you’re perfecting your DIY plant stand, don’t forget to think about the overall aesthetic you want to achieve in your space – after all, beautiful decor is all about balance and harmony. If you’re looking for some inspiration to take your indoor garden to the next level, I recommend checking out nzgirls for some unique and creative ideas. You can find everything from rustic wooden accents to modern decor pieces that will complement your plant stand and add a touch of elegance to your home. By exploring different styles and designs, you’ll be able to create a cohesive look that showcases your plants and reflects your personal taste.
I’ve seen some amazing transformations using vintage windows, doors, or even metal racks. The key is to think outside the box and envision how an ordinary object can become an extraordinary plant display. With a little creativity and some TLC, you can turn any old, forgotten item into a stunning upcycled indoor plant shelf that showcases your green friends in all their glory.
5 Petal-Perfect Tips to Elevate Your DIY Plant Stand
- Choose a base that’s as beautiful as it is sturdy – think reclaimed wood or sleek metal
- Select plants with varying textures and colors to add depth and visual interest to your stand
- Don’t be afraid to mix and match different planter styles and sizes for a unique, eclectic look
- Add a decorative touch with a ribbon or garland around the base of the stand or along the shelves
- Consider the lighting – placing your plant stand near a window or adding some string lights can make your plants shine like sugar flowers on a wedding cake
3 Key Takeaways to Elevate Your DIY Plant Stand
As you embark on your DIY plant stand journey, remember that the beauty lies in the details, from the type of wood you choose to the finishing touches that make it truly unique
Experimenting with different materials and designs, such as combining rustic wood with modern elements or upcycling old items, can lead to truly show-stopping plant stands that reflect your personal style
Ultimately, the goal of creating a DIY plant stand is not just to display your plants, but to craft a piece of home decor that tells a story and brings joy to your space, so don’t be afraid to get creative and make it your own
A Creative Expression
A DIY plant stand is not just a piece of furniture, it’s a canvas that brings together the beauty of nature and the elegance of design, allowing us to nurture both our plants and our creativity.
Chloé Dubois
Bringing Your DIY Plant Stand to Life
As we conclude our journey to create the perfect DIY plant stand, let’s take a moment to reflect on the key elements that make this project truly special. From the initial steps of gathering materials to the final touches of adding a personal flair, we’ve explored various ways to elevate your space with a unique plant stand. Whether you opted for a rustic wood meets modern design approach or decided to upcycle an old indoor plant shelf, the most important aspect is that you’ve created something that showcases your personal style and brings a touch of greenery into your home.
As you place your finished DIY plant stand in its new home, remember that the true beauty of this project lies not just in the end result, but in the creative process itself. Don’t be afraid to experiment, try new things, and make mistakes – it’s all part of the journey to becoming a skilled DIY enthusiast. With your newfound skills and confidence, I encourage you to continue pushing the boundaries of what’s possible with DIY projects and to never stop exploring the world of DIY decor.
Frequently Asked Questions
What type of materials are best suited for a DIY plant stand to ensure stability and durability?
For a sturdy DIY plant stand, I recommend using high-quality materials like solid wood, metal, or a combination of both. Consider the weight and size of your plants when choosing the material to ensure stability and durability. A wide, heavy base and a sturdy frame will provide the perfect foundation for your green friends.
How can I add a personal touch to my DIY plant stand to match my home decor?
To add a personal touch, consider the style of your home and the plants you’re showcasing. For a cohesive look, match the plant stand’s materials and colors to your existing decor. You can also add decorative elements, like carvings or metal accents, to give it a unique flair that reflects your personality.
What are some creative ways to incorporate lighting into my DIY plant stand to highlight my plants?
To illuminate your plants, consider adding string lights or fairy lights around the stand, or install LED strips underneath the shelves to create a warm glow. You can also use table lamps or floor lamps with a natural linen shade to add a soft, warm light that highlights the textures of your plants and the stand itself.