I still remember the first time I attempted to make a custard, only to end up with a scrambled, eggy mess. It was a hard lesson in how to temper eggs for custards, one that I’ve never forgotten. The myth that tempering eggs is a delicate, intuitive process that can’t be taught is simply not true. With the right technique and a bit of practice, anyone can master the art of tempering eggs for silky, smooth custards. I’ve spent years perfecting my craft, from my early days as a chocolatier in Belgium to my current role as a pastry consultant, and I’m excited to share my knowledge with you.
In this article, I’ll cut through the confusion and provide you with practical, step-by-step advice on how to temper eggs for custards. You’ll learn the importance of temperature control, the secret to gently warming your eggs, and the simple tricks that will take your custards from good to great. Whether you’re a beginner or an experienced baker, my goal is to empower you with the skills and confidence to create stunning, restaurant-quality desserts in the comfort of your own kitchen. By the end of this guide, you’ll be well on your way to mastering the art of tempering eggs and creating custards that are truly sublime.
Table of Contents
Guide Overview: What You'll Need
Total Time: 30 minutes to 1 hour
Estimated Cost: $5 – $10
Difficulty Level: Easy
Tools Required
- Whisk for mixing
- Heat-resistant Bowl for tempering
- Measuring Cups for accurate measurements
Supplies & Materials
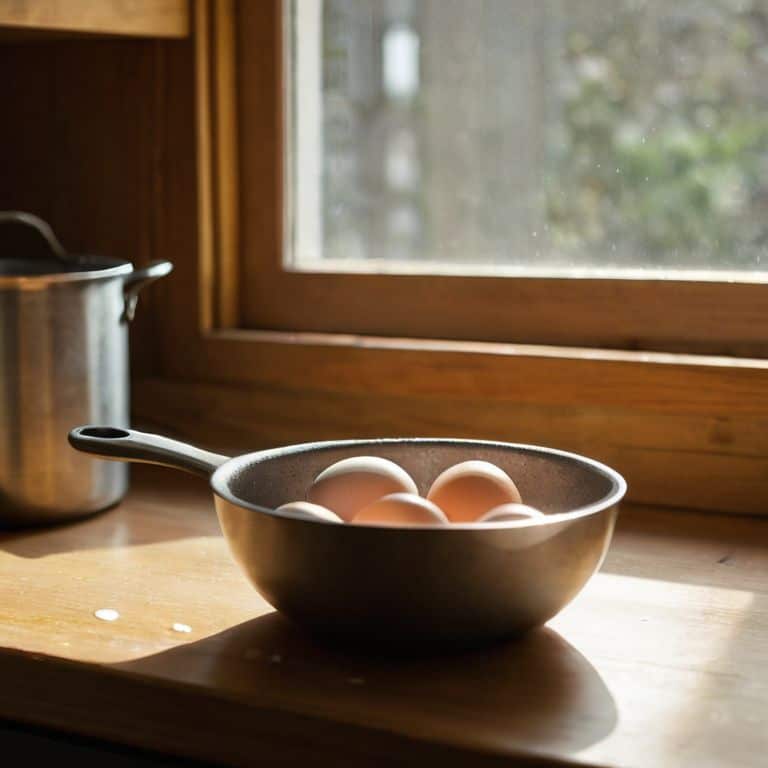
- Eggs large or extra-large
- Liquid for Tempering such as warm milk, cream, or sugar syrup
- Thermometer optional, for precise temperature control
Step-by-Step Instructions
- 1. First, let’s start with the foundation of tempering: having your ingredients at the right temperature. This means your eggs should be at room temperature, and your cream or milk should be warmed to around 140°F to 150°F (60°C to 65°C). I like to think of this step as setting the stage for a perfect performance – everything needs to be just so.
- 2. Next, in a separate bowl, whisk together your egg yolks and any additional ingredients like sugar or flavorings until they’re well combined and smooth as silk. This is where the magic begins, and you start to build the structure of your custard. Don’t overbeat at this stage; you want to avoid incorporating too much air.
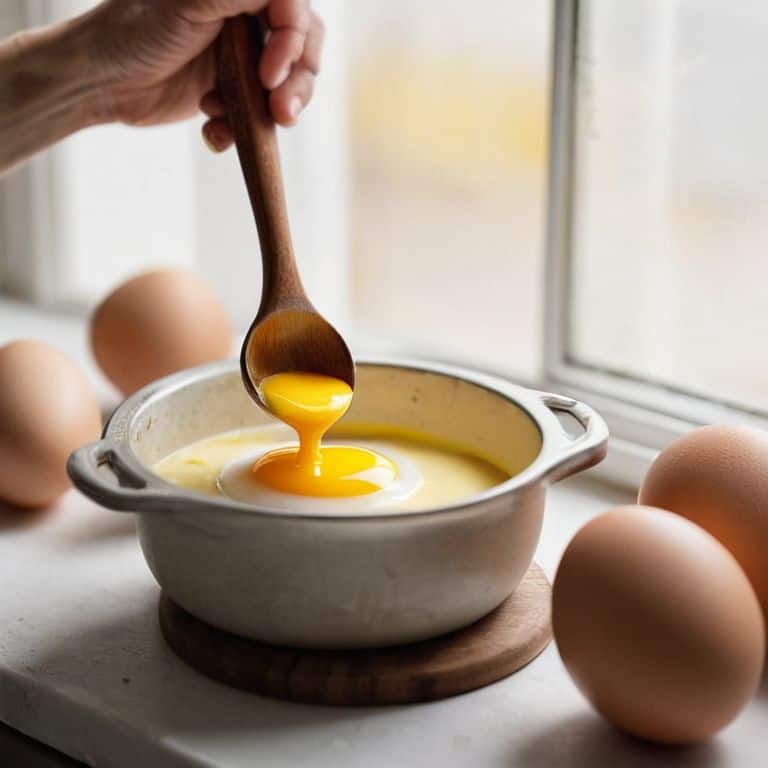
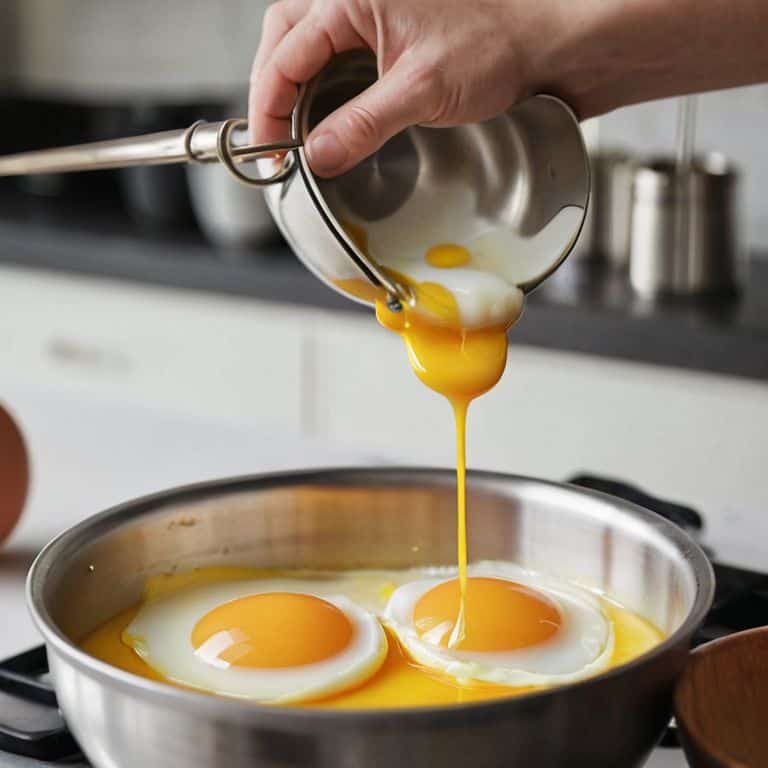
- 3. Now, it’s time to temper your eggs. This is the part where many people get nervous, but trust me, with practice, it becomes second nature. Slowly pour the warm cream or milk into the egg yolks, whisking constantly. The key here is to do it slowly and gently, allowing the eggs to warm up gradually without scrambling.
- 4. As you continue whisking, you’ll start to notice the mixture thickening and emulsifying. This is where the science of tempering really comes into play. Keep whisking until the mixture is smooth and there are no streaks of egg or cream visible. It’s a bit like watching a puzzle come together – all the pieces need to fit just right.
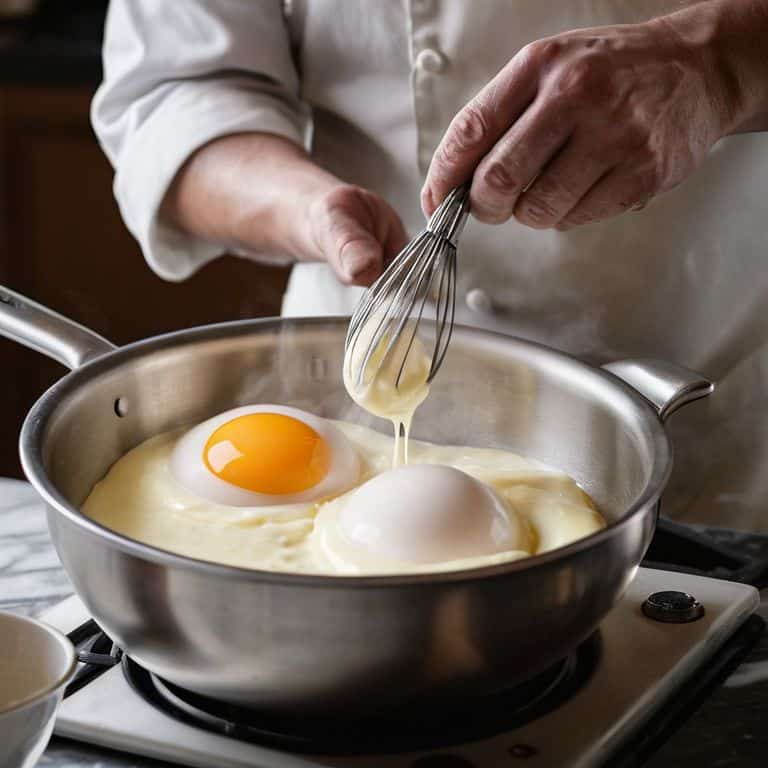
- 5. Once your mixture is fully tempered, it’s time to strain it. This step is crucial for removing any potential egg solids that might have formed during the tempering process. Use a fine-mesh sieve or cheesecloth to strain the mixture into a clean bowl, pressing gently on the solids to extract as much liquid as possible. It’s a bit of an extra step, but it makes all the difference in the texture of your final custard.
- 6. With your mixture now strained and smooth, you can proceed to cook your custard. Pour the mixture into a saucepan and place it over low heat, stirring constantly. I find that using a heat-resistant spatula is essential here, as it allows you to scrape the bottom of the pan thoroughly and prevent the custard from sticking and scrambling.
- 7. As you cook your custard, it’s essential to monitor the temperature. Use a thermometer to check the temperature of the mixture, aiming for between 170°F and 180°F (77°C to 82°C). This is the perfect range for a smooth, creamy custard. Once you’ve reached this temperature, remove the saucepan from the heat and let it cool slightly before chilling it in the refrigerator.
- 8. Finally, once your custard has chilled, it’s ready to use in your desired recipe. Whether you’re making crème brûlée, flan, or a traditional custard pie, the key to success lies in the precise tempering of your eggs. With practice, you’ll find that this step becomes easier and easier, and the results will be well worth the effort – a silky smooth custard that’s sure to impress anyone who tries it.
Tempering Eggs for Custards
As I guide you through the nuances of tempering eggs, it’s essential to understand the concept of thermal shock, which can lead to curdling in your custard. To avoid this, it’s crucial to slowly introduce the warm mixture to the eggs, allowing them to adjust to the temperature change. This gentle approach will help you achieve a smooth, creamy texture in your final product.
When it comes to egg tempering techniques for beginners, I always stress the importance of precise temperature control. The ideal temperature for tempering eggs is between 150°F and 155°F, and it’s vital to maintain this range to prevent the eggs from scrambling. By mastering this technique, you’ll be able to create a wide range of desserts, from creamy custards to smooth ice cream bases.
To take your egg tempering skills to the next level, remember to monitor the egg temperature closely, as this will help you prevent common mistakes, such as over- or under-tempering. By paying attention to the temperature and using the right technique, you’ll be able to achieve a perfectly tempered egg mixture, which is essential for creating a delicious and smooth custard.
Egg Tempering Techniques for Beginners
As a chocolatier, I’ve found that tempering eggs is a skill that translates beautifully to other desserts. For beginners, it’s essential to understand that tempering eggs is not just about mixing hot and cold ingredients, but about creating a harmonious balance of temperatures. I always tell my students to start by warming their eggs to room temperature, which helps to prevent shocking the eggs when adding hot liquids. From there, it’s all about gradual incorporation, whisking constantly to ensure a smooth, even texture.
When I’m teaching egg tempering techniques, I emphasize the importance of feel and intuition. It’s not just about following a recipe, but about developing a sense of how the eggs should feel and look as you temper them. With practice, you’ll begin to recognize the subtle signs of perfectly tempered eggs – the silky texture, the subtle sheen, and the way they seem to glow with an inner light. Trust me, once you master this technique, you’ll be unstoppable in the kitchen.
Preventing Curdling in Custard Basics
To prevent curdling, it’s essential to understand that temperature is key. I always say, a good temper is like a good relationship – it’s all about balance and harmony. When combining hot milk with egg yolks, the goal is to raise the egg temperature gently, without shocking it. This is where most people go wrong, and curdling occurs. My trick is to warm the eggs first by whisking them with a small amount of hot milk, then gradually adding more, all while maintaining a smooth, gentle flow.
By doing so, you’ll introduce the eggs to the heat gradually, preventing them from scrambling. It’s a delicate dance, but with practice, you’ll develop a sense of when to slow down or speed up the process. Remember, the egg yolks should always be warmed, not cooked, and the mixture should remain silky smooth. With this technique, you’ll be well on your way to creating flawless custards that are the epitome of pastry perfection.
Cracking the Code: 5 Essential Tips for Tempering Eggs like a Pro
- Start with room temperature eggs for a smoother tempering process, as cold eggs can cause the mixture to curdle
- Use a gentle flow of warm liquid, whisking constantly, to prevent scrambling the eggs and to create a seamless incorporation
- Temper in small increments, typically 1-2% of the hot liquid at a time, to avoid shocking the eggs and to maintain their emulsification properties
- Whisk in a zig-zag pattern to introduce air and prevent the formation of lumps, ensuring a silky texture in your final custard
- Remove from heat and let cool slightly before whisking in the tempered eggs, as this brief pause allows the mixture to stabilize and reduces the risk of curdling
Mastering Egg Tempering: 3 Key Takeaways
Tempering eggs is not just about mixing hot and cold ingredients, but about creating a harmonious balance of temperatures to achieve a smooth, creamy custard
Preventing curdling is crucial, and this can be achieved by gently heating the eggs, using room temperature ingredients, and whisking constantly to distribute the heat evenly
Practice makes perfect, so don’t be discouraged if your first few attempts at tempering eggs don’t yield the desired results – with patience, persistence, and a gentle touch, you’ll soon be crafting exquisite custards like a pro
The Art of Egg Tempering
Tempering eggs is not just about combining warm and cool liquids, it’s about understanding the delicate dance of temperatures and textures that elevates a custard from mere mortal dessert to sublime masterpiece.
Juliette Le Roux
Mastering the Art of Tempering Eggs
As we conclude our journey through the world of tempering eggs for custards, let’s recap the essential techniques we’ve covered. From understanding the importance of temperature control to mastering the art of gentle folding, each step is crucial in achieving a smooth, creamy texture. We’ve also explored common pitfalls to avoid, such as curdling, and discussed ways to prevent them. By following these guidelines and practicing patience and precision, you’ll be well on your way to creating exquisite custards that will impress even the most discerning palates.
As you continue to hone your skills, remember that perfection is a journey, not a destination. Don’t be discouraged by initial failures – instead, use them as opportunities to learn and grow. With time and dedication, you’ll develop a deep understanding of the intricacies involved in tempering eggs, and your creations will become truly exceptional. So, keep pushing the boundaries of what’s possible, and never stop striving for that perfect, silky smooth custard that will leave everyone in awe.
Frequently Asked Questions
What is the ideal temperature range for tempering eggs to ensure a smooth custard?
For a silky custard, I swear by tempering eggs within a narrow temperature range: between 90°F and 100°F. This gentle warmth coaxes the eggs into harmony with the hot mixture, preventing curdling. Trust me, it’s a game-changer – I’ve spent years perfecting this technique in my kitchen.
How do I know if I've tempered the eggs too much or too little, and what are the consequences for my custard?
Ah, the tempering tightrope! If you’ve over-tempered, your eggs will scramble, while under-tempering leads to curdling. Check the mixture’s texture: it should be smooth, with no visible egg strands. If you’re unsure, whisk in a small amount of hot liquid and observe – it should emulsify seamlessly. Practice makes perfect, so don’t be discouraged if it takes a few tries to get the feel just right.
Can I temper eggs for custards in advance, or is it best to do it just before mixing the custard ingredients?
While it’s possible to temper eggs ahead of time, I advise against it. Tempered eggs are best used immediately, as they can revert to their original state, affecting texture. If you must, temper them just before mixing, or at most, 30 minutes in advance, keeping them in a warm water bath to maintain stability.