As I stood in my own kitchen, surrounded by the chaos of baking supplies, I realized that the common wisdom on how to organize your baking supplies often falls short. We’re told to focus on efficiency and productivity, but I believe that’s only half the story. The truth is, a beautifully organized kitchen is not just about function, but about creating a space that sparks joy. When our baking supplies are thoughtfully arranged, we’re more inspired to whip up a storm and share that joy with others.
In this article, I’ll share my personal approach to organizing baking supplies, one that combines style and practicality. You’ll learn practical tips for transforming your kitchen into a warm and inviting space that’s perfect for baking and entertaining. From my favorite storage solutions to clever ways to display your most beautiful baking treasures, I’ll show you how to create a kitchen that’s both functional and visually stunning. Whether you’re a seasoned baker or just starting out, I promise that these honest, no-hype tips will help you create a kitchen that feels like the true heart of your home.
Table of Contents
- Guide Overview: What You'll Need
- Step-by-Step Instructions
- Organizing Baking Supplies
- Whisking Wonders: 5 Essential Tips to Organize Your Baking Supplies
- Whipping Your Baking Supplies into Shape: 3 Key Takeaways
- The Heart of the Matter
- Bringing It All Together: A Beautifully Organized Baking Sanctuary
- Frequently Asked Questions
Guide Overview: What You'll Need
Total Time: 2 hours 30 minutes
Estimated Cost: $50 – $100
Difficulty Level: Intermediate
Tools Required
- Measuring Tape for measuring shelf space
- Level for ensuring shelves are straight
- Screwdriver for assembling storage units
- Label Maker for labeling storage containers
Supplies & Materials
- Shelves custom-cut to fit specific baking supply storage needs
- Stackable Containers for storing dry ingredients, such as flour and sugar
- Drawer Organizers for maximizing storage space in baking supply drawers
- Adhesive Hooks for hanging baking utensils, such as whisks and spatulas
- 6 inches by 6 inches Baskets for storing small baking supplies, such as cupcake liners and sprinkles
Step-by-Step Instructions
- 1. First, let’s start by purging any unused or duplicate baking supplies – it’s time to get rid of those old, rusty cake pans and make space for the goodies you truly love and use. Take everything out of your cabinets and sort items into three piles: keep, donate, and discard. This will help you see what you have and what you need to organize.
- 2. Next, categorize your baking supplies into groups, such as baking utensils, ingredients, and decorative items. This will make it easier to decide where each item should be stored and how you can create a functional workflow in your kitchen. Think about the types of baked goods you make most often and what supplies you need to have within easy reach.
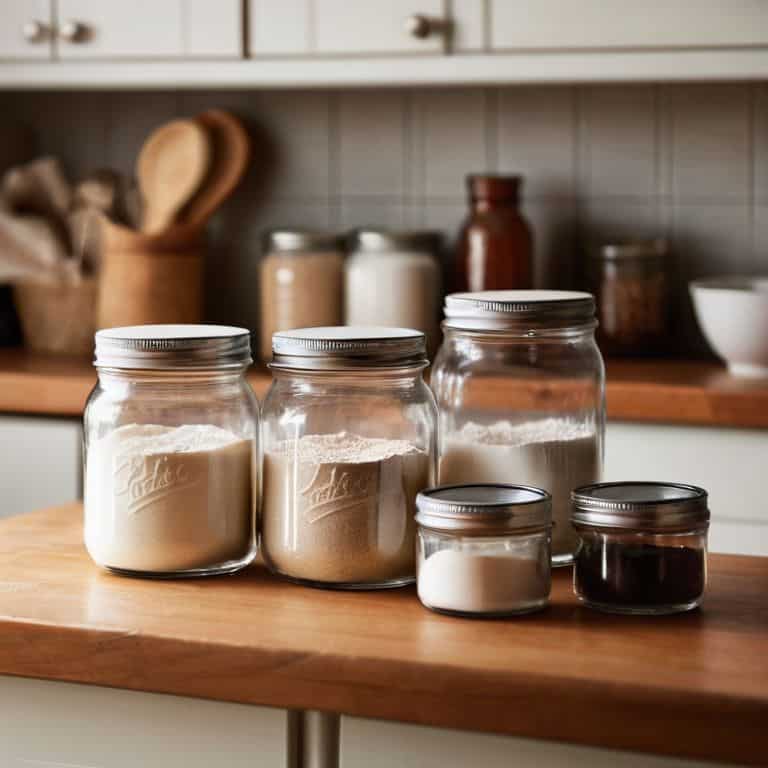
- 3. Now, let’s talk about storage containers – you’ll want to use a variety of containers to store your baking supplies, such as glass jars, baskets, and plastic bins. Choose containers that are visually appealing and fit with your kitchen’s aesthetic, as they will be on display. Label each container so you can easily find what you need, and consider using a label maker to add a touch of whimsy to your storage.
- 4. It’s time to assign a home for each of your baking supplies – think about the items you use most frequently and where they should be stored for maximum convenience. For example, you might store your stand mixer on the counter, while less frequently used items like specialty cake pans can be stored in higher cabinets. Consider the workflow of your kitchen and how you can create a functional, efficient space.
- 5. To keep your baking supplies organized and easy to find, implement a maintenance routine – set aside a few minutes each week to tidy up your kitchen and ensure everything is in its assigned place. This will help prevent clutter from building up and make it easier to find what you need when you need it. Try to make it a habit to put things back where they belong after each use.
- 6. Now, let’s not forget about the decorative touches that can make your kitchen a truly special space – consider displaying your favorite baking-themed items, such as vintage baking utensils or decorative ceramic jars, on a stylish shelf or in a glass-front cabinet. This will add a touch of personality to your kitchen and make it feel more like a warm and inviting space.
- 7. Finally, take a step back and admire your handiwork – your baking supplies are now organized, and your kitchen is looking more beautiful than ever. To keep your space looking its best, consider implementing a “one in, one out” policy, where you get rid of an old item each time you bring a new one into your kitchen. This will help prevent clutter from building up and keep your space feeling fresh and inspiring.
Organizing Baking Supplies
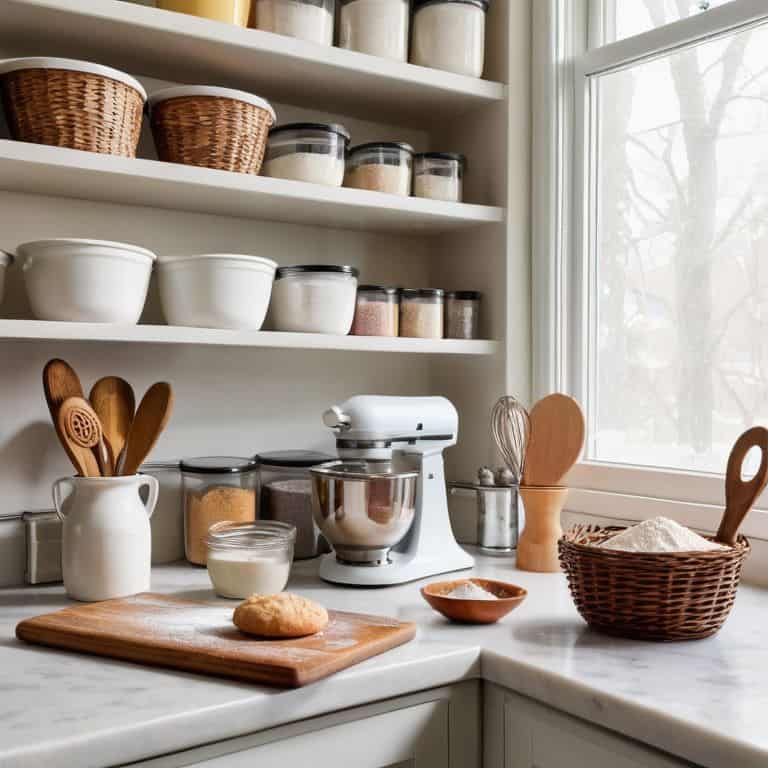
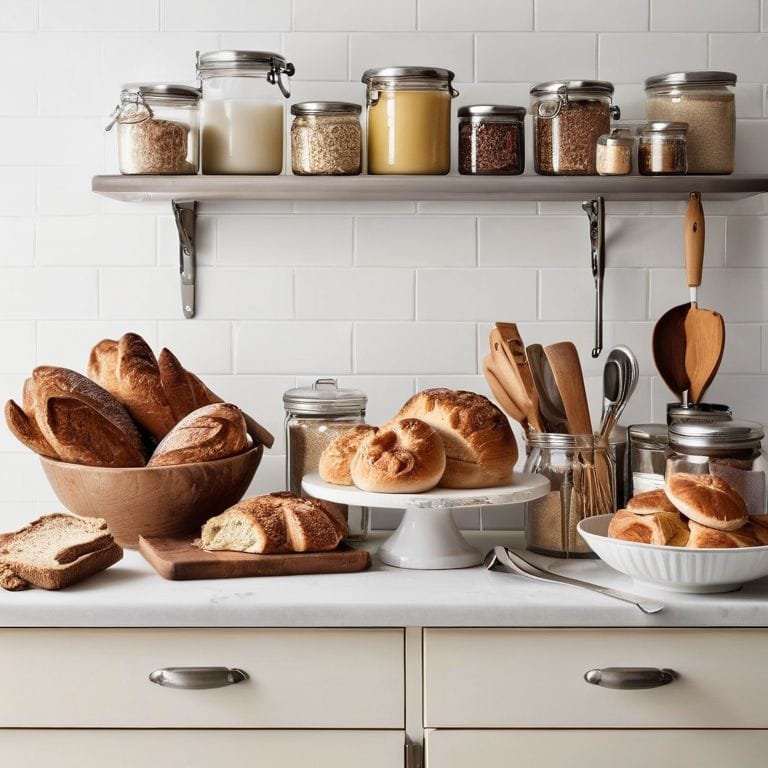
As I delve into the world of baking supply storage, I find myself drawn to the beauty of decorative baking jars. Not only do they add a touch of warmth and personality to my kitchen, but they also keep my ingredients fresh and within reach. When setting up my baking station, I like to consider the flow of my workspace and group similar items together, making it easier to find what I need when I need it.
In smaller kitchens, custom baking cabinets can be a game-changer for maximizing storage space. I’ve seen friends use these cabinets to store their stand mixers, keeping them dust-free and out of the way, while also showcasing their beautiful design. For those with limited cabinet space, kitchen drawer organization tips can be a lifesaver, helping to keep baking supplies tidy and organized.
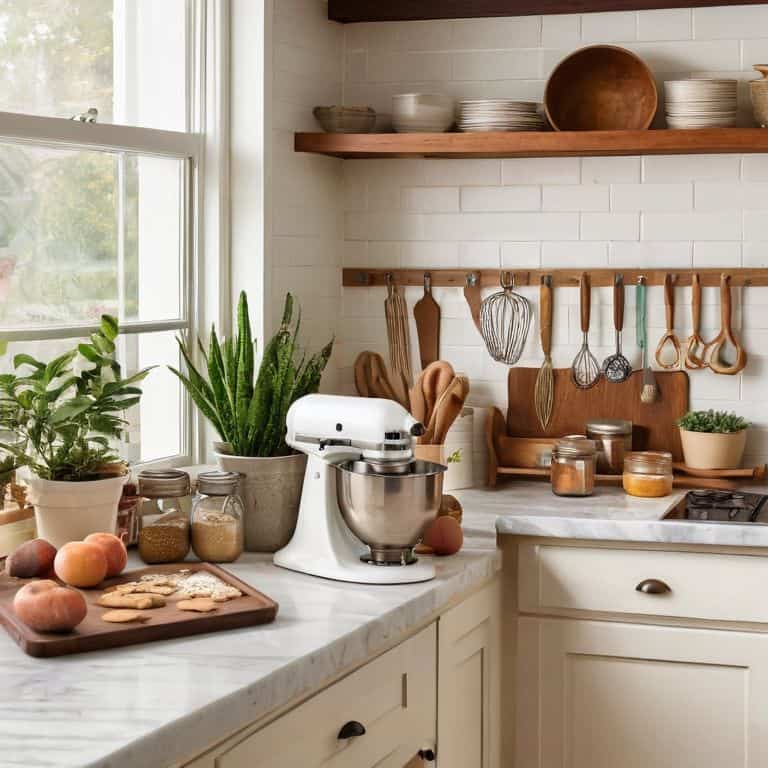
To take your baking supply storage to the next level, consider implementing baking station setup ideas that prioritize functionality and aesthetics. This might include designating a specific area for mixing, baking, and decorating, or using a cart or island to add extra counter space and storage. By investing time in setting up your baking station, you’ll be able to focus on the joy of baking, rather than wasting time searching for misplaced ingredients or equipment.
Baking Station Setup Essentials
To create a truly functional baking station, you’ll want to focus on the essentials that bring it all together. For me, it’s all about having my trusty stand mixer as the centerpiece – it’s not just a tool, but a beautiful addition to the kitchen. I also swear by a few key utensils, like a sleek silicone spatula and a set of measuring cups that add a touch of elegance to the space.
When setting up your baking station, consider the tools and ingredients you use most frequently and keep them within easy reach. A decorative tray or container can be a great way to corral small items like pastry brushes and whisk, keeping your countertops clutter-free and your baking station feeling organized and peaceful.
Sweet Storage Solutions Found
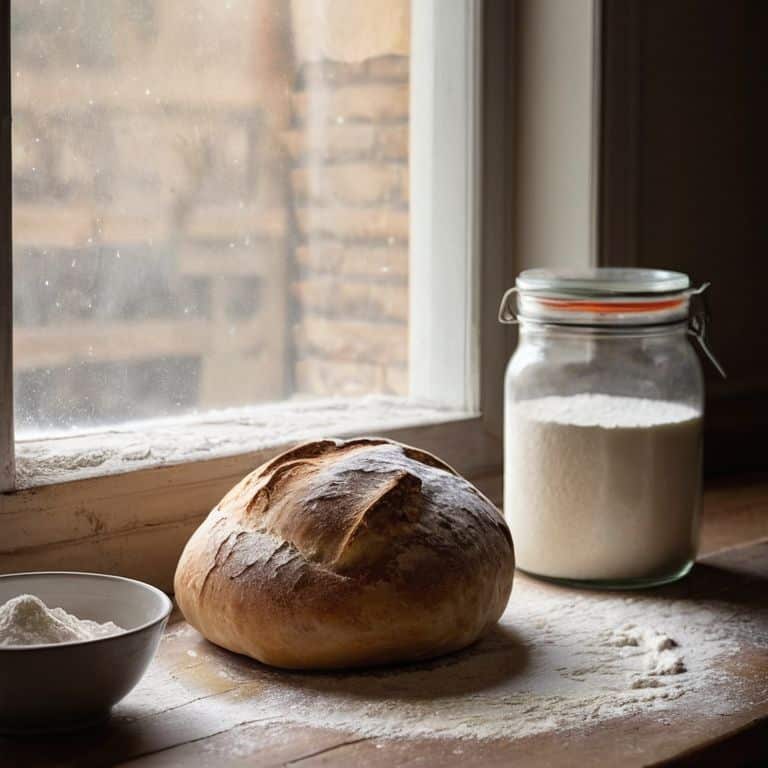
As I always say, the right storage can make all the difference in keeping your baking supplies organized and within reach. I’m obsessed with using beautiful, decorative containers to store my flour, sugar, and other dry goods. Not only do they add a touch of warmth and personality to my kitchen, but they also keep everything fresh and easily accessible. Plus, they make for a stunning display on my open shelving – it’s all about creating a visually appealing space that inspires me to get baking!
I’ve also fallen in love with using stackable baskets and trays to corral my smaller baking essentials, like cupcake liners and sprinkles. They’re perfect for maximizing my cabinet space and keeping everything neatly tucked away. With these sweet storage solutions, I can focus on what really matters – whipping up a storm in my kitchen and making memories with the people I love.
Whisking Wonders: 5 Essential Tips to Organize Your Baking Supplies
- Designate a Dedicated Baking Zone: Create a baking station that sparks joy, with all your essentials within easy reach, from flour to frosting tips
- Sort and Purge with a Discerning Eye: Get rid of expired or redundant baking supplies, and group similar items together, like a colorful rainbow of cake decorations
- Choose Storage Containers that Shine: Select beautiful, functional containers that add to your kitchen’s aesthetic, like glass jars for flour and sugar, or a vintage tin for your cookie cutters
- Label and Sign with Love: Add handwritten labels or charming signs to your storage containers, so you and your loved ones can easily find what you need, from baking powder to sprinkles
- Make the Most of Vertical Space: Install shelves, hooks, or a pegboard to maximize your kitchen’s vertical real estate, keeping your baking supplies organized, accessible, and visually appealing
Whipping Your Baking Supplies into Shape: 3 Key Takeaways
Create a baking sanctuary that sparks joy by assigning a home for each supply, making it easy to find what you need when inspiration strikes
Infuse your kitchen with personality by choosing storage solutions and baking stations that reflect your unique style, from vintage ceramics to modern stand mixers
Remember, the art of baking is just as much about the journey as the destination – take the time to beautifully organize your supplies, and you’ll find that the process of creating something delicious is just as enjoyable as the end result
The Heart of the Matter
A beautifully organized kitchen is not just about function, it’s about feeling – and when your baking supplies are in harmony, so is your soul.
Olivia Bennett
Bringing It All Together: A Beautifully Organized Baking Sanctuary
As we’ve explored the world of organizing baking supplies, I hope you’ve discovered that it’s all about creating a space that sparks joy and makes your heart skip a beat. From sweet storage solutions to baking station setup essentials, every detail matters in crafting a kitchen that’s both functional and visually stunning. By implementing these tips, you’ll be well on your way to whipping up a storm in a space that truly feels like the heart of your home.
So, as you put the finishing touches on your newly organized baking sanctuary, remember that it’s not just about the supplies or the space – it’s about the love and care you pour into every detail. Your kitchen is a reflection of you, and with a little creativity and flair, it can be a true masterpiece. Happy baking, and I look forward to seeing the beautiful spaces you create!
Frequently Asked Questions
How can I maximize my kitchen's storage space for baking supplies without breaking the bank?
For a budget-friendly boost, consider repurposing vintage jars, baskets, or crates to store your baking essentials. You can also upcycle old furniture, like a wooden ladder or dresser, to create a one-of-a-kind baking station that’s both functional and fabulous.
What are some creative ways to repurpose old or unused kitchen items to store baking essentials?
I adore giving old items a new life. Consider transforming vintage mason jars into flour and sugar containers, or repurposing a wooden crate as a baking supply shelf. You can also upcycle an old tea infuser into a quaint storage container for small baking tools, adding a touch of whimsy to your kitchen.
How often should I purge and reorganize my baking supplies to keep my kitchen clutter-free and functional?
I like to give my baking supplies a good refresh every season, getting rid of expired ingredients and donating unused items. This helps keep my kitchen clutter-free and functional, and it’s also a great excuse to treat myself to some new, beautiful storage containers – it’s all about balance, darling!