I still remember the first time I attempted to create a two-tone frosting swirl – it was a disaster. The colors bled into each other, and the texture was uneven. I was determined to master this technique, and after months of trial and error, I finally cracked the code. The secret to a stunning how to make a two-tone frosting swirl lies not in the ingredients, but in the temperature and timing. It’s a delicate balance that requires precision and patience.
In this article, I’ll share my hard-earned expertise on how to make a two-tone frosting swirl that will elevate your baked goods to the next level. I’ll walk you through the step-by-step process, from preparing the frostings to achieving the perfect swirl. You’ll learn how to avoid common pitfalls and troubleshoot issues that may arise. My goal is to empower you with the techniques and confidence to create breathtaking desserts that will impress even the most discerning palates. By the end of this guide, you’ll be equipped with the knowledge to create stunning two-tone frosting swirls that will make your friends and family wonder if you’re a pastry pro.
Table of Contents
Guide Overview: What You'll Need
Total Time: 1 hour 15 minutes
Estimated Cost: $10 – $20
Difficulty Level: Intermediate
Tools Required
- Stand Mixer (with paddle attachment)
- Measuring Cups
- Rubber Spatula (for scraping sides of bowl)
- Piping Bag (with large round tip)
- Offset Spatula (for smoothing frosting)
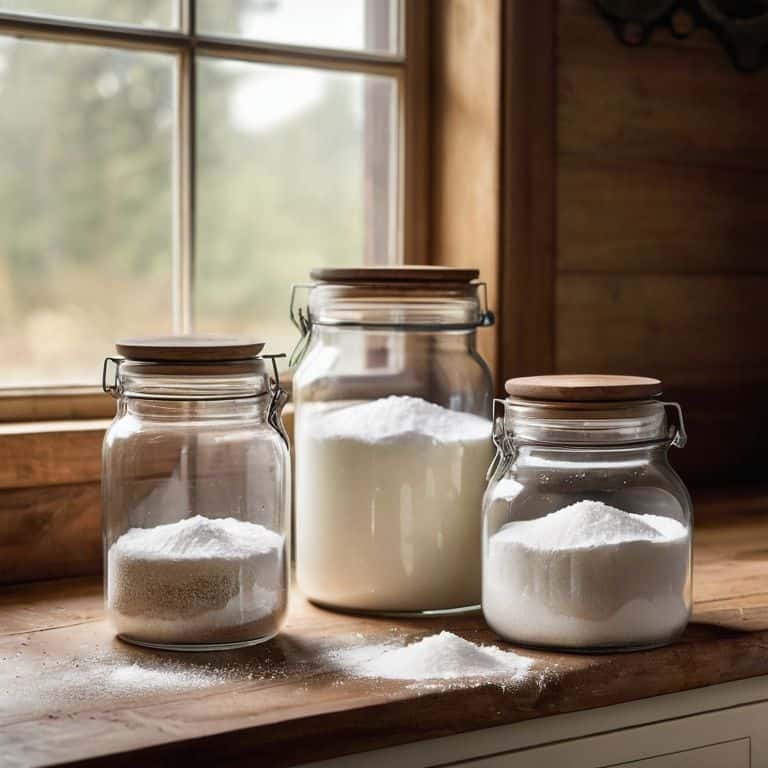
Supplies & Materials
- Unsalted Butter (at room temperature)
- Powdered Sugar (sifted)
- Whole Milk
- Food Coloring (two different colors)
- Vanilla Extract
Step-by-Step Instructions
- 1. To begin creating a two-tone frosting swirl, start by preparing your frostings. You’ll need two different colors, and I always say that the key to a beautiful swirl is having the right consistency in both. If your frosting is too thin, it won’t hold the swirl; if it’s too thick, it won’t spread evenly. I aim for a consistency that’s similar to mayonnaise – yes, you read that right, mayonnaise! It’s all about finding that perfect balance.
- 2. Next, divide your frostings into two separate bowls, making sure they’re at room temperature. This is crucial because cold frosting won’t spread as smoothly, and you might end up with a swirl that looks more like a blob. Take a moment to whip each frosting gently to ensure they’re light and airy; this step makes all the difference in achieving a smooth, even texture.
- 3. Now, it’s time to color your frostings, if you haven’t already. Remember, the colors should complement each other. I love using a classic combination like rich chocolate and creamy vanilla, but feel free to experiment with different hues to match your theme or preference. When adding color, do it gradually – you can always add more, but it’s harder to remove excess dye.
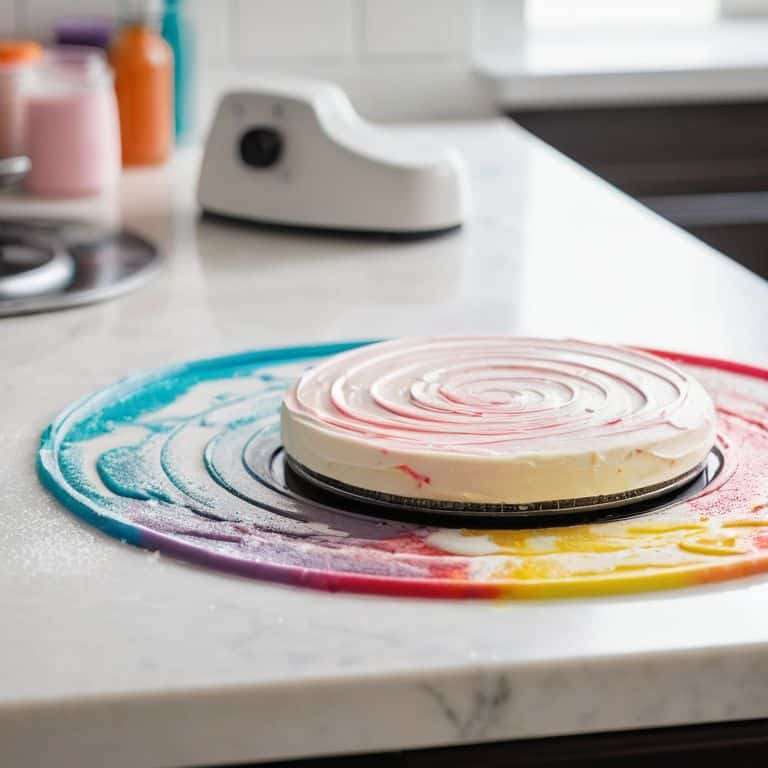
- 4. With your frostings ready, place a small amount of each onto a flat surface, like a marble countertop or a piece of parchment paper. This is where the magic begins. You’re going to create a marbled effect by gently folding the two colors together, but be careful not to overmix. The goal is to create a beautiful, swirly pattern, not a uniform color.
- 5. To achieve the perfect swirl, use an offset spatula to place a dollop of one color onto the top of your cake or pastry. Immediately follow with a dollop of the second color right next to it. Then, using a gentle sweeping motion, start to merge the two colors together, swirling them into a beautiful, marbled pattern. Don’t press too hard; you want to keep the layers light and airy.
- 6. As you continue to swirl the frostings, pay close attention to the temperature of your workspace. If it’s too warm, the frosting can melt and lose its definition. Ideally, you want to work in a cool, draft-free area to maintain the integrity of your swirl. This is where experience and a bit of patience come into play – practice makes perfect, so don’t be discouraged if your first attempts don’t turn out exactly as you hoped.
- 7. Finally, step back and admire your work. The two-tone frosting swirl is a piece of art that requires patience, precision, and practice. Don’t be afraid to experiment with different colors and patterns – the more you play, the more you’ll understand the nuances of creating the perfect swirl. And remember, temperature is key; it’s what sets a good swirl apart from a great one. With time and practice, you’ll be creating stunning two-tone frosting swirls like a pro, and the sense of accomplishment is truly sweet.
Swirling Secrets Uncovered
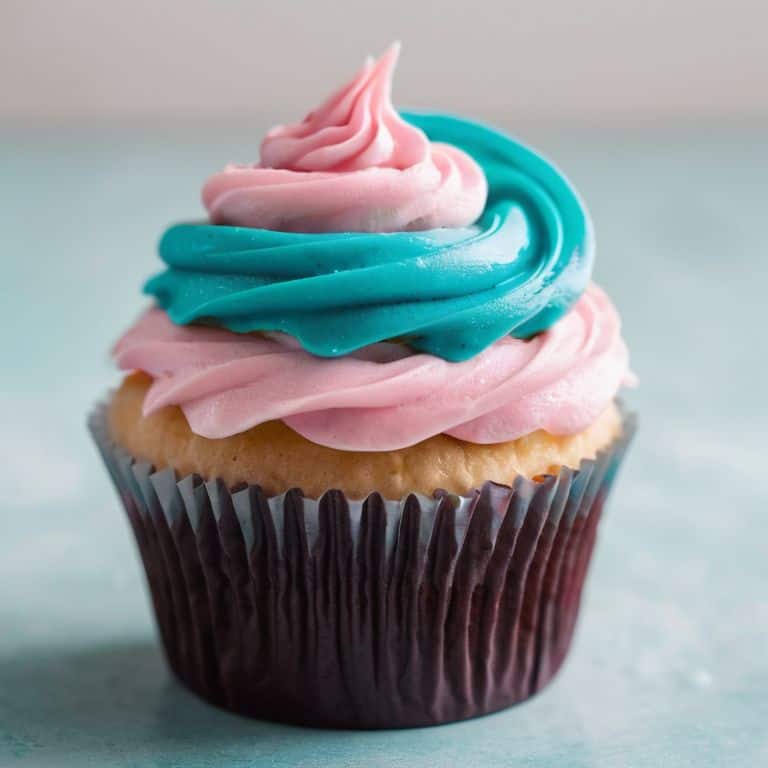
As I delve deeper into the world of two-tone frosting swirls, I’ve discovered that frosting color combinations can make or break the overall aesthetic of your design. When choosing your colors, consider the theme and atmosphere you want to create – for example, pastel shades for a whimsical touch or bold colors for a more dramatic effect. I’ve found that pairing contrasting colors can add a level of sophistication to your swirl, making it truly eye-catching.
When it comes to achieving the perfect swirl, piping techniques for beginners can be a bit tricky to master. However, with practice and patience, you’ll be creating beautiful, intricate designs in no time. One tip I always share with my students is to focus on the consistency of your frosting, as this will greatly impact the flow and overall appearance of your swirl. By adjusting the consistency, you can achieve a range of effects, from smooth and rounded to sharp and defined.
To take your two-tone frosting swirl to the next level, experiment with different swirl design patterns and multi-colored frosting effects. You can create a marbled effect by layering different colors or try a more structured approach with geometric patterns. Remember, the key to a stunning swirl is to have fun and be creative – don’t be afraid to try new things and see what works best for you. With a little practice and patience, you’ll be a pro at creating beautiful, one-of-a-kind frosting designs.
Mastering Frosting Color Combinations
When it comes to mastering frosting color combinations, I always say that harmony is key. You want your two-tone swirl to be visually stunning, not jarring. For me, that means considering the 60-30-10 rule: 60% of one color, 30% of another, and 10% accent. This balance creates a beautiful, eye-catching effect. I also love experimenting with analogous colors – think blues and greens or yellows and oranges – for a soothing, natural look.
My favorite combinations? Rich chocolate and creamy beige, or vibrant pink and velvety white. The possibilities are endless, but remember, the goal is to create a look that’s both whimsical and sophisticated. Trust your instincts, and don’t be afraid to try new pairings – after all, that’s where the magic happens!
Piping Techniques for Swirl Perfection
To achieve swirl perfection, piping techniques are paramount. I always emphasize the importance of using the right piping bag and tip – for a two-tone swirl, a large round tip is ideal. The key is to apply consistent pressure, allowing the frosting to flow smoothly and evenly.
As you pipe, remember to maintain a steady hand and move in a continuous, sweeping motion. This will help you create a seamless blend of colors. Practice makes perfect, so don’t be discouraged if your early attempts don’t yield the desired result – with time and patience, you’ll develop the muscle memory needed to craft stunning two-tone swirls.
Swirling to Perfection: 5 Essential Tips for a Two-Tone Frosting Swirl
- I always start by ensuring my frostings are at room temperature, as this allows for a smoother, more even blend of colors and textures
- Never underestimate the power of a high-quality piping bag and tip – it’s the difference between a sloppy swirl and a majestic, Instagram-worthy masterpiece
- Achieving the perfect two-tone effect is all about contrast, so don’t be afraid to experiment with bold, complementary colors to create a visually stunning swirl
- To avoid a muddy or uneven swirl, make sure to pipe your frostings in thin, consistent streams, allowing each color to maintain its integrity and texture
- Practice, practice, practice – the key to mastering the two-tone frosting swirl is to develop a sense of touch and timing, so don’t be discouraged if your early attempts don’t turn out as expected – keep swirling, and you’ll soon get the hang of it
Key Takeaways for the Perfect Two-Tone Frosting Swirl
I’ve emphasized throughout this guide that mastering the two-tone frosting swirl is not just about aesthetics, but also about understanding the science behind frosting consistency and temperature control.
By experimenting with different piping techniques and frosting color combinations, you can elevate your baked goods from ordinary to extraordinary, making each piece a unique work of art.
Remember, practice makes perfect, so don’t be discouraged if your first few attempts at creating a two-tone frosting swirl don’t turn out exactly as you hoped – with patience, precision, and a bit of creativity, you’ll soon be crafting swirls like a pro.
The Essence of Swirling
A two-tone frosting swirl is not just a design element, it’s a symphony of colors and textures that can elevate your dessert from mere mortal to heavenly masterpiece – the key is to balance contrast with harmony, and precision with passion.
Juliette Le Roux
The Sweetest Finish
As we conclude our journey to create the perfect two-tone frosting swirl, let’s recap the essential elements that bring this show-stopping effect to life. From mastering frosting color combinations to piping techniques for swirl perfection, each step is crucial in achieving a beautiful, symmetrical design. Remember, practice makes perfect, and it’s all about finding the right balance between colors and textures to create a visually stunning dessert. Don’t be afraid to experiment and try new things – after all, that’s what makes baking so exciting!
Now that you’ve unlocked the secrets of the two-tone frosting swirl, I encourage you to keep pushing the boundaries of your creativity. Temper your expectations and don’t settle for anything less than perfection. With patience, precision, and a willingness to learn, you’ll be creating breathtaking desserts that impress and delight. So go ahead, get baking, and remember – the art of pastry is all about the pursuit of perfection, one delicious layer at a time!
Frequently Asked Questions
What are the best types of frosting to use for a two-tone swirl, and how do I ensure they have the right consistency?
For a flawless two-tone swirl, I swear by Swiss meringue or Italian buttercream – their stable consistency is a dream to work with. Ensure your frostings are at room temperature and have a smooth, silky texture, similar to mayonnaise. This will allow for a seamless blend and a gorgeous, marbled effect.
Can I use natural food colorings to achieve the desired colors for my two-tone frosting swirl, or are artificial colorings more reliable?
While I adore the idea of natural food colorings, they can be unpredictable. Artificial colorings offer more reliability, especially when it comes to achieving vibrant, consistent hues. That being said, if you’re set on using natural colorings, beet juice and turmeric can create stunning, albeit more subdued, shades for your two-tone frosting swirl.
How do I prevent the two colors from mixing or bleeding into each other when creating a two-tone frosting swirl, especially if I'm using a particularly wet or oily frosting?
To prevent colors from mixing, I swear by precise temperature control and the right frosting consistency. For wet or oily frostings, I add a touch more powdered sugar to balance it out, and always chill the frosted cake for at least 10 minutes to set the colors before serving.