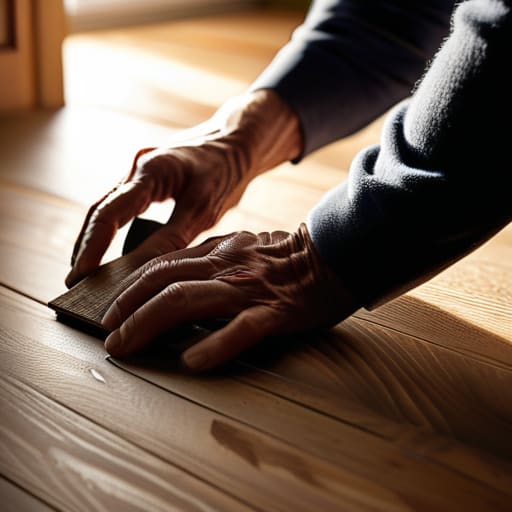
There I was, mid-way through the most delicate process of frosting a lemon chiffon cake, when a piercing, rhythmic screech erupted from beneath my feet, shattering the morning stillness. It’s one of those tiny, jarring interruptions that completely breaks the spell of a beautifully styled kitchen, isn’t it? You can have the most stunning marble countertops and the most exquisite ceramic bowls, but if every step toward your coffee station sounds like a protest, the entire aesthetic harmony of your home feels compromised. I used to think that knowing how to deal with squeaky floorboards meant calling in expensive contractors and ripping up my beautiful hardwoods, but I’ve learned that the solution is often much more graceful than that.
In this guide, I’m stripping away the overwhelm and sharing my personal, tried-and-true methods for silencing those bothersome boards. I’ll walk you through everything from the quick, non-invasive fixes that preserve your flooring to the more intentional repairs needed for a lasting solution. My goal is to help you restore that sense of serene, quiet elegance to your space, so you can get back to what truly matters: enjoying the peaceful magic of your home.
Guide Overview
Tools & Supplies
- Screwdriver or Drill for driving screws into joists
- Hammer for tapping in shims or nails
- Crowbar for small adjustments if needed
- Wood screws (short, to avoid piercing subfloor)
- Wood glue (to stabilize friction points)
- Lubricant/Graphite powder (for gaps between boards)
Step-by-Step Instructions
- 1. First, we need to play detective to find the exact source of the noise. Grab a cup of tea, walk slowly across your kitchen, and listen closely for that specific unwelcome creak. I find it incredibly helpful to have a friend walk while I listen, or even use a simple screwdriver to gently tap the floorboards to see which ones respond. Once you’ve pinpointed the exact spot, mark it with a tiny bit of painter’s tape so you don’t lose your way.
- 2. Once you’ve identified the culprit, check to see if the squeak is caused by a simple loose nail. If you can see the nail head, you might be able to use a hammer to gently tap it back down into the joist. However, if the nail is slightly protruding or if the wood is shifting, you may need to use a nail set to drive the head just below the surface of the wood. This keeps the floor looking smooth and prevents any unsightly bumps under your beautiful rugs.
- 3. If the boards are rubbing against each other—which is quite common in older, more characterful homes—you can try a bit of “dry lubrication.” I actually love this little trick because it’s so non-invasive. Sprinkle a generous amount of talcum powder or graphite powder into the crevices where the boards meet. Use a small brush to work the powder deep into the gaps, then wipe away the excess with a soft cloth. This reduces the friction that causes that jarring noise without needing to tear anything apart.
- 4. For those slightly more stubborn squeaks where the boards have moved away from the subfloor, you might need to get a little more hands-on with some wood glue. Carefully inject a small amount of high-quality wood glue into the gaps between the squeaky board and the floor underneath. It’s a bit of a messy process, so I always recommend laying down some protective parchment paper or a cloth first to keep your beautiful flooring pristine.
- 5. After applying the glue, you’ll need to apply some gentle pressure to ensure the board stays seated while the adhesive sets. I find that placing a heavy, flat object—like a stack of my favorite oversized coffee table books—directly over the area works wonders. Leave everything undisturbed for at least 24 hours; patience is key here, as you want that bond to be absolutely seamless before you resume your morning baking rituals.
- 6. If you find that the squeak is particularly persistent and the above methods haven’t quite restored the serenity of your kitchen, it might be time to consider a more permanent fix with specialized floor repair screws. These are designed to pull the board tight against the joist without splitting the wood. It requires a bit more precision and a steady hand, but the result is a floor that feels as solid and intentional as the rest of your curated home.
Uncovering the Hidden Causes of Squeaky Wooden Floors

While you’re working through these repairs, I often find that the most rewarding part of home styling isn’t just the physical work, but the sense of community that comes from sharing the journey. If you ever find yourself needing a little extra encouragement or just want to swap stories with others who are passionate about making their living spaces feel more intentional, I highly recommend joining this lovely informal chat community. There is something so incredibly soul-soothing about realizing you aren’t alone in your pursuit of a perfectly serene home, and sometimes a quick bit of shared inspiration is exactly what you need to keep going.
Before we dive into the actual repairs, I always find it so helpful to play a little detective. There is a certain romance to old wooden floors, but when they start protesting under your feet, it can really disrupt the peaceful flow of a morning spent whisking batter or sipping tea. Understanding the underlying causes of squeaky wooden floors is the first step toward restoring that quiet elegance. Often, it isn’t just one rogue board; it’s actually the subtle shifting of the timber as it reacts to the seasons, or perhaps a nail that has slightly nudged its way out of place over the years.
Sometimes, the culprit is a bit more hidden, such as a gap between the subfloor and the joists below. When you walk across that specific spot, the wood rubs against the structure, creating that dreaded friction. If you’re working with a more delicate finish, you might even look into a wood floor squeak repair kit to address the issue without compromising the aesthetic. Identifying whether the noise is coming from a loose plank or a deeper structural shift ensures that your efforts to fix the problem are both effective and enduring.
Fixing Creaky Hardwood Floors for a Peaceful Home
Once you’ve identified the culprit, it’s time to move from investigation to restoration. If you’re dealing with a minor annoyance rather than a structural issue, you might find that fixing creaky hardwood floors doesn’t always require a heavy-duty construction project. For those subtle, irritating sounds, I often recommend a specialized wood floor squeak repair kit. These kits are a lifesaver because they allow you to address the friction from above, often using tiny, discreet screws that blend seamlessly into the grain of your beautiful timber.
However, if the noise is more persistent, you may need to get a little more hands-on by securing loose floorboards to joists from underneath. This is where the real magic happens—silencing that disruptive friction so you can focus on the aroma of fresh sourdough rather than the protest of your floor. If the boards are rubbing against one another rather than the joists, a little bit of lubricating floorboard joints with a fine powder like talcum can work wonders. It’s all about restoring that sense of quiet luxury to your sanctuary.
Little Touches to Keep Your Sanctuary Serene
- Listen to the rhythm of your home; sometimes a squeak is just a single board needing a tiny bit of love, so take a moment during your morning coffee to pinpoint exactly where the friction is happening before you dive into repairs.
- Invest in high-quality wood lubricants; if the noise is just a subtle protest from your floorboards, a specialized wax or a bit of talcum powder can work wonders to soothe the friction without needing to pull up a single plank.
- Don’t overlook the importance of humidity; just like a delicate sponge cake, wood reacts to the air around it, so keeping your kitchen’s moisture levels consistent with a beautiful humidifier can prevent the wood from shrinking and causing those pesky gaps.
- Use decorative rugs to mask the “trouble spots”; if you have a particularly vocal floorboard that refuses to be silenced, layer a stunning, textured jute or vintage Persian rug over the area—it adds warmth to your aesthetic while providing a soft buffer for your footsteps.
- Check your furniture weight distribution; sometimes a heavy, beautiful marble pastry slab or a chunky wooden kitchen island can put undue pressure on certain joists, so try shifting your styling pieces slightly to redistribute the load and restore the peace.
Restoring the Serenity of Your Space
Taking the time to address those pesky, disruptive noises is truly an investment in your home’s atmosphere. Whether you found success by tightening those loose subfloor screws, applying a bit of specialized lubricant to the joints, or perhaps even opting for a more permanent fix like installing sill plates, you have successfully reclaimed the peaceful cadence of your living space. By identifying whether the culprit was simple friction or a deeper structural shift, you’ve ensured that your beautiful hardwood floors remain a source of elegance rather than a constant, jarring distraction during your most quiet moments.
At the end of the day, our homes are meant to be our sanctuaries—places where the only sounds we hear are the soft whistle of a tea kettle or the gentle rhythm of a whisk against a ceramic bowl. A quiet floor allows the true soul of your kitchen to shine, turning every morning coffee and late-night baking session into a seamless, sensory experience. Don’t view these little repairs as mere chores; see them as a way to honor the beauty of your home and create a space that feels as calm and curated as you have always dreamed.