I still remember the first time I encountered a cracked fondant disaster – it was during my early days as a cake artist, and I was determined to learn how to fix cracked or torn fondant without starting all over again. The cake was supposed to be the centerpiece for a wedding reception, and I had spent hours perfecting the design. But, as I was smoothing out the fondant, a tiny crack appeared, and before I knew it, the entire thing was torn. I was devastated, but I didn’t give up. Instead, I dove headfirst into researching and experimenting with different techniques to repair the damage. It wasn’t easy, but I eventually mastered the art of mending imperfect fondant, and now I’m excited to share my knowledge with you.
In this article, I’ll walk you through my tried-and-true methods for fixing fondant flaws, so you can rescue your own cakes from disaster. You’ll learn how to assess the damage, prepare the right tools, and apply simple yet effective techniques to smoothen out cracks and tears. My goal is to empower you with the skills and confidence to tackle even the most daunting fondant challenges, and to show you that how to fix cracked or torn fondant is not a mysterious art, but a straightforward process that anyone can master with a little practice and patience. By the end of this guide, you’ll be equipped with the know-how to transform your imperfect fondant into a flawless masterpiece.
Table of Contents
- Guide Overview: What You'll Need
- Step-by-Step Instructions
- Fixing Fondant Flaws
- From Flaws to Perfection: 5 Essential Tips for Fixing Cracked or Torn Fondant
- Key Takeaways for a Flawless Fondant Finish
- The Art of Redemption
- Bringing It All Together: Perfecting Your Fondant
- Frequently Asked Questions
Guide Overview: What You'll Need
Total Time: 30 minutes to 1 hour
Estimated Cost: $5 – $15
Difficulty Level: Easy
Tools Required
- Fondant Smoother (or a similar tool to smooth out fondant)
- Paintbrush (small, for applying water or fondant adhesive)
- Rolling Pin (for flattening and smoothing fondant)
Supplies & Materials
- Fondant (matching the color of the original fondant)
- Water (for dampening fondant)
- Fondant Adhesive (or piping gel, for bonding fondant pieces)
Step-by-Step Instructions
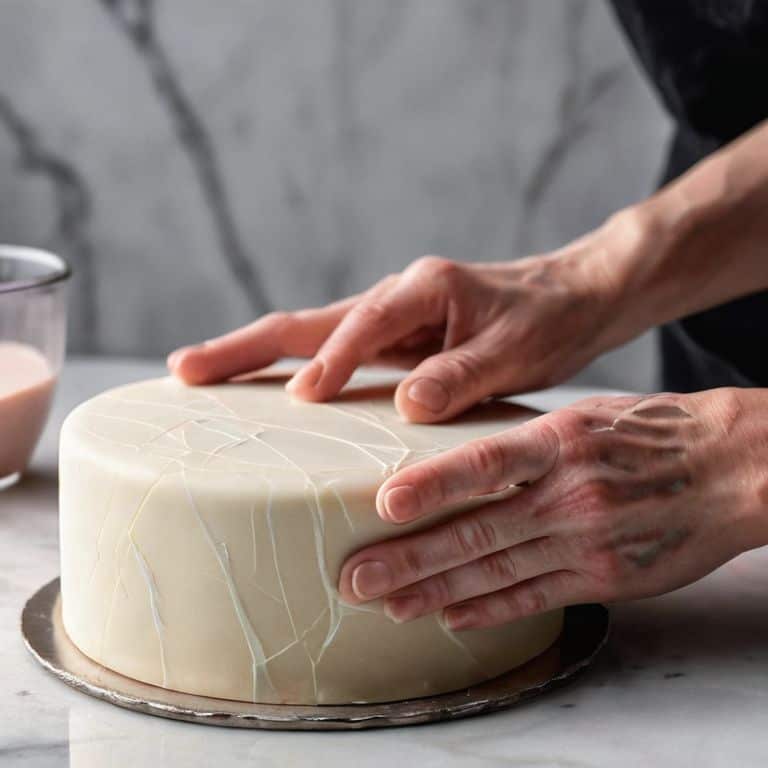
- 1. First, let’s assess the damage and determine the best course of action. Take a close look at the crack or tear in your fondant and decide whether it’s a minor flaw that can be easily fixed or a more significant issue that requires a bit more work. This will help you choose the right technique to repair it.
- 2. Next, gather your trusty toolkit: a small, sharp knife or a fondant tool, a dab of water, and a pinch of cornstarch or powdered sugar. These will be your allies in smoothing out the fondant and erasing any imperfections. Remember, the key to a successful repair is to work patiently and gently, as rough handling can lead to further damage.
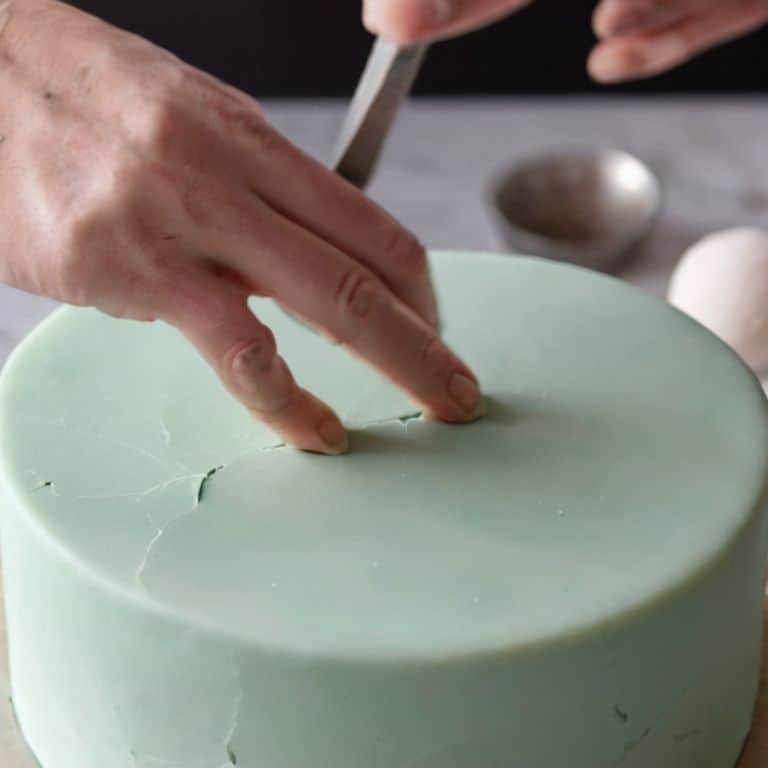
- 3. Now, let’s start by cleaning up the area around the crack or tear. Use your knife or fondant tool to carefully remove any excess or damaged fondant, taking care not to pull or stretch the surrounding area. This will give you a clean slate to work with and help you achieve a seamless repair.
- 4. With the area prepared, it’s time to apply a small amount of water to the crack or tear. Dip your brush or a small tool into the water and gently dab it onto the affected area. Be cautious not to apply too much water, as this can cause the fondant to become soggy or develop unsightly blisters.
- 5. Once the water has been applied, use your cornstarch or powdered sugar to help absorb any excess moisture and create a smooth surface. Gently dust the area with a small amount of powder, then use your fondant tool or a soft brush to smooth out the fondant and blend the edges of the repair.
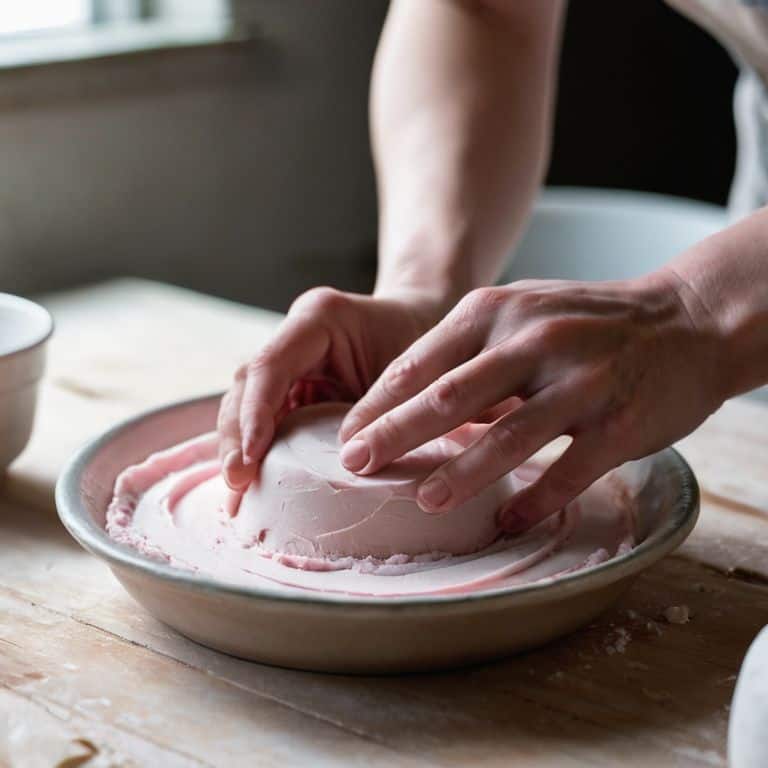
- 6. If the crack or tear is particularly deep or wide, you may need to apply a small amount of fondant to the area to build it up and create a smooth surface. To do this, simply knead a tiny piece of fondant until it’s pliable, then use your tool or fingers to shape it into a thin, delicate patch that can be applied to the affected area.
- 7. Finally, use your fingers or a fondant tool to blend the edges of the repair, feathering the new fondant out towards the surrounding area to create a flawless finish. Take your time and work carefully, as this is the most critical part of the process. With patience and practice, you’ll be able to achieve a smooth, professional-looking finish that’s sure to impress.
Fixing Fondant Flaws
When working with fondant, it’s essential to be aware of the common fondant mistakes to avoid, such as overworking the fondant, which can lead to cracks and tears. To prevent this, I always make sure to handle the fondant gently and avoid over-stretching it. Additionally, fondant troubleshooting techniques can be a lifesaver when issues arise. For instance, if you notice your fondant starting to crack, you can try using a small amount of shortening to moisturize it and prevent further cracking.
In my experience, working with fondant in high humidity can be particularly challenging. To combat this, I use fondant repair tools and materials, such as a fondant smoother or a sharp knife, to help maintain the fondant’s shape and texture. It’s also crucial to have the right materials on hand, like gum paste, which can be used for fondant patching to create seamless repairs.
To take your fondant repair skills to the next level, it’s essential to understand the importance of preventing fondant from cracking in the first place. This can be achieved by using the right type of fondant for your project and ensuring it’s properly kneaded and rested before use. By following these tips and being mindful of common mistakes, you’ll be well on your way to creating flawless, professional-looking cakes that showcase your artistry and attention to detail.
Fondant Troubleshooting Essentials
When it comes to fondant troubleshooting, I always say that prevention is the best medicine. To avoid those pesky cracks and tears, make sure your fondant is at room temperature and kneaded to perfection before applying it to your cake. Also, don’t overwork the fondant, as this can cause it to become brittle and prone to cracking.
By being gentle and patient when handling fondant, you’ll be amazed at how much more cooperative it becomes. And, if you do encounter any issues, remember that a little bit of shortening or corn syrup can go a long way in reviving your fondant and making it pliable once again.
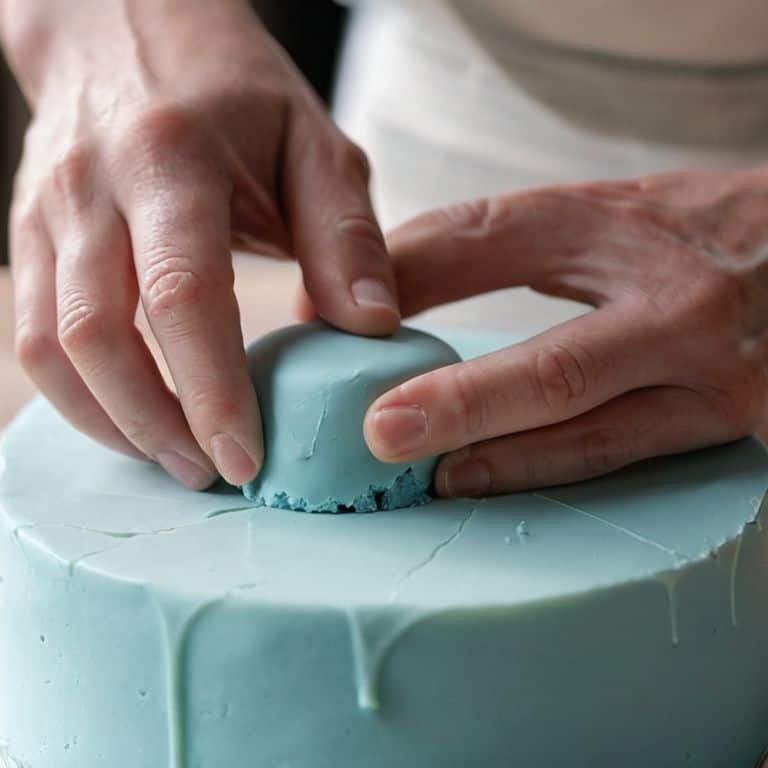
Patching With Gum Paste Mastery
To masterfully patch imperfections, I turn to gum paste – a reliable ally in my cake decorating journey. With its pliable nature, gum paste can be molded to seamlessly blend with the surrounding fondant, making it perfect for fixing small tears or cracks. I gently knead the gum paste until it reaches a smooth, pliable consistency, then carefully apply it to the affected area, smoothing out the edges to create a flawless finish.
By using gum paste in this way, I’ve found that even the most noticeable flaws can be transformed into barely perceptible imperfections, allowing the beauty of the cake to shine through. With a little patience and practice, you’ll be able to achieve the same professional-looking results, turning your cakes into stunning works of art that showcase your skill and creativity.
From Flaws to Perfection: 5 Essential Tips for Fixing Cracked or Torn Fondant
- Assess the Damage: Before you start repairing, take a step back and evaluate the extent of the crack or tear to determine the best approach
- Prepare Your Tools: Having the right tools, such as a fondant smoother, a sharp knife, or a paintbrush, can make all the difference in achieving a seamless repair
- Blend with Caution: When blending the repaired area with the surrounding fondant, do so gently to avoid creating more cracks or air pockets
- Add Reinforcement: For deeper cracks or tears, consider adding a thin layer of gum paste or piping gel to reinforce the area and prevent further damage
- Finishing Touches: Once the repair is complete, use a dusting of powdered sugar or a light brushing with a small paintbrush to remove any excess fondant or imperfections and leave your cake looking flawless
Key Takeaways for a Flawless Fondant Finish
Mastering the art of mending imperfect fondant requires patience, the right tools, and a gentle touch to transform cracked or torn areas into seamless, professional-looking finishes
By understanding the basics of fondant troubleshooting, including patching with gum paste, you can confidently tackle common decorating dilemmas and ensure your cakes look stunning and polished
With practice and attention to detail, you’ll be able to rescue even the most damaged fondant, turning potential disasters into breathtaking works of art that showcase your skill and creativity as a cake decorator
The Art of Redemption
Just as a watercolor painter embraces the happy accidents of bleeding pigment, we cake artists can transform fondant flaws into breathtaking works of art, for it’s in the repair that we find the true beauty of imperfection.
Chloé Dubois
Bringing It All Together: Perfecting Your Fondant
As we’ve journeyed through the process of fixing cracked or torn fondant, it’s clear that mastering this skill is all about attention to detail and having the right techniques up your sleeve. From initial troubleshooting to more advanced methods like patching with gum paste, each step is crucial in achieving a flawless finish. By understanding the basics of fondant repair and being patient with the process, you’ll be well on your way to creating cakes that are not only delicious but also visually stunning.
So, the next time you’re faced with a fondant faux pas, remember that it’s not the end of the world – it’s merely an opportunity to practice your skills and turn a potential disaster into a work of art. With practice and patience, you’ll find that fixing fondant flaws becomes second nature, allowing you to focus on the true artistry of cake decorating and bringing your most beautiful creations to life.
Frequently Asked Questions
What are the most common causes of cracked or torn fondant, and how can I prevent them from happening in the first place?
To avoid those pesky cracks and tears, it’s essential to understand what causes them. Overworking the fondant, uneven cake surfaces, and drastic temperature changes are common culprits. Prevent them by ensuring your cake is level, using the right fondant consistency, and working in a stable environment.
Can I use the same techniques to fix fondant flaws on intricate cake designs or sculpted elements?
While the techniques I shared can be applied to intricate designs, you may need to adapt them for delicate or sculpted elements. For example, use a small brush to apply gum paste or fondant patches, and work in tiny, gentle strokes to avoid damaging the surrounding design.
How do I know when it's better to start over with a new piece of fondant rather than trying to repair the damaged one?
The million-dollar question: when to call it quits on a damaged fondant. For me, it’s all about assessing the extent of the damage. If the tear or crack is too deep or widespread, it’s often better to start fresh with a new piece of fondant to avoid compromising the entire design. Trust your instincts and don’t be afraid to start over – it’s better than risking a cake that’s more patchwork than masterpiece.