I still remember the first time I attempted to make caramel – it was a disaster. The sugar crystallized, the mixture turned a strange shade of brown, and the whole kitchen was filled with a burnt smell. It was a hard lesson to learn, but it taught me that temperature control is the key to creating perfect caramel. Many people believe that making caramel is all about guessing the right moment to stop cooking the sugar, but I’m here to tell you that it’s actually about understanding the science behind caramelization. If you’re struggling to get it right, you’re not alone – even experienced pastry chefs like myself have had their fair share of caramel failures. But with the right techniques and a bit of practice, you can learn how to make caramel like a pro.
In this article, I’ll share my expertise on how to make caramel, from the basics of selecting the right sugar to the advanced techniques of creating intricate caramel designs. You’ll learn how to avoid common mistakes, such as crystallization and overcooking, and how to achieve that perfect, smooth and creamy texture. I’ll also reveal some of my favorite tips and tricks for working with caramel, from tempering chocolate to creating stunning dessert presentations. By the end of this guide, you’ll be equipped with the knowledge and confidence to create stunning caramel desserts that will impress even the most discerning palates. So, let’s get started and dive into the world of caramel making – it’s a journey that requires patience, practice, and a bit of precision, but the results are well worth the effort.
Table of Contents
Guide Overview: What You'll Need
Total Time: 30 minutes to 1 hour
Estimated Cost: $5 – $15
Difficulty Level: Easy
Tools Required
- Medium Saucepan with heavy bottom
- Candy Thermometer for accurate temperature reading
- Wooden Spoon or silicone spatula
- Glass Jar for storing caramel
Supplies & Materials
- Granulated Sugar 1 cup
- Light Corn Syrup 1/2 cup
- Water 1/2 cup
- Unsalted Butter 1/2 cup
- Sea Salt optional, for flavor
Step-by-Step Instructions
- 1. First, let’s start with the basics: to make caramel, you’ll need a heavy-bottomed saucepan, as it distributes heat evenly. I prefer using a copper or stainless steel pan, as they retain heat well and can help you achieve that perfect caramel color. Make sure your pan is clean and dry before you begin.
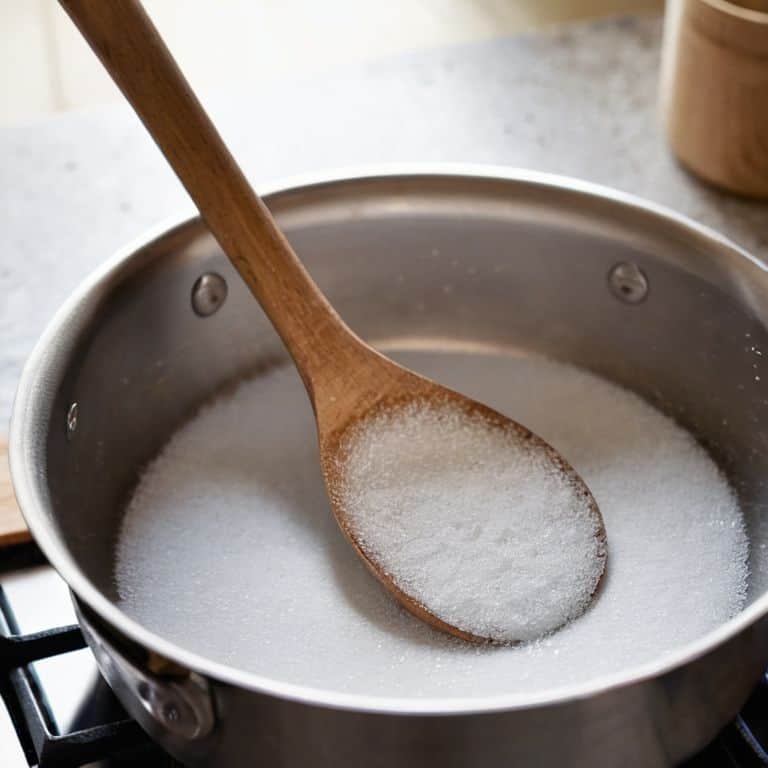
- 2. Next, combine 1 cup of granulated sugar, 1/2 cup of water, and 1/4 teaspoon of sea salt in your saucepan. Place the saucepan over medium heat and stir until the sugar has dissolved, creating a simple syrup. It’s essential to stir constantly during this initial phase to prevent the sugar from crystallizing.
- 3. Now, increase the heat to medium-high and bring the mixture to a boil. Use a pastry brush to wash down the sides of the pan with a little water, removing any sugar crystals that may have formed. This step is crucial, as it helps prevent the caramel from becoming grainy.
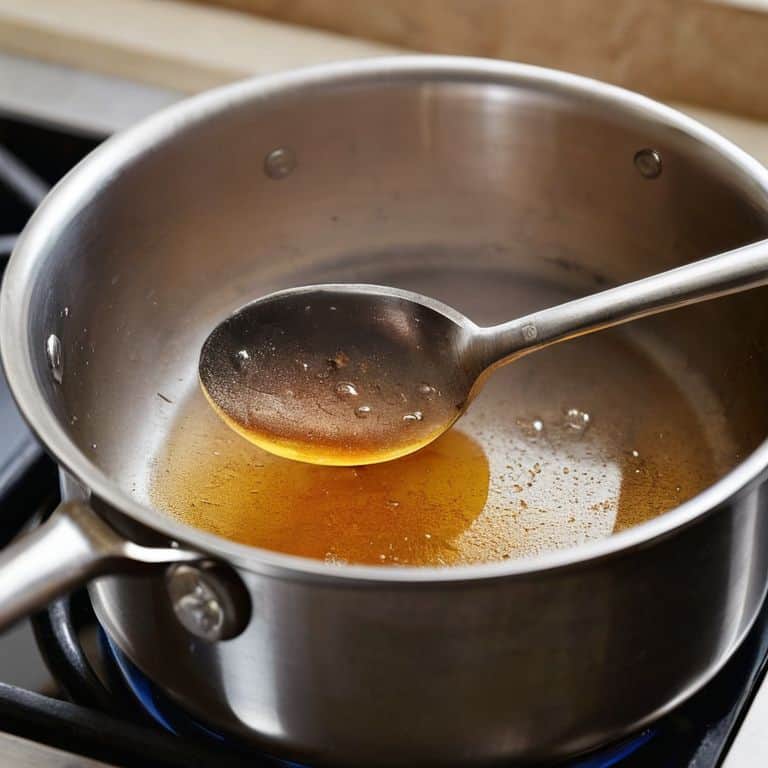
- 4. Once the mixture reaches a boil, reduce the heat to medium-low and simmer for about 10-15 minutes, or until the caramel turns a deep amber color. You’ll know it’s ready when it emits a nutty aroma and starts to smoke slightly. Be careful not to burn the caramel, as it can quickly go from perfect to ruined.
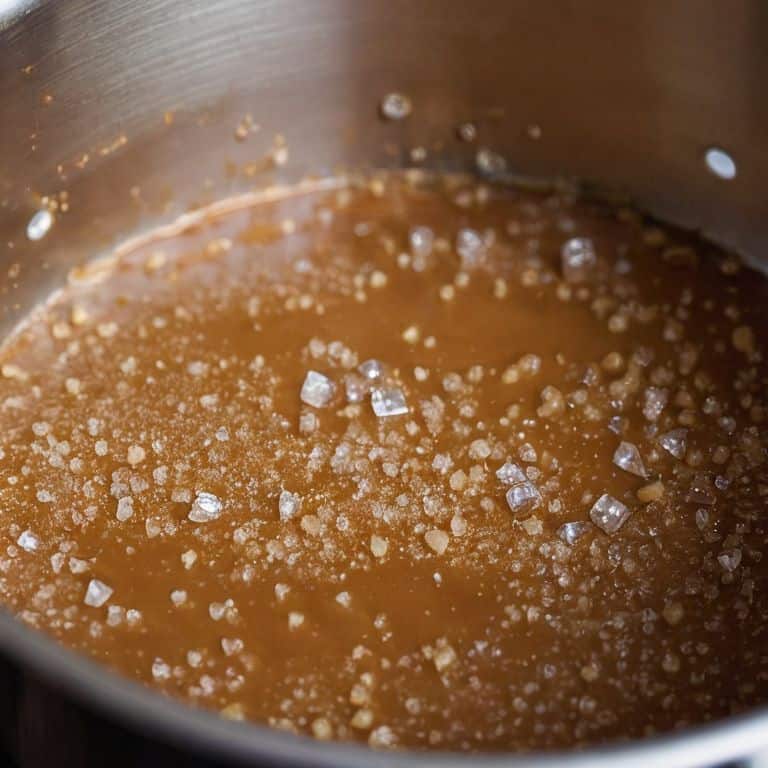
- 5. Remove the saucepan from the heat and slowly pour in 1/2 cup of heavy cream. The mixture will vigorously bubble and steam, so be cautious not to splash any of the hot caramel. Use a wooden spoon or spatula to gently stir the mixture, allowing it to calm down and emulsify.
- 6. Return the saucepan to medium heat and cook for an additional 2-3 minutes, stirring constantly, until the caramel has thickened slightly and turned a rich, creamy color. You can test the consistency by drizzling a small amount of the caramel into a cup of cold water – it should form a soft ball that flattens when removed from the water.
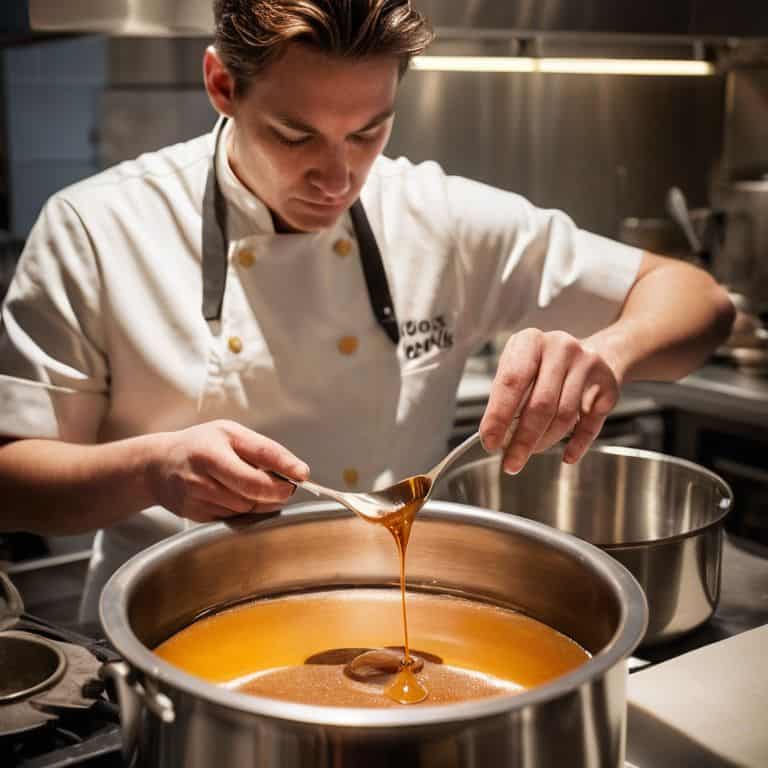
- 7. Finally, remove the saucepan from the heat and let the caramel cool slightly before straining it into a clean glass jar or airtight container. Tempering the caramel is essential to prevent it from crystallizing, so make sure to let it cool to around 100°F to 110°F before using it in your recipes. With this step-by-step guide, you’ll be well on your way to creating delicious, smooth caramel that’s perfect for topping cakes, filling chocolates, or simply enjoying on its own.
Mastering Caramel Chaos
As I delve deeper into the world of caramel, I’ve come to realize that mastering the art of caramelization is a journey, not a destination. It’s about understanding the nuances of sugar and heat, and how they interact to create that perfect, rich flavor. I’ve found that using high-quality sugar, such as turbinado or Demerara, makes a significant difference in the caramel color and flavor profiles. The dry caramel method, in particular, allows for a more precise control over the caramelization process, resulting in a deeper, more complex flavor.
When it comes to creating a caramel sauce recipe for ice cream, it’s essential to consider the texture and consistency you’re aiming for. A smooth, creamy sauce requires a slightly different approach than a crunchy, caramelized topping. I’ve learned that the key to achieving the perfect texture lies in the temperature control, as well as the type of sugar used. By experimenting with different sugar types and temperatures, you can create a range of unique caramel flavors and textures.
To avoid common caramel making mistakes, it’s crucial to pay attention to the caramel’s color and aroma. A perfectly caramelized sugar will have a deep, amber-like color and a rich, nutty aroma. By monitoring these factors, you can ensure that your caramel turns out perfectly every time, whether you’re using it as a topping for ice cream or as a sauce for cakes and pastries.
Dry vs Wet Caramel Methods
When it comes to making caramel, the age-old debate rages on: dry vs wet method. I’ve tried both, and let me tell you, each has its own unique charm. The dry method, where you simply melt sugar in a pan, can be a bit more finicky, but the results are worth it – a deeper, richer flavor that’s hard to replicate.
I prefer the wet method, though, where a small amount of water is added to the sugar. It’s more forgiving, and the moisture helps to create a smoother, more even caramelization. Of course, the key is to find the perfect balance – too much water and you’ll end up with a sticky mess, too little and you’ll be back to the dry method’s unpredictability.
Sugar Seduction Best Types
When it comes to sugar, I’m a firm believer that not all types are created equal. For caramel, you want to use a sugar that will caramelize evenly and add a depth of flavor. I swear by using a combination of granulated sugar and a touch of muscovado sugar – the latter adds a rich, almost velvety texture to the caramel. Some of my colleagues also swear by using turbinado or Demerara sugar for their caramel, citing the slightly caramel-like flavor they bring to the table.
Personally, I find that the key is to experiment and find the sugar combination that works best for you. Whether you’re a fan of the robust flavor of brown sugar or the subtle sweetness of white sugar, the most important thing is to understand how your chosen sugar will behave when heated. This is where the magic happens, and your caramel transforms from a mere mixture of sugar and cream to a sublime, golden nectar.
Taming the Beast: 5 Essential Tips for Caramel Success
- Cook with Confidence: Never leave your caramel unattended, as the temperature can quickly escalate and ruin the entire batch
- Temperature Tango: Remember, I always say temperature is the most important ‘ingredient’ – invest in a reliable thermometer to ensure you’re hitting the perfect 338°F to 345°F range
- Sugar Synergy: Balance is key when it comes to sugar and cream ratios; experiment with different combinations to find your perfect harmony
- Patience is a Virtue: Don’t rush the process – caramelizing sugar is an art that requires time, attention, and a gentle touch to achieve that perfect golden hue
- Practice Makes Perfect: Making caramel is a skill that takes time to develop, so don’t be discouraged by initial failures – keep trying, and you’ll soon be crafting caramel like a pro
Key Takeaways for the Perfect Caramel
I’ve found that mastering the dry caramel method requires a deep understanding of temperature control, as it’s easy to burn the sugar if you’re not paying attention to the subtle changes in color and aroma
Selecting the right type of sugar is crucial – I swear by using a combination of granulated sugar and a touch of fleur de sel for a deeper, more complex flavor profile in my caramels
Practice makes perfect, and I always tell my students that the key to achieving that perfect, glassy caramel is to never stop experimenting and to always be mindful of the ‘why’ behind each technique, whether it’s the impact of humidity on sugar crystallization or the art of tempering chocolate to create the perfect caramel shell
The Caramel Conquest
To make caramel is to dance with sugar, where every step, every temperature, and every moment of hesitation can either lead to sublime harmony or chaotic disaster – and it’s in this delicate balance that the true art of caramel-making resides.
Juliette Le Roux
The Sweet Taste of Victory: Conquering Caramel
As we conclude our journey through the world of caramel, I want to emphasize the importance of temperature control and precision in achieving that perfect, golden hue. We’ve discussed the age-old debate between dry and wet caramel methods, and explored the seductive qualities of various sugar types. By mastering these fundamentals and understanding the nuances of caramelization, you’ll be well on your way to creating sublime desserts that impress and delight. Whether you’re a seasoned pastry chef or a curious home baker, the art of making caramel is a skill worth honing.
So, as you embark on your own caramel-making adventures, remember that practice is key. Don’t be discouraged by initial failures or setbacks – instead, learn from your mistakes and use them as an opportunity to refine your technique. With patience, persistence, and a willingness to experiment, you’ll unlock the secrets of this temperamental ingredient and discover a world of sweet, sticky possibilities. And when you finally achieve that perfect, glassy sheen, you’ll know that all your hard work has paid off in the most delicious way possible.
Frequently Asked Questions
What is the ideal temperature for cooking caramel to achieve a perfect golden color?
For that perfect golden color, I aim for a temperature between 338°F and 345°F. Any higher, and you risk burning the caramel. I recall my days in the Belgian chocolatieries, where we’d meticulously monitor the temperature to achieve that ideal amber hue. It’s all about precision, my friends!
How do I prevent caramel from crystallizing or becoming too grainy?
To prevent caramel from crystallizing, I swear by precise temperature control and careful sugar dissolution. Avoid introducing stray grains or stirring too vigorously, as this can trigger unwanted crystal formation. Instead, gently coax the sugar into submission, and never, ever, stop whisking until it reaches the perfect, silky smoothness.
Can I make caramel with alternative sweeteners, such as honey or maple syrup, and still achieve a similar texture and flavor?
While I adore experimenting with alternative sweeteners, I must advise that honey and maple syrup won’t yield the same texture as traditional caramel. Their water content and crystalline structures differ significantly from sucrose, affecting the Maillard reaction. However, you can still create a luscious, caramel-like sauce with these sweeteners – just don’t expect the same snap and sheen as traditional caramel.