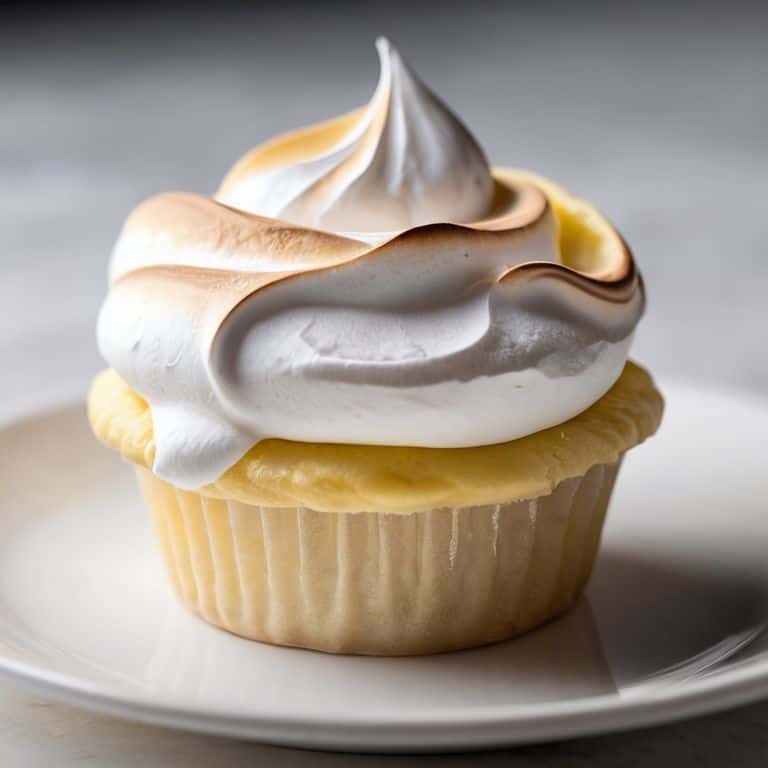
I still remember the first time I encountered the infamous weeping meringue – it was during my early days as a chocolatier in Belgium. I had spent hours perfecting my meringue-based dessert, only to have it collapse into a sad, soggy mess. The culprit? Insufficient tempering and a lack of understanding of how to prevent weeping meringue. It was a hard lesson to learn, but one that has since become a cornerstone of my pastry philosophy. As I delved deeper into the world of meringues, I realized that many home bakers struggle with this very issue, searching for tips on how to prevent weeping meringue.
As a Master Pastry Chef, I’m here to tell you that preventing weeping meringue is not rocket science, but rather a matter of precision and patience. In this article, I’ll share my tried-and-true methods for achieving stable, crisp meringues that will elevate your baked goods to new heights. You’ll learn the importance of temperature control, proper mixing techniques, and the role of humidity in meringue stability. By the end of this guide, you’ll be equipped with the knowledge and skills to tackle even the most daunting meringue-based desserts, and you’ll never have to worry about how to prevent weeping meringue again.
Table of Contents
Guide Overview: What You'll Need
Total Time: 30 minutes to 1 hour
Estimated Cost: $10 – $20
Difficulty Level: Easy
Tools Required
- Electric Mixer (for precise temperature control)
- Oven Thermometer (for accurate oven temperature)
- Rubber Spatula (for gentle folding)
Supplies & Materials
- Granulated Sugar superfine or caster sugar recommended
- Egg Whites room temperature
- Cream of Tartar a pinch
- Baking Sheet lined with Parchment Paper for stable meringue drying
Step-by-Step Instructions
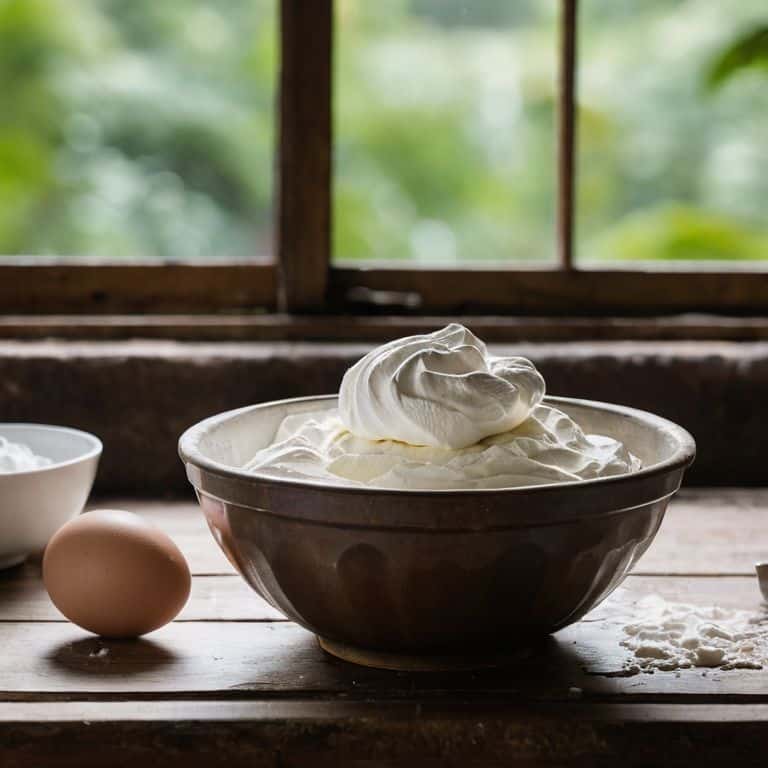
- 1. First, let’s start with the foundation of a perfect meringue: room temperature eggs. I cannot stress enough how crucial this is. If your eggs are straight out of the fridge, your meringue will likely be too cold, leading to an uneven structure and, ultimately, weeping. Make sure to take your eggs out of the fridge at least an hour before you start baking.
- 2. Next, it’s time to separate your eggs. This might seem like a simple step, but trust me, it’s where many people go wrong. Use fresh eggs for the best results, as they will have a firmer white and a more defined separation between the white and the yolk. Gently crack the egg and let the white flow into a bowl, making sure not to get any yolk in there.
- 3. Now, let’s talk about sugar quality. The type of sugar you use can significantly affect your meringue. I always recommend using superfine sugar because it dissolves more easily, ensuring that your meringue is smooth and even. Avoid using regular granulated sugar, as it can leave grains in your meringue, leading to an unpleasant texture.
- 4. With your eggs and sugar ready, it’s time to start whipping. Begin with a clean and dry bowl, as any trace of fat or moisture can prevent your eggs from whipping properly. Start whipping your egg whites on low speed until they become frothy, then gradually increase the speed. It’s essential to do this slowly, as you want to incorporate air gradually to avoid overmixing.
- 5. As you continue whipping, you’ll start to see your egg whites turn into a beautiful, stiff peak meringue. This is where patience comes into play. Don’t rush the process, and make sure to stop and scrape down the sides of the bowl periodically to ensure everything is well mixed. Remember, the goal is to create a meringue that is smooth and glossy, not one that’s overwhipped and grainy.
- 6. Once you’ve achieved the perfect meringue consistency, it’s time to add your sugar. Do this gradually, spooning the sugar into the meringue while continuously whipping. This step requires finesse, as you want to make sure the sugar is fully incorporated without overwhipping the meringue. Stop occasionally to check the texture, ensuring it remains smooth.
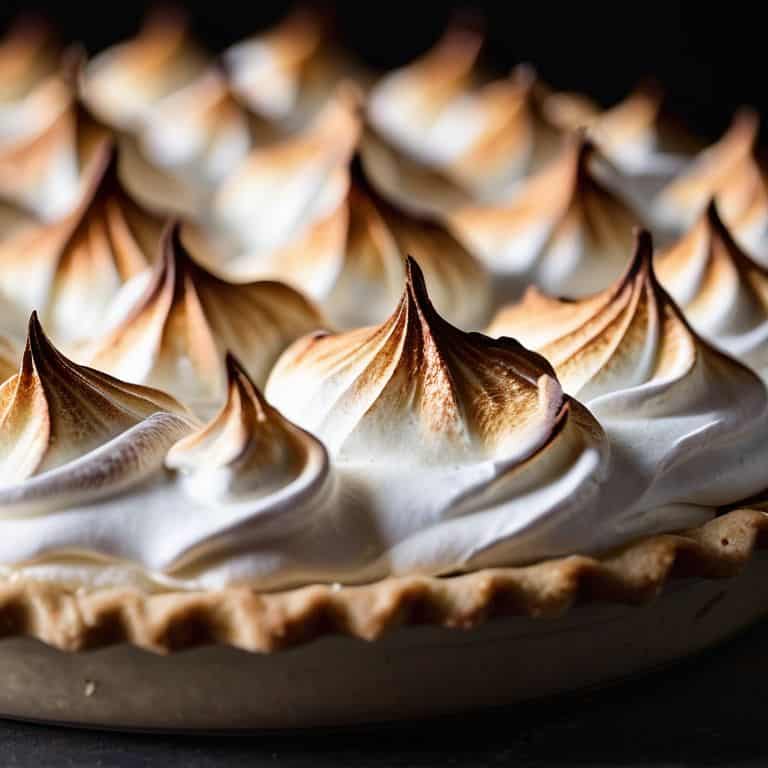
- 7. Now that your meringue is ready, it’s crucial to bake it correctly. Preheat your oven to the right temperature (usually around 200°F), and make sure you’re using a water bath if the recipe calls for it. This will help regulate the temperature and prevent your meringue from cooking too quickly on the outside. Place your meringue in the oven and let it bake slowly, undisturbed, for the recommended time.
- 8. Finally, once your meringue is baked, it’s essential to cool it slowly and naturally. Avoid opening the oven door during the cooling process, as sudden temperature changes can cause your meringue to weep. Instead, let it cool in the oven with the door slightly ajar, or remove it from the oven and let it cool on a wire rack. This final step is where patience really pays off, as a slowly cooled meringue will be stable and less prone to weeping.
Taming Weeping Meringue
As I delve into the world of meringue-based desserts, I’ve come to realize that stabilizing egg whites is crucial to preventing those pesky tears. It’s all about understanding the science behind egg white temperature control. You see, when eggs are at room temperature, they whip up to be lighter and more stable, making them less prone to overmixing meringue symptoms. I’ve learned this the hard way, having spent countless hours perfecting my meringue technique in the humid weather of cacao plantations.
When it comes to humid weather baking tips, it’s essential to be mindful of the environment. High humidity can cause meringues to absorb moisture, leading to a soggy, weeping mess. To combat this, I always ensure my workspace is well-ventilated and at a comfortable temperature. It’s also vital to avoid common meringue mistakes, such as overbaking or underbaking, which can disrupt the delicate balance of the meringue’s structure.
In my experience, the key to creating impeccable meringue-based desserts lies in attention to detail and a deep understanding of the ingredients. By mastering the art of egg white temperature control, you’ll be well on your way to crafting meringues that are both stable and delicious. Whether you’re a seasoned pastry chef or a novice baker, it’s essential to remember that practice makes perfect, and even the smallest adjustments can make a significant difference in the outcome of your desserts.
Avoiding Overmixing Symptoms and Humid Weather Woes
To truly stabilize those egg whites, I’ve found that avoiding overmixing is crucial. Overmixing introduces too much air, leading to a meringue that’s more prone to weeping. I always stop mixing the moment the eggs reach the soft peak stage – any further, and I risk disaster. Additionally, humid weather can be a pastry chef’s worst enemy, causing meringues to absorb moisture and weep. On particularly humid days, I adjust my recipe by reducing the sugar content slightly, which helps to counteract the excess moisture in the air. It’s all about balance and adaptability in the kitchen.
Stabilizing Egg Whites for Success
To stabilize egg whites, I swear by using room temperature eggs and a pinch of cream of tartar. This simple step helps to strengthen the bonds between the egg white proteins, making them less prone to weeping. I also make sure to whip my egg whites in a cool, dry environment – any hint of humidity or heat can throw off the delicate balance of my meringue. By taking these precautions, I can ensure that my egg whites are stable and ready to be transformed into a sturdy, glossy meringue.
By stabilizing my egg whites, I can then focus on the art of folding – a crucial step in combining my meringue with other ingredients without deflating it. With stable egg whites, I can achieve a smooth, even texture that’s essential for my signature desserts.
My Top 5 Secrets to Conquering Weeping Meringue
- Use room temperature eggs for stability and ease of whipping
- Tap into the power of acid: a pinch of cream of tartar can stabilize those finicky egg whites
- Invest in an accurate digital thermometer to ensure your sugar syrup reaches the perfect temperature
- Don’t overdo it: mix your egg whites and sugar just until they become glossy friends, then stop
- Respect the humidity: adjust your recipe and technique according to the weather, or risk a meringue meltdown
Key Takeaways to Conquer Weeping Meringue
Using room temperature eggs and avoiding overmixing are crucial steps in preventing weeping meringue, as they help stabilize the egg whites and maintain the structure of the meringue.
Controlling the environment, particularly the humidity and temperature, is vital for successful meringue-based desserts, and techniques like tempering and aging can help mitigate the effects of adverse weather conditions.
Understanding the science behind meringue, including the role of sugar, acid, and moisture, is essential for mastering the techniques that prevent weeping and ensure a stable, smooth finish in your desserts.
The Secret to Tear-Free Meringues
To prevent weeping meringue, you must first understand that it’s not just about the technique, but about respecting the delicate balance of temperature, texture, and time – it’s a waltz of precision, where one misstep can lead to a soggy, sweet sorrow.
Juliette Le Roux
Mastering the Art of Meringue

As I reflect on our journey to prevent weeping meringue, it’s clear that temperature control and precise measurement are the cornerstones of success. We’ve explored the importance of stabilizing egg whites, avoiding overmixing, and mitigating the effects of humid weather. By mastering these techniques, you’ll be well on your way to crafting meringue-based desserts that are both visually stunning and deliciously consistent. Whether you’re a seasoned pastry chef or an enthusiastic home baker, the key to success lies in attention to detail and a commitment to best practices.
As you continue to hone your meringue-making skills, remember that perfection is a journey, not a destination. Don’t be discouraged by setbacks or failures – instead, use them as opportunities to learn and grow. With patience, practice, and a willingness to experiment, you’ll unlock the secrets of the perfect meringue and take your baking to new heights. So, go ahead, take on the challenge, and indulge in the sweet satisfaction of creating something truly sublime.
Frequently Asked Questions
What role does the age of the eggs play in preventing weeping meringue?
The age of eggs significantly impacts meringue stability. Fresh eggs have weaker albumen, leading to less stable foams. I recommend using eggs that are 7-10 days old for optimal performance. The slight reduction in moisture content and strengthening of the albumen help create a more stable meringue, reducing the likelihood of weeping.
Can I still salvage a meringue that has already started to weep, or is it best to start over?
Don’t be too quick to toss it, my friend. If the weeping is minimal, you can try rescuing it by gently blotting the excess moisture with a paper towel and then re-drying it in a low-temperature oven. However, if it’s a lost cause, trust me, it’s better to start fresh – the texture will never be the same.
How does altitude affect the stability of meringue and what adjustments can I make to prevent weeping at high elevations?
At high altitudes, lower air pressure can cause meringue to weep more easily. To combat this, I adjust my recipes by increasing the egg white ratio and reducing sugar content. I also lower the oven temperature and extend baking time to prevent over-cooking. It’s all about balance and precision, even at 5,000 feet.