I still remember the first time I attempted to make meringue – it was a disaster. I had read all the recipes, followed all the tips, but my meringue was still a flat, sad mess. The problem was, I believed the myth that making perfect meringue was all about whipping those egg whites to death. But, as I later learned, the key to a perfect meringue lies in understanding how to make perfect meringue – it’s all about the temperature, the technique, and a pinch of patience.
As a master pastry chef, I’ve spent years perfecting my meringue game, and I’m excited to share my secrets with you. In this article, I’ll walk you through the step-by-step process of making perfect meringue, from preparing your ingredients to piping those perfect kisses. You’ll learn how to avoid common mistakes, like over-whipping or under-baking, and how to achieve that perfect balance of crunch and chew. By the end of this guide, you’ll be equipped with the knowledge and skills to create stunning meringue-based desserts that will impress even the most discerning palates. So, let’s get started and uncover the secrets to making perfect meringue!
Table of Contents
Guide Overview: What You'll Need
Total Time: 2 hours 30 minutes
Estimated Cost: $10 – $20
Difficulty Level: Intermediate
Tools Required
- Electric Mixer (stand or handheld)
- Whisk
- Rubber Spatula
- Baking Sheet (lined with parchment paper)
- Oven (preheated to 200 degrees Fahrenheit)
Supplies & Materials
- Egg Whites (room temperature)
- Granulated Sugar
- Cream of Tartar
- Salt
- Water (cold)
Step-by-Step Instructions
- 1. First, let’s start with the foundation of a perfect meringue: room temperature egg whites. I know it sounds simple, but trust me, it’s crucial. Take your eggs out of the fridge and let them sit at room temperature for at least 30 minutes before you start. This will ensure that your egg whites whip up to their full potential.
- 2. Next, _preheat your oven_ to 200°F (90°C). Yes, it’s a low temperature, but that’s what you want for drying out your meringue without browning it. While your oven is heating up, move on to the next step.
- 3. Now it’s time to separate your eggs. I like to do this by cracking the egg gently and passing the yolk back and forth between the two halves of the shell, letting the white drip into a bowl below. Make sure to use a clean, dry bowl, as any fat or moisture can prevent your egg whites from whipping properly.
- 4. Add a pinch of salt to your egg whites and start whipping them with an electric mixer on low speed. As you whip, slowly increase the speed to medium-high. You’ll start to see _soft peaks_ forming – this is where the magic begins.
- 5. Once you’ve reached the soft peak stage, it’s time to add your sugar. I like to use a mixture of granulated and superfine sugar for the best results. Add the sugar slowly, while continuously whipping the mixture, to ensure it dissolves evenly and doesn’t leave any gritty texture.
- 6. Continue whipping your meringue mixture until it forms stiff, glossy peaks. This should take about 5-7 minutes with an electric mixer, depending on its power. Be careful not to over-whip, as this can cause your meringue to become too dense and separate.
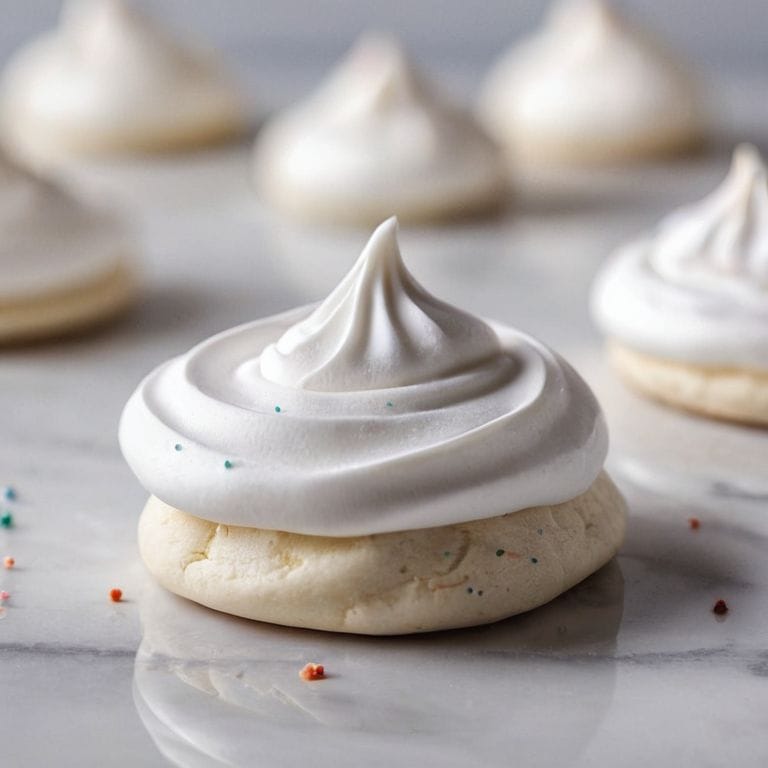
- 7. Now that your meringue is ready, it’s time to shape it. You can use a piping bag with a round tip to create individual meringue kisses, or simply spoon the mixture onto a parchment-lined baking sheet. Whatever shape you choose, make sure to _leave some space_ between each meringue, as they will expand slightly during baking.
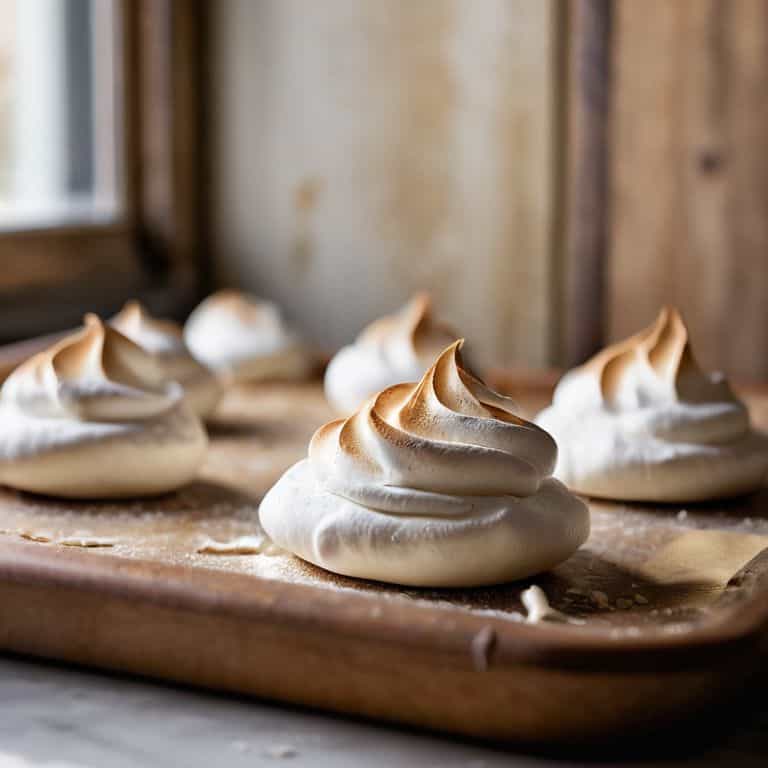
- 8. Place your meringues in the preheated oven and bake for 1 1/2 to 2 hours, or until they are dry and crisp. You can check on them after 1 1/2 hours by removing one from the oven and letting it cool for a minute or two. If it’s still slightly soft in the center, return it to the oven for another 30 minutes and check again.
Cracking How to Make Perfect Meringue
As I delve deeper into the world of meringue, I’ve come to realize that stabilizing egg whites is a crucial step in achieving the perfect texture. It’s all about creating an environment where the eggs can thrive, and that means maintaining a consistent temperature and humidity level. I’ve seen many a home baker fall victim to common meringue mistakes, such as overmixing or underbaking, which can lead to a dense and chewy texture.
When it comes to crafting the perfect meringue, it’s essential to understand the impact of humidity and meringue quality. On a humid day, the meringue may not set as well, resulting in a sticky or soft texture. To combat this, I recommend using a dehumidifier or baking the meringue for a longer period to ensure it’s crispy and dry. By taking these extra precautions, you’ll be well on your way to creating meringue dessert ideas that are truly show-stopping.
To take your meringue game to the next level, I suggest experimenting with different meringue based cake recipes. By incorporating meringue into your cake batter, you can create a light and airy texture that’s simply divine. Just be sure to avoid overmixing meringue symptoms, such as a dense or tough crumb, by folding the meringue into the batter with a gentle touch. With practice and patience, you’ll be whipping up perfect meringues in no time.
Avoiding Overmixing Meringue Symptoms and Humidity
To avoid overmixing, I watch for symptoms like deflating bubbles and a dense, flat texture. Humidity also plays a crucial role – on damp days, I adjust my technique to compensate for the extra moisture in the air. A delicate touch is essential when folding in ingredients, as overmixing can deflate the meringue’s airy structure. I’ve found that using room-temperature ingredients and a gentle folding motion helps to preserve the meringue’s tender crumb. By being mindful of these factors, you can create a meringue that’s both stable and ethereal.
Stabilizing Egg Whites for Fluffy Meringue
Stabilizing Egg Whites for Fluffy Meringue
To achieve the fluffiest meringue, I swear by stabilizing my egg whites. It’s a simple step that makes all the difference. I add a pinch of cream of tartar to my egg whites before whipping – it helps to strengthen the protein bonds, resulting in a more stable foam. I also make sure my eggs are at room temperature, as this helps the whites to whip up to their full potential. With these two tweaks, I can guarantee a meringue that’s both tender and sturdy.
By stabilizing my egg whites, I can push the whipping process further than I otherwise would, resulting in an incredibly light and airy texture. It’s all about finding that perfect balance between stability and aeration – and with practice, you’ll develop the touch to achieve it every time.
My Top 5 Secrets to Crafting the Fluffiest Meringue
- Maintain an Impeccable Workspace: Ensure your bowls, whisks, and utensils are scrupulously clean and dry to prevent any introduction of oil or moisture that could deflate your meringue
- Temperature Tango: Keep your egg whites at room temperature, around 70°F to 75°F (21°C to 24°C), to facilitate easier whipping and a more stable structure
- Acid Test: Add a pinch of cream of tartar or a squeeze of fresh lemon juice to stabilize your egg whites and enhance their ability to hold air, resulting in a lighter, more tender meringue
- Whipping Wisdom: Whip your egg whites in three stages – soft peaks, firm peaks, and stiff peaks – to avoid overmixing and to incorporate the perfect amount of air for a fluffy yet stable meringue
- Drying Dynamics: Once your meringue is shaped, let it dry in a low-temperature oven (150°F – 200°F or 65°C – 90°C) for at least 1.5 hours to remove excess moisture and achieve a crisp exterior and a tender interior
Mastering Meringue: 3 Essential Takeaways
Temperature control is paramount: ensuring your egg whites are at room temperature and your sugar is precisely measured will make all the difference in achieving stable, fluffy meringue
Stabilizing egg whites with cream of tartar or lemon juice is a game-changer, but beware of over-acidifying, as this can lead to a dense, unpleasant texture
Avoid overmixing at all costs: stop your mixer the moment the peaks form, and gently fold in any remaining ingredients by hand to preserve the delicate structure of your meringue
The Meringue Whisperer's Mantra
To craft the perfect meringue, one must first understand that it’s not just about whipping egg whites, but about orchestrating a delicate symphony of temperature, timing, and technique – where every fold, every whisper of sugar, and every gentle coaxing of air is a deliberate note in the pursuit of airy, crunchy, and divine perfection.
Juliette Le Roux
The Sweet Taste of Perfection
As we conclude our journey to perfect meringue, let’s recap the essential elements that will elevate your baking: temperature control, precise measurement, and a gentle touch. We’ve discussed the importance of stabilizing egg whites, avoiding overmixing, and the impact of humidity on your meringue’s texture. By mastering these techniques, you’ll be well on your way to creating fluffy, tender meringues that will impress even the most discerning palates.
Now, go forth and experiment with confidence, remembering that practice is the key to perfection. Don’t be afraid to try new recipes, to innovate, and to push the boundaries of what’s possible with meringue. With patience, persistence, and a passion for the craft, you’ll unlock the secrets of this versatile ingredient and create truly show-stopping desserts that will leave your friends and family in awe.
Frequently Asked Questions
What is the ideal temperature and humidity level for whipping egg whites to achieve perfect meringue?
For perfect meringue, I swear by a temperature of 20°C to 22°C (68°F to 72°F) and a humidity level below 60%. Any higher, and you’ll be fighting a losing battle against weeping meringues. Trust me, I’ve tested this in my kitchen, and the results are nothing short of magical.
How do I know if I've overmixed my meringue, and what can I do to fix it?
Overmixing is a silent killer of meringues. Check for a dull sheen, dense texture, or a strange, almost grainy consistency. If you’ve overmixed, don’t panic! Stop mixing immediately and gently fold in a small amount of unused egg whites to revive the mixture. It’s a delicate rescue, but it can save your meringue from disaster.
Can I use a stand mixer with a whisk attachment to make perfect meringue, or is it better to whip the egg whites by hand?
While a stand mixer with a whisk attachment can speed up the process, I prefer whipping egg whites by hand for perfect meringue – it allows for a more gentle approach, preventing overmixing and preserving delicate air pockets. However, if you do use a mixer, keep an eye on it and stop frequently to check consistency.