As I sit in my bespoke cake studio, surrounded by the sweet scent of butter and the soft glow of afternoon light, I am reminded of the countless times I’ve been asked for a guide to tarts and galettes. It’s a topic that sparks both excitement and intimidation in the hearts of many home bakers. The myth that tarts and galettes are only for the skilled or the patient is one that I’m eager to dispel. In reality, with a few simple techniques and a willingness to experiment, anyone can create these stunning, flaky masterpieces.
In this article, I promise to share my honest, no-fuss approach to crafting the perfect tarts and galettes. From the importance of using high-quality ingredients to the art of balancing flavors and textures, I’ll guide you through the process with step-by-step precision. Whether you’re a seasoned baker or just starting out, my goal is to empower you with the knowledge and confidence to create your own breathtaking tarts and galettes. So, let’s dive in and uncover the secrets to making these delicious, elegant treats that are sure to impress friends and family alike.
Table of Contents
- Guide Overview: What You'll Need
- Step-by-Step Instructions
- A Guide to Tarts and Galettes
- Butter Flour and a Dash of Whimsy Tart Crust Recipes
- Summer Galettes Best Fillings and Tips for Blind Baking
- Elevating Your Baking: 5 Essential Tips for Tarts and Galettes
- Essential Lessons from Our Guide to Tarts and Galettes
- The Art of Tarts and Galettes
- Elevating the Art of Tarts and Galettes
- Frequently Asked Questions
Guide Overview: What You'll Need
Total Time: 2 hours 30 minutes
Estimated Cost: $20 – $40
Difficulty Level: Intermediate
Tools Required
- Pastry Brush (for egg wash)
- Rolling Pin (for dough rolling)
- Tart Pan (with removable bottom)
- Pastry Cutter (or sharp knife)
- Measuring Cups (dry and liquid)
- Measuring Spoons
Supplies & Materials
- All-Purpose Flour (2 cups)
- Cold Unsalted Butter (1 cup)
- Granulated Sugar (1 cup)
- Eggs (2 large)
- Fresh Fruit (for tart and galette fillings)
- Confectioners Sugar (for dusting)
- Parchment Paper (for lining baking sheet, 12 inches by 16 inches)
Step-by-Step Instructions
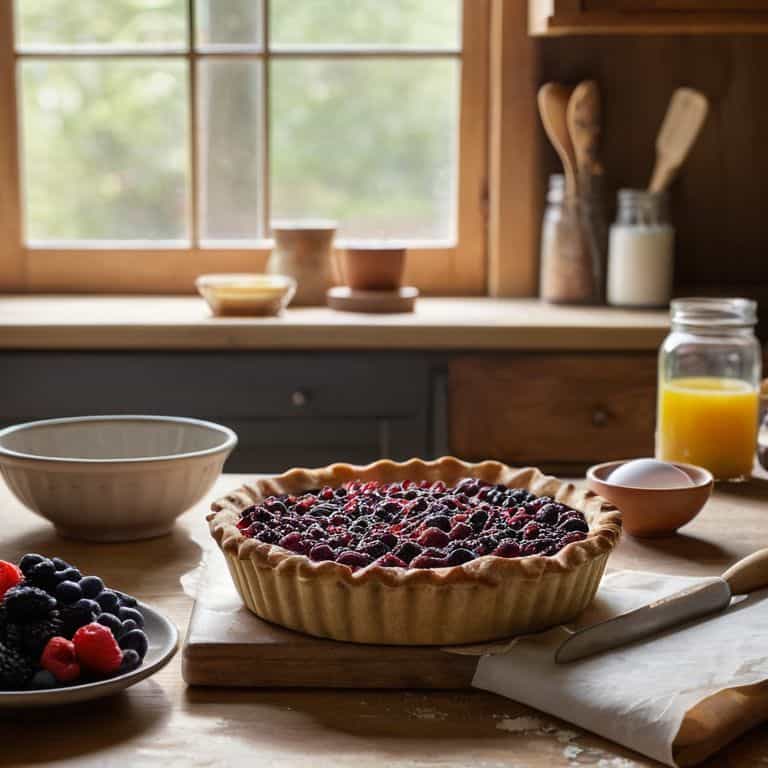
- 1. First, let’s start with the foundation of any great tart or galette: the crust. To make a flaky and tender crust, you’ll need to combine 2 1/4 cups of all-purpose flour, 1 teaspoon of salt, and 1 cup of cold unsalted butter in a large mixing bowl. Use a pastry blender or your fingertips to work the butter into the flour until the mixture resembles coarse crumbs with some larger pea-sized pieces of butter remaining.
- 2. Next, you’ll need to add a small amount of ice-cold water to the mixture, stirring it in with a fork until the dough starts to come together in a shaggy mass. Be careful not to overwork the dough at this stage, as it can lead to a tough crust. Instead, focus on creating a _cohesive_ dough that still retains some of its rough texture.
- 3. Now it’s time to roll out the dough into a thin sheet, about 1/8 inch thick. This is where the magic happens, and your tart or galette begins to take shape. Use a light touch and a _gentle_ rolling motion to avoid developing the gluten in the dough, which can cause it to become tough and dense.
- 4. As you roll out the dough, use a pastry mat or a lightly floured surface to prevent it from sticking. You can also use a piece of parchment paper or a silicone mat to make the process even easier. Once you’ve reached the desired thickness, use a sharp pastry cutter or a knife to trim the edges of the dough into a neat circle or rectangle, depending on the shape of your tart or galette.
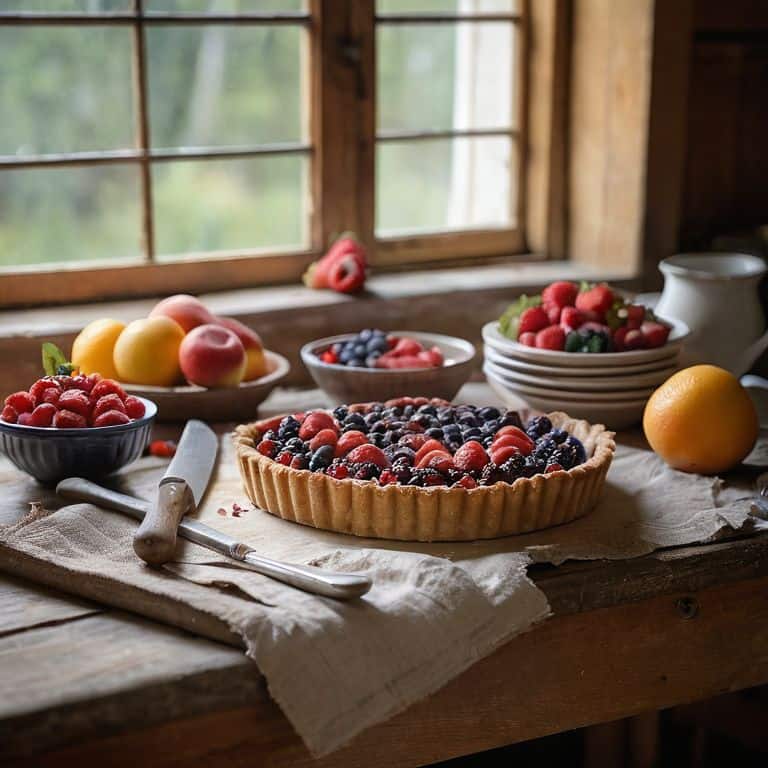
- 5. With your crust rolled out and trimmed, it’s time to add the filling. This can be anything from a simple mixture of sliced fruit and sugar to a rich and creamy _frangipane_ filling made with almonds and butter. The key is to choose a filling that complements the flavor and texture of your crust, and to arrange it in a way that creates a beautiful and visually appealing pattern.
- 6. Once your filling is in place, use a delicate touch to fold the edges of the crust up over the filling, creating a decorative border that adds texture and visual interest to your tart or galette. You can use a little bit of water or egg wash to help the edges stick together, but be careful not to overdo it, as this can lead to a soggy or uneven crust.
- 7. Finally, it’s time to bake your tart or galette to a golden brown perfection. This will typically involve preheating your oven to a moderate temperature, around 375°F, and baking the pastry for 35-45 minutes, or until the crust is _golden_ and the filling is cooked through. Keep an eye on your pastry as it bakes, rotating it every 10-15 minutes to ensure even cooking and a beautiful, caramelized crust.
A Guide to Tarts and Galettes
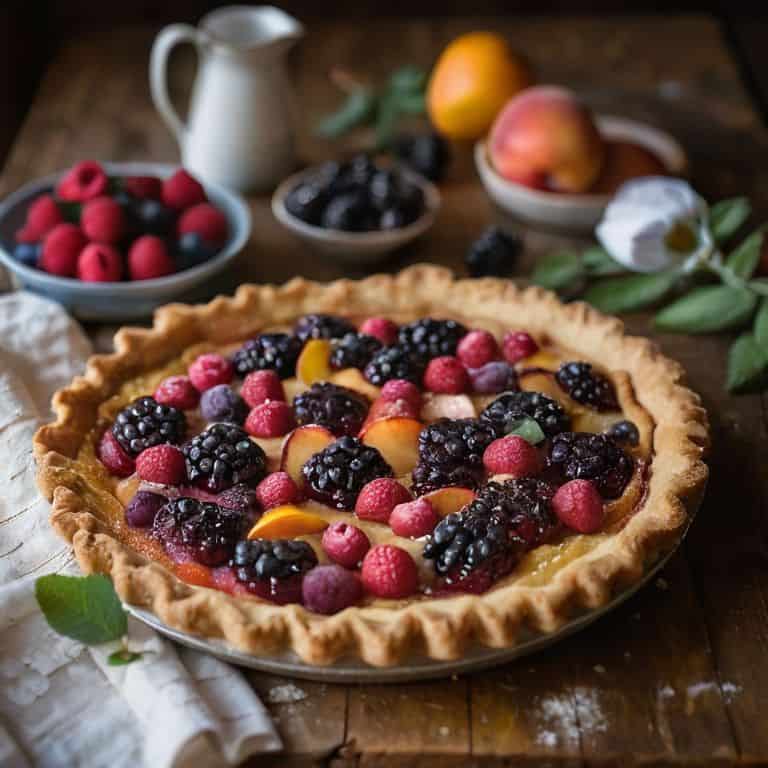
As I delve into the world of tarts and galettes, I’m reminded of the importance of a well-crafted tart crust recipe from scratch. It’s the foundation upon which our edible masterpiece is built, and it’s essential to get it just right. I like to think of it as the canvas for our artistic expression, waiting to be filled with an array of vibrant ingredients. When it comes to summer galettes, I’m particularly fond of experimenting with best fillings that showcase the season’s freshest flavors.
One of the most common questions I receive is about the difference between tart and galette, and how to choose between the two. While both are delicious in their own right, I believe it ultimately comes down to the desired texture and presentation. Tarts offer a more refined, elegant appearance, while galettes exude a charming, rustic charm. When working with tarts, I always recommend tips for blind baking tart shells to ensure a crispy, golden crust that provides a beautiful contrast to the filling.
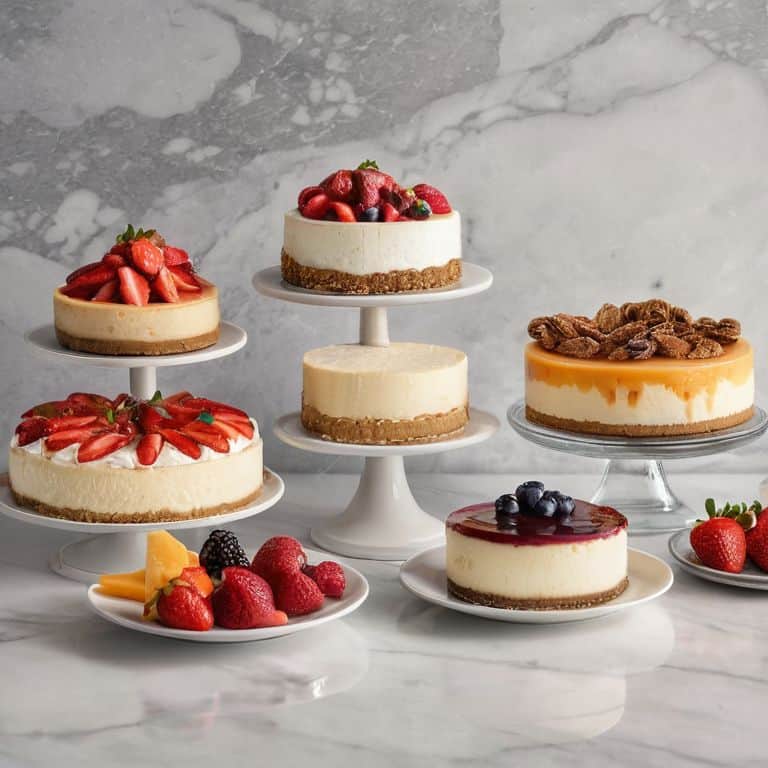
For those looking to add a touch of creativity to their bakes, I suggest exploring creative ways to top a fruit tart. A simple yet effective approach is to arrange a pattern of fresh fruits, such as berries or sliced peaches, in a decorative manner. Alternatively, you could try your hand at crafting a rich chocolate tart filling, perfect for satisfying any sweet tooth. Whatever your choice, remember to have fun and experiment with different combinations – after all, that’s what makes baking such a joyful experience.
Butter Flour and a Dash of Whimsy Tart Crust Recipes
As I delve into the world of tart crusts, I’m reminded of the importance of quality ingredients. For me, it all begins with the butter – its richness and depth of flavor are unparalleled. I exclusively use European-style butter with a high butterfat content, as it yields a tender, flaky crust that’s nothing short of magical. When paired with the right type of flour, the result is a crust that’s both delicate and full of character. My go-to flour is a finely milled, French all-purpose flour that provides a subtle nutty flavor and a delicate texture.
With these ingredients as my foundation, I can begin to experiment with various flavor combinations and techniques. A pinch of sea salt, a sprinkle of sugar, or a drizzle of vanilla extract can all add unique dimensions to my tart crusts. By balancing these elements, I can create crusts that are not only delicious but also visually stunning, providing the perfect base for my edible artworks.
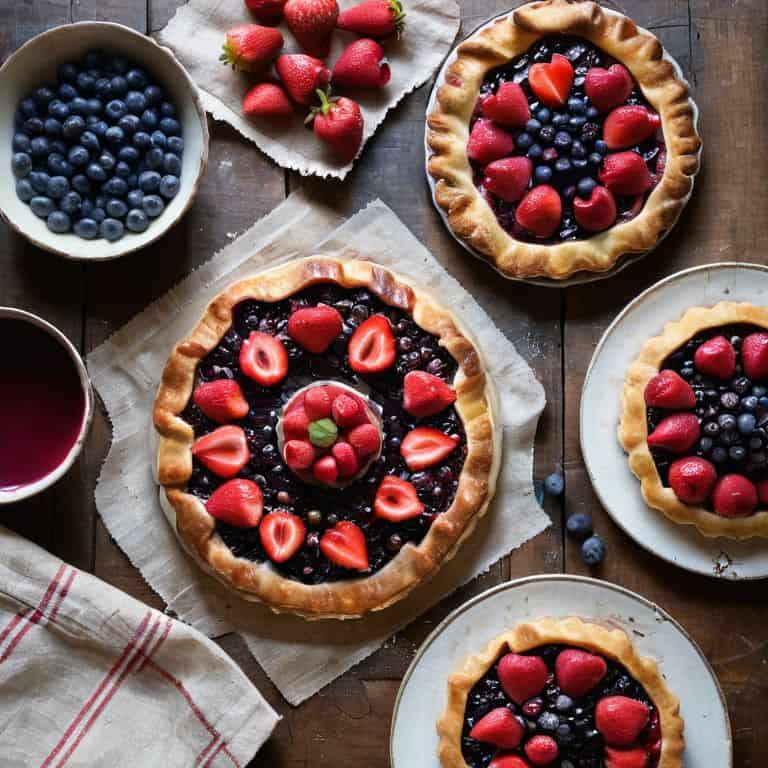
Summer Galettes Best Fillings and Tips for Blind Baking
As we delve into the realm of summer galettes, the possibilities for fillings become endless. I adore combining fresh berries with a hint of citrus zest, or pairing caramelized peaches with a sprinkle of thyme. When it comes to blind baking, it’s all about achieving that perfect, flaky crust. My trick is to chill the crust thoroughly before baking, and to use a delicate touch when lining it with parchment paper and pie weights. This ensures a beautifully baked crust that’s ready to be filled with the sweetness of the season.
For a truly unforgettable summer galette, don’t be afraid to experiment with unique fillings like roasted apricots or plums. And remember, the key to a successful blind bake is to keep an eye on the crust’s color, removing it from the oven when it’s just lightly golden.
Elevating Your Baking: 5 Essential Tips for Tarts and Galettes
- Keep Your Ingredients Cold: The key to a flaky, tender crust is keeping your butter and water chilled, ensuring the dough comes together smoothly without overworking it
- Blind Baking is an Art: To prevent your tart crust from becoming soggy, blind baking with a delicate touch and the right pie weights is crucial, especially for fillings that aren’t baked
- Don’t Overwork the Dough: Mix your ingredients just until they come together in a cohesive mass, then stop – overmixing leads to tough, dense pastry that’s a disappointment to bite into
- Choose Your Fillings Wisely: Whether sweet or savory, the filling should complement the pastry, not overpower it – consider the balance of flavors and textures for a truly memorable tart or galette
- Presentation Matters: A beautifully presented tart or galette can elevate the dining experience – consider garnishes, the color of your filling, and how you arrange your pastry for a visually stunning dessert or snack
Essential Lessons from Our Guide to Tarts and Galettes
To achieve a flaky and tender crust, it’s crucial to keep your butter cold and handle the dough gently, allowing the layers to form naturally as you roll it out.
Selecting the right filling for your galette can make all the difference – consider seasonal fruits and nuts for a harmonious balance of flavors and textures.
Blind baking your tart crust is an art that requires precision, so remember to chill your crust thoroughly before baking, and use pie weights or beans to prevent the crust from bubbling up unevenly.
The Art of Tarts and Galettes
Tarts and galettes are not just desserts, they are edible canvases waiting for the brushstrokes of our imagination, where every layer, every filling, and every presentation tells a story of love, of art, and of the simple joys in life.
Alison Lawson
Elevating the Art of Tarts and Galettes
As we conclude this journey through the world of tarts and galettes, let’s recap the essential elements that elevate these pastries from simple desserts to works of art. From the flaky, buttery crusts to the vibrant, seasonal fillings, each component plays a crucial role in creating a truly unforgettable experience. Whether you’re a beginner or an experienced baker, mastering the techniques outlined in this guide will empower you to push the boundaries of what’s possible with these classic French desserts.
As you continue to explore the realm of tarts and galettes, remember that the true magic happens when you combine technical precision with creative freedom. Don’t be afraid to experiment with new flavors, ingredients, and presentation styles – and most importantly, have fun! With practice, patience, and a willingness to take risks, you’ll be well on your way to creating your own unique, show-stopping masterpieces that will leave friends and family in awe.
Frequently Asked Questions
What are some common mistakes to avoid when making tart and galette crusts from scratch?
When making tart and galette crusts from scratch, beware of overworking the dough, which can lead to toughness. Also, avoid over-chilling, as this can cause the crust to shrink excessively during baking. Additionally, don’t forget to blind bake, or you may end up with a soggy bottom – a pastry chef’s worst nightmare!
How do I ensure that my galette filling is evenly distributed and baked to perfection?
To achieve a perfectly baked galette, I swear by a gentle folding technique when combining fillings, followed by a meticulous arrangement of the ingredients within the pastry. Blind baking can also help, but don’t forget to rotate your galette halfway through to ensure an evenly cooked crust and beautifully caramelized filling.
Can I use alternative types of flour, such as gluten-free or whole wheat, to make tarts and galettes with unique flavors and textures?
While traditional flour is ideal, I do love experimenting with alternatives. Gluten-free flours, like almond or coconut, can add intriguing textures, and whole wheat flour brings a nutty depth. However, keep in mind that substituting flours may require adjustments to liquid content and ratios, so be prepared to tweak and taste as you go.