As I sit here, surrounded by my collection of unique cake stands and half-finished watercolor paintings, I’m reminded of the countless hours I’ve spent perfecting my piping techniques. I’ve often heard that mastering the art of piping is a daunting task, but I’m here to tell you that it’s not as intimidating as it seems. In fact, with the right guidance, anyone can learn to create beautiful, intricate designs that elevate their cakes from ordinary to extraordinary. That’s why I’m excited to share my knowledge with you in this guide to piping techniques, where we’ll dive into the world of smooth finishes, delicate borders, and stunning sugar work.
In this article, I promise to share my honest, no-hype advice on how to get started with piping, from choosing the right tools to mastering the most essential techniques. You’ll learn how to create smooth, consistent lines and delicate, realistic flowers that will make your cakes truly unforgettable. Whether you’re a beginner or an experienced baker, my goal is to give you the confidence and skills to take your cake decorating to the next level. So, let’s get started on this journey together, and discover the art of piping that will make your cakes truly stand out.
Table of Contents
Guide Overview: What You'll Need
Total Time: 3 hours 15 minutes
Estimated Cost: $50 – $100
Difficulty Level: Intermediate
Tools Required
- Piping Bag (with various tips)
- Turntable (for displaying and spinning piped designs)
- Offset Spatula (for smoothing and spreading)
- Parchment Paper (for practicing and protecting surfaces)
- Measuring Cups (for accurate ingredient measurements)
- Electric Mixer (for creaming and mixing ingredients)
Supplies & Materials
- Buttercream Frosting
- Piping Gel
- Food Coloring
- Corn Syrup (for thinning piping gel)
- Water (for adjusting consistency)
- Wax Paper (for creating piping bags or practicing techniques)
Step-by-Step Instructions
- 1. To begin with, let’s prepare our piping bags and tips – I like to use a variety of round tips to achieve different effects, from fine details to smooth, rounded shapes. Make sure to choose a tip that suits the design you have in mind, and attach it to your piping bag. Fill the bag with your chosen buttercream or piping gel, and twist the top to seal it.
- 2. Next, let’s talk about the importance of piping consistency – you want your buttercream to be smooth and pliable, but not too soft or too stiff. If it’s too soft, it will be difficult to control, and if it’s too stiff, it won’t pipe smoothly. To achieve the perfect consistency, you can add a small amount of powdered sugar or corn syrup to your buttercream and mix well.
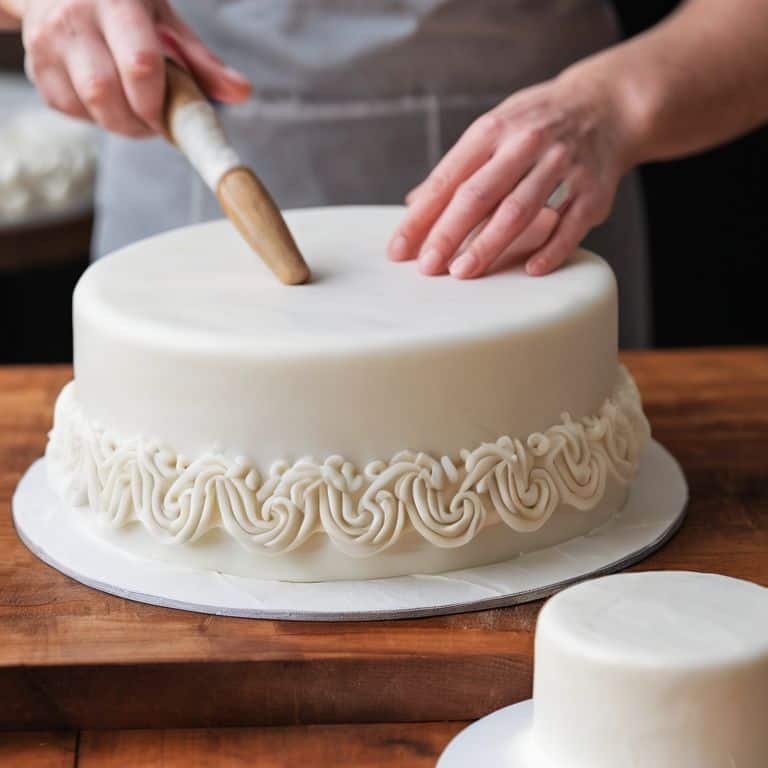
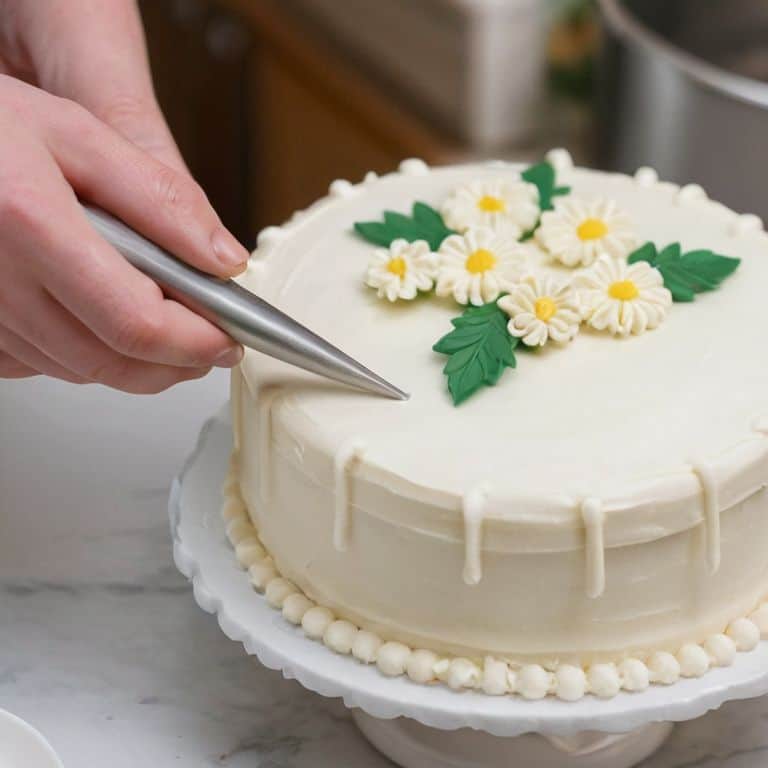
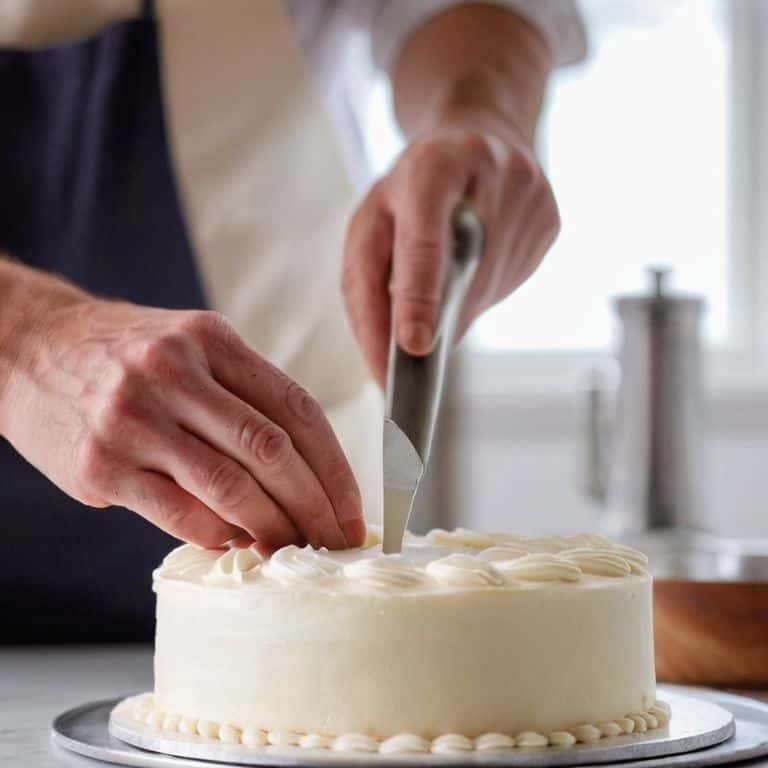
- 3. Now, let’s move on to the actual piping technique – I like to start with a simple border, using a large round tip to create a smooth, rounded edge around the cake. Hold the piping bag at a 90-degree angle to the cake, and squeeze the bag gently to release the buttercream. Move the bag in a steady, continuous motion to create a smooth, even border.
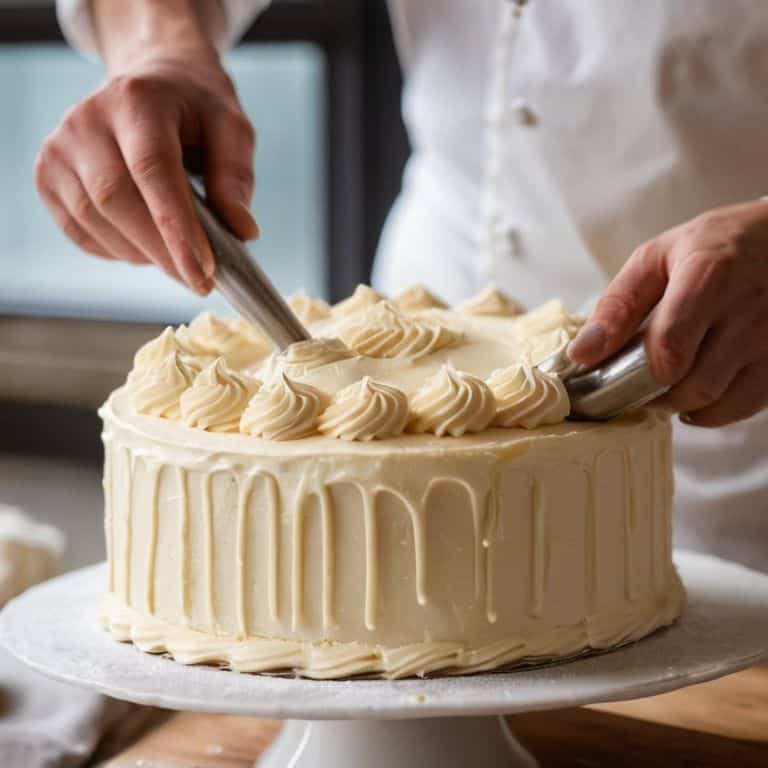
- 4. Once you have your border in place, you can start adding intricate details – this is where the magic happens, and your cake starts to come alive. Use a smaller round tip to create delicate patterns, such as stars, rosettes, or leaves. Remember to keep your piping bag at room temperature, as this will help the buttercream to flow smoothly.
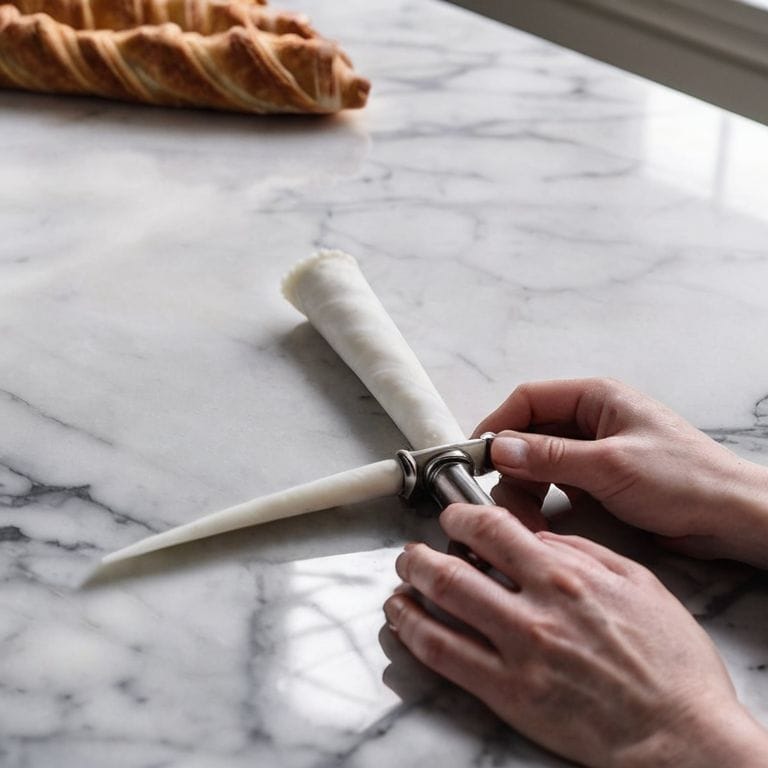
- 5. To create more dimensional elements, such as flowers or bows, you can use a combination of piping techniques and tools. For example, you can use a petal tip to create delicate flower petals, or a ribbon tip to create a beautiful, flowing bow. Experiment with different techniques and tools to find what works best for you.
- 6. As you pipe, remember to take your time and don’t be afraid to make mistakes – they can often be corrected, and they’re an opportunity to learn and improve. If you find that your piping is not turning out as expected, don’t worry – simply scrape off the buttercream and start again.
- 7. Finally, let’s talk about finishing touches – once you’ve completed your piping design, take a step back and evaluate your work. You can add a few final details, such as a sprinkle of dust or a delicate piping border, to complete the look. Remember to keep your design balanced and visually appealing, and don’t be afraid to experiment and try new things.
A Guide to Piping Techniques
As I delve into the world of piping, I’m reminded of the importance of mastering piping bags. It’s a skill that takes time and practice to develop, but trust me, it’s worth it. With a steady hand and the right techniques, you can create decorative piping designs that will elevate your cakes to new heights. I love experimenting with different piping tools and tips to achieve unique effects, from delicate borders to intricate flowers.
When it comes to piping, I’ve noticed that many beginners struggle with common piping mistakes, such as uneven pressure or inconsistent flow. To avoid these mistakes, it’s essential to understand the basics of piping and to practice regularly. I always recommend starting with simple designs and gradually moving on to more advanced piping techniques. With patience and dedication, you’ll be creating stunning piping designs in no time.
As you continue to hone your piping skills, don’t forget to invest in the right piping tool essentials. A good set of piping bags, tips, and brushes can make all the difference in achieving professional-looking results. I’m excited to share more of my favorite piping tips and tricks with you, from piping for beginners to advanced techniques, so you can take your cake decorating to the next level.
Avoiding Common Piping Mistakes
As I share my passion for piping with you, I also want to touch on some common mistakes to watch out for. One of the most frequent errors is applying too much pressure, which can result in thick, uneven lines. To avoid this, remember to squeeze the piping bag gently, allowing the buttercream to flow smoothly. Another mistake is not having the right consistency of buttercream – if it’s too thin, it will be difficult to control, and if it’s too thick, it won’t come out of the piping bag easily.
By being mindful of these potential pitfalls, you’ll be able to create beautiful, delicate designs that elevate your cakes to the next level. With a little practice and patience, you’ll be piping like a pro in no time, and your cakes will be the perfect reflection of your artistic vision.
Mastering Piping Bags With Ease
To truly master piping techniques, it’s essential to feel comfortable with your piping bag. For me, it’s all about finding the perfect balance – not too tight, not too loose. I like to think of it as holding a gentle secret. When you squeeze, the buttercream should flow smoothly, like a summer breeze through a botanical garden. Experiment with different grips until you find what works best for you.
As you become more confident, you can start to play with different piping bag sizes and tips. I adore using a small round tip for delicate details, like the center of a sugar flower. Remember, practice makes perfect, so don’t be discouraged if it takes a few tries to get the hang of it. With time and patience, you’ll be piping like a pro, and your cakes will be the stunning works of art you’ve always envisioned.
Elevate Your Piping Game: 5 Essential Tips
- Choose the right piping tip for your design to ensure a smooth, even flow of buttercream or frosting
- Prepare your piping bag by making sure it’s the right size for your project and that you’ve got a comfortable grip
- Start with simple designs and gradually move on to more complex patterns to build your confidence and skills
- Keep your piping bag at room temperature to prevent the buttercream or frosting from becoming too stiff or too runny
- Practice, practice, practice – piping is all about feel and movement, so don’t be discouraged if it takes a few tries to get the hang of it
Piping Perfection: 3 Key Takeaways
I’ve learned that mastering the art of piping is all about practice and patience – don’t be too hard on yourself if your first attempts don’t turn out as expected, it’s all part of the journey to creating stunning cakes!
Experimenting with different piping techniques and tips can completely transform your cake designs, from delicate florals to intricate borders, the possibilities are endless and I just love seeing what my students come up with!
Remember, piping is not just about the technical skills, it’s also about telling a story with your design – think about the theme, colors, and overall aesthetic you want to achieve, and let your piping be the icing on the cake, literally!
The Art of Piping
As I always say, piping is not just about squeezing out icing, it’s about telling a story with every swirl and curve, where every delicate touch brings your cake to life.
Chloé Dubois
Mastering the Art of Piping: A Journey to Beautiful Cakes
As we conclude this guide to piping techniques, remember that practice is key to mastering the art of piping. We’ve covered the essential steps to get you started, from filling and handling piping bags to creating smooth, even borders and intricate designs. By following these step-by-step instructions and tips, you’ll be well on your way to decorating cakes like a pro. Don’t be discouraged if it takes time to develop your skills – with patience and persistence, you’ll soon be creating stunning works of art that will impress friends and family alike.
As you continue on your piping journey, remember that the true magic happens when you combine technique with creative freedom. Don’t be afraid to experiment with new designs, colors, and patterns – and most importantly, have fun! With every swirl of the piping bag, you’re not just decorating a cake, you’re telling a story and bringing joy to those who get to experience your creations. So go ahead, get piping, and let your imagination run wild!
Frequently Asked Questions
What are the most essential piping techniques for a beginner to learn?
For a beginner, I recommend starting with the basics: round piping, star tips, and shell borders. These fundamental techniques will help you build confidence and create a solid foundation for more intricate designs. Practice these skills and you’ll be well on your way to piping like a pro!
How do I achieve consistent and smooth piping borders on my cakes?
To achieve consistent and smooth piping borders, I recommend using a piping bag with a round tip and keeping your buttercream at room temperature. Apply gentle, steady pressure, and move the bag in a continuous motion to create seamless borders. Practice makes perfect, so don’t be discouraged if it takes a few tries to get the hang of it!
What are some common issues that can cause piping bags to clog or malfunction?
When it comes to piping bags, I’ve found that clogs and malfunctions often occur due to overmixing the buttercream or using the wrong tip size. Also, not squeezing out excess air or twisting the bag too tightly can cause issues. Let’s troubleshoot together and get your piping back on track!