I still remember the first time I attempted to create a perfect cupcake swirl – it was a disaster! The swirl was uneven, the frosting was too thin, and the overall look was far from the elegant, smooth finish I was aiming for. But, as I delved deeper into the world of cake decorating, I realized that mastering a guide to the perfect cupcake swirl wasn’t just about following a recipe, it was about understanding the art of balance and harmony. With practice and patience, I was able to develop my skills and now I’m excited to share my knowledge with you.
In this article, I’ll take you through a step-by-step journey to creating the perfect cupcake swirl, from preparing the ideal frosting consistency to finishing touches that will make your cupcakes truly stand out. You’ll learn how to avoid common mistakes, troubleshoot issues, and develop the confidence to experiment with different designs and flavors. By the end of this guide, you’ll be equipped with the practical advice and techniques needed to turn your cupcakes into stunning works of art, and I’m thrilled to be a part of your creative journey.
Table of Contents
Guide Overview: What You'll Need
Total Time: 30 minutes to 1 hour
Estimated Cost: $10 – $20
Difficulty Level: Easy
Tools Required
- Piping Bag (16 inches or 18 inches long)
- Round Piping Tip (1/2 inch or 5/8 inch diameter)
- Turntable (optional, 6 inches or 8 inches diameter)
- Offset Spatula (for smoothing and shaping)
- Measuring Cups and Spoons (for accurate measurements)
Supplies & Materials
- Buttercream Frosting (homemade or store-bought)
- Cupcakes (baked and cooled)
- Piping Bag Coupler (for easy tip changes)
- Food Coloring (optional, for coloring the frosting)
- Sprinkles or Decorations (optional, for topping the cupcakes)
Step-by-Step Instructions
- 1. To start creating the perfect cupcake swirl, begin by preparing your frosting. Make sure it’s at room temperature and has a smooth consistency, as this will make it easier to work with. If your frosting is too stiff, you can always add a little bit of cream or milk to thin it out.
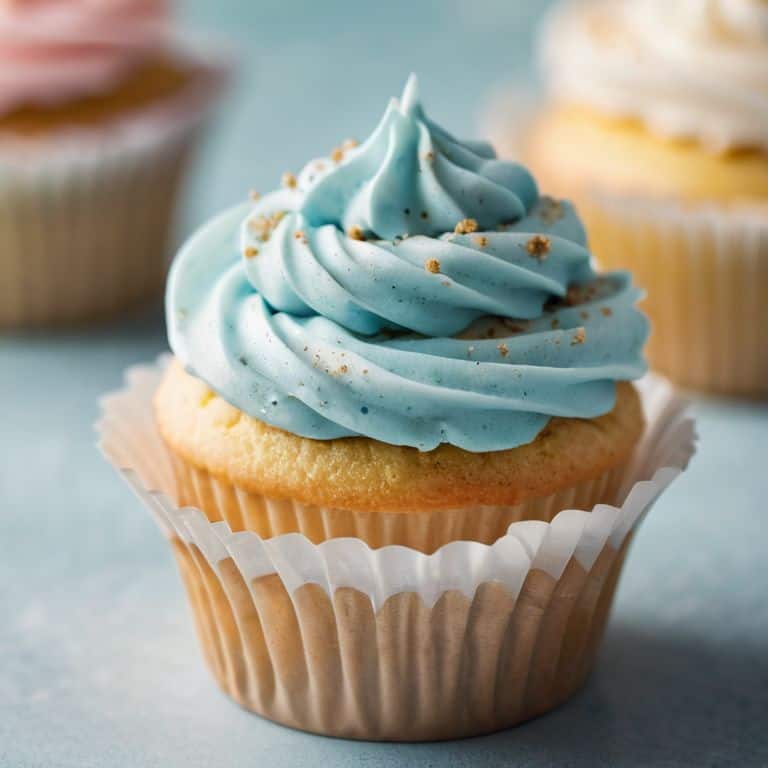
- 2. Next, choose the right piping tip for your swirl. I personally love using a large round tip, as it gives a beautiful, full swirl. However, feel free to experiment with different tips to find the one that works best for you and your design. Remember, the key to a perfect swirl is even pressure, so make sure your piping bag is comfortable to hold and easy to squeeze.
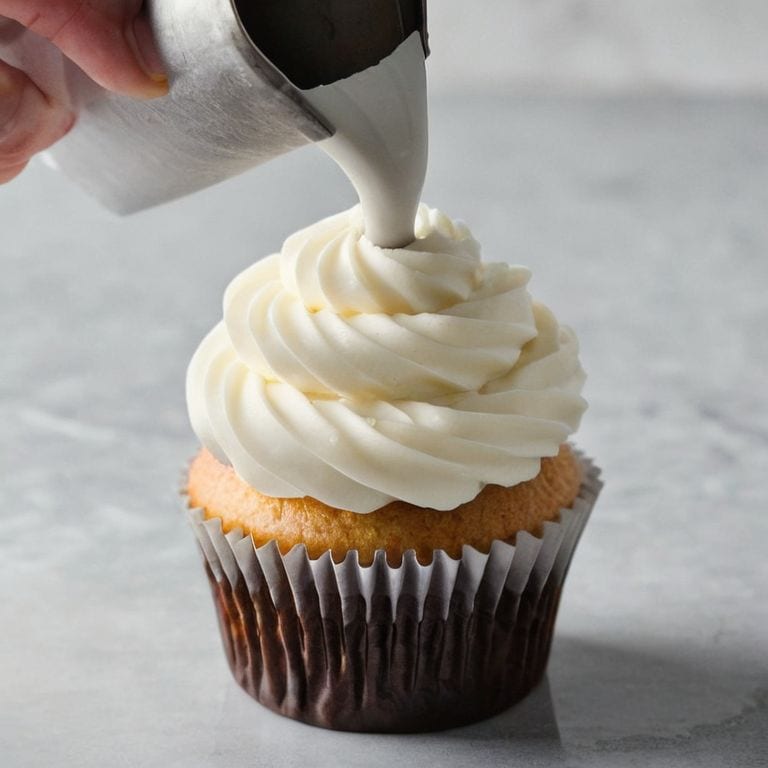
- 3. Now it’s time to get swirling! Hold your piping bag at a 90-degree angle to the cupcake, with the tip just above the surface. Squeeze the bag gently to start the swirl, moving the piping bag in a circular motion as you go. Don’t worry too much about making it perfect on the first try – it takes a little practice to get the hang of it.
- 4. As you continue to swirl, pay attention to the size of your swirl. You want it to be large enough to cover the top of the cupcake, but not so large that it overflows. To achieve this, control the pressure on your piping bag, squeezing harder for a larger swirl and softer for a smaller one.
- 5. To add some extra flair to your swirl, try changing up the direction of your circular motion. You can go from small to large, or even try a figure-eight pattern for a more intricate design. The key is to have fun and experiment with different techniques until you find one that works for you.
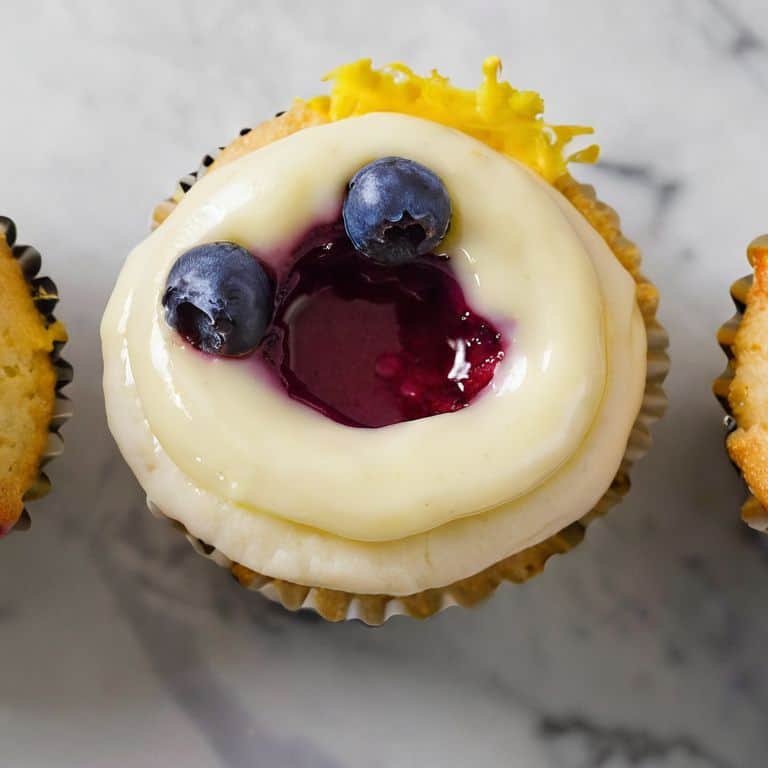
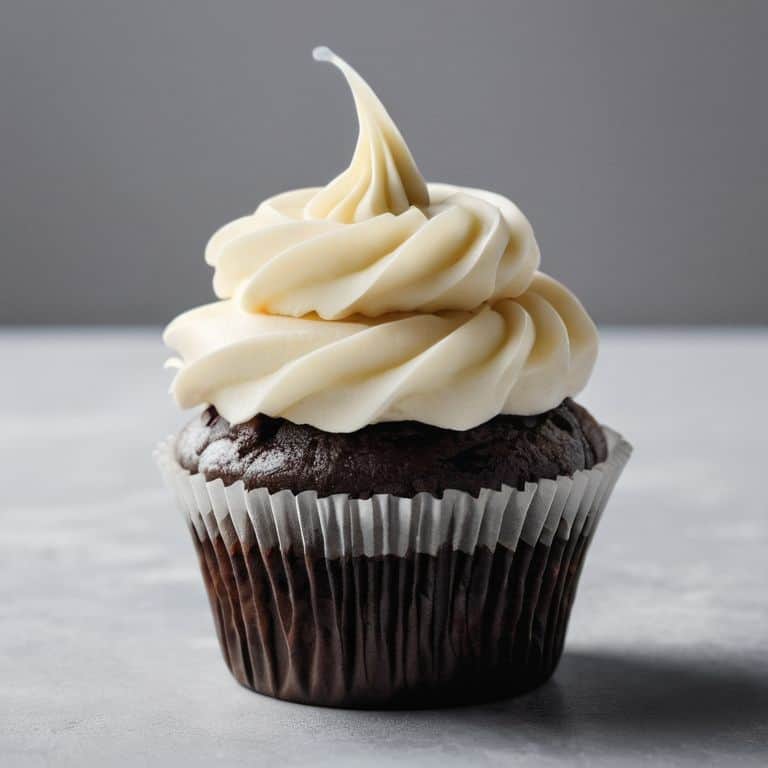
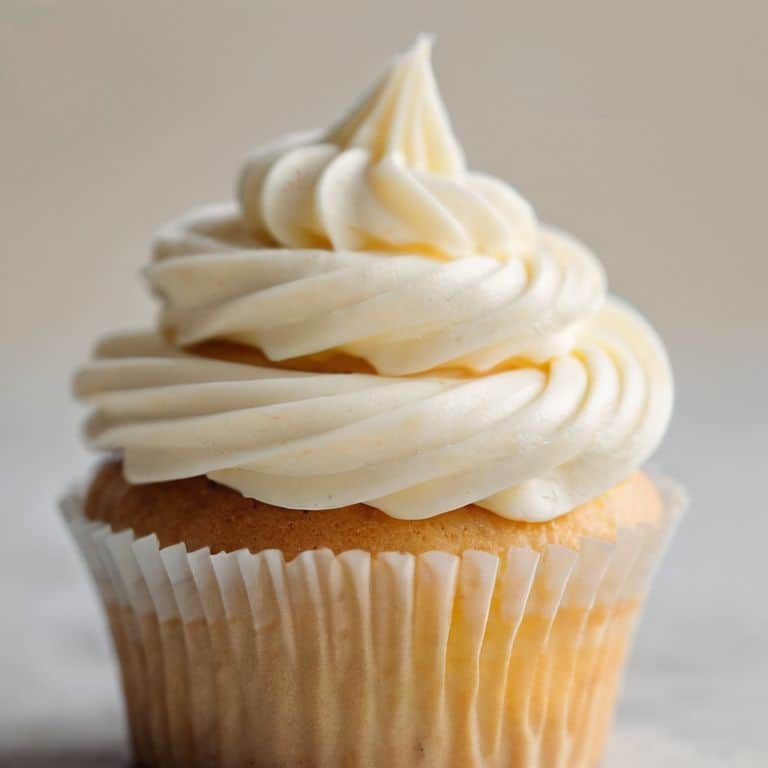
- 6. Once you’ve completed your swirl, step back and admire your work. If needed, you can use a small offset spatula or knife to smooth out any imperfections. Remember, the goal is to create a beautiful, smooth swirl that’s almost too pretty to eat.
- 7. Finally, add any finishing touches to your cupcake, such as sprinkles or edible decorations. This is where you can really get creative and make your cupcake stand out. Just be sure not to overdo it – sometimes, less is more, and a simple swirl can be just as stunning as an elaborate design.
A Guide to Perfect Cupcake Swirl
As I always say, the devil is in the details, and when it comes to achieving a flawless cupcake swirl, it’s all about piping bag control tips. To master this technique, you’ll want to make sure your frosting is at the right consistency for piping. If it’s too thin, it will be difficult to control, and if it’s too thick, it won’t flow smoothly. I like to think of it as finding the perfect harmony between the frosting and the piping bag.
When it comes to classic cupcake designs, a well-executed swirl can make all the difference. To add some visual interest to your swirl, you can experiment with different swirl pattern variations. Try changing up the size and shape of your swirls, or even adding a few decorative flourishes on top. Remember, the key to a beautiful swirl is to keep your piping bag steady and your pressure consistent.
To take your cupcake game to the next level, don’t be afraid to invest in some cupcake decorating tools. A good quality piping bag and tip can make all the difference in achieving a smooth, even swirl. And, of course, no cupcake is complete without a generous dollop of frosting on top – which is where cupcake frosting techniques come in. With a little practice and patience, you’ll be creating stunning cupcakes that are almost too beautiful to eat.
Mastering Cupcake Frosting Techniques
To truly master the cupcake swirl, you need to have a solid foundation in cupcake frosting techniques. For me, it’s all about achieving that perfect balance of texture and flavor. I like to think of buttercream as a sculptural medium – it’s all about manipulating it to create the desired effect. When it comes to frosting, I always say that less is more. Start with a small amount and build up gradually, as it’s easier to add more frosting than it is to remove excess.
By practicing these techniques, you’ll be well on your way to creating beautiful, swirled masterpieces. Remember, the key to mastering cupcake frosting is to be gentle, yet deliberate in your movements. With a little patience and practice, you’ll be swirling like a pro in no time!
Piping Bag Control for Classic Designs
To achieve a classic swirl, piping bag control is essential. I like to think of my piping bag as an extension of my hand, allowing me to create smooth, flowing motions. With a steady grip and a gentle touch, you can guide the frosting into beautiful, swooping curves. Remember, it’s all about the pressure – too much and you’ll end up with a messy blob, too little and your swirl will be weak.
As you pipe, focus on keeping your bag at a 90-degree angle to the cupcake. This will help you maintain even pressure and create a consistent swirl. Practice makes perfect, so don’t be discouraged if it takes a few tries to get the hang of it. With time and patience, you’ll be piping like a pro, creating classic designs that are sure to impress.
Swirling to Perfection: 5 Essential Tips for a Stunning Cupcake Swirl
- Start with the right consistency: your frosting should be smooth and pliable, but not too soft or too stiff, to achieve that perfect swirl
- Choose the right piping tip: a large, round tip is ideal for creating a classic swirl, while a smaller tip can be used for more delicate designs
- Don’t overfill your piping bag: leave about an inch at the top to allow for easy twisting and turning, and to prevent frosting from oozing out the top
- Apply gentle, consistent pressure: as you pipe the swirl, apply gentle pressure to the bag, increasing or decreasing as needed to maintain a smooth, even flow
- Finish with a flourish: to complete your swirl, give the piping bag a little flick or twist to create a decorative edge, and voila – your cupcake is transformed into a work of art
Key Takeaways for the Perfect Swirl
Remember, the key to a flawless swirl is all about the pressure and flow of your piping bag – it’s a delicate dance between you, the bag, and the cupcake!
Experimenting with different piping tips and frosting consistencies can completely transform your swirl game, so don’t be afraid to try new things and make mistakes – they’re all part of the creative process!
With practice, patience, and a little bit of flair, you’ll be swirling like a pro in no time – just recall the steps, trust your instincts, and let your inner cake artist shine through in every twirl and curl of that beautiful buttercream!
The Art of Swirling
A perfect cupcake swirl is not just a design element, but a whispered promise of the delight that awaits within – a gentle balance of form and function that elevates the humblest of treats into a masterpiece of edible art.
Chloé Dubois
The Sweet Finale: Perfecting Your Cupcake Swirl
As we conclude this journey to the perfect cupcake swirl, let’s recap the essentials: mastering cupcake frosting techniques, achieving piping bag control, and of course, practicing that swirl until it becomes second nature. It’s all about balance and harmony – finding the right consistency in your frosting, the optimal pressure in your piping bag, and the perfect twirl to top it all off. Remember, the key to a stunning cupcake swirl lies not just in the technique, but in the patience and dedication you bring to the craft. With time and practice, you’ll be creating swirls that are almost too beautiful to eat – almost.
Now, as you put down your piping bag and step back to admire your handiwork, I want to leave you with a final thought: the art of cake decorating is a journey, not a destination. It’s about experimenting with new techniques, pushing the boundaries of what’s possible with sugar and buttercream, and most importantly, having fun along the way. So don’t be afraid to get creative and try new things – your cupcakes will thank you, and so will the people lucky enough to taste them. Happy decorating, and I’ll see you in the next tutorial!
Frequently Asked Questions
What's the best way to achieve a smooth and consistent swirl on top of a cupcake?
To achieve a smooth and consistent swirl, I recommend using a piping bag with a large round tip and holding it at a 90-degree angle to the cupcake. Apply gentle, consistent pressure while moving the bag in a circular motion, starting from the outside and working your way in. Practice makes perfect, so don’t be discouraged if it takes a few tries to get the hang of it!
How do I prevent my frosting from becoming too thin or too thick for a perfect swirl?
To achieve the perfect swirl, it’s all about finding that sweet spot with your frosting consistency. If it’s too thin, refrigerate it for a few minutes to firm up. If it’s too thick, add a tiny bit of liquid, like milk or water, and mix until it’s just right. Remember, practice makes perfect, so don’t be afraid to experiment and adjust as needed!
Can I use a specific type of piping tip to create different swirl designs on my cupcakes?
The piping tip is your magic wand, my friend. Yes, you can definitely experiment with different tips to create unique swirl designs. I adore using a large star tip or a French piping tip to add some extra flair to my cupcakes. Feel free to play around and find the perfect tip to match your artistic vision!