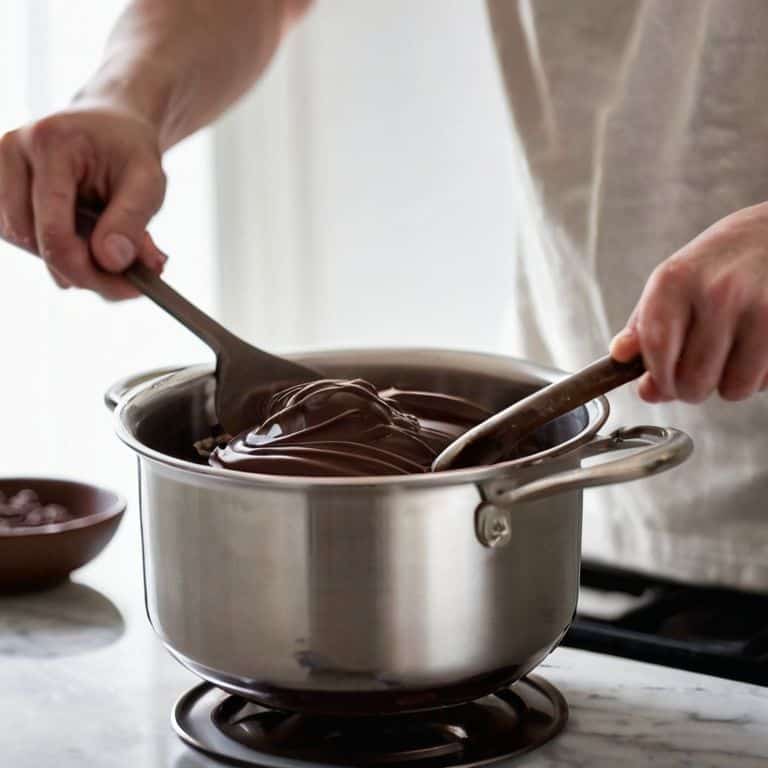
I still remember the first time I tried to temper chocolate without a thermometer – it was a disaster. The common myth that tempering chocolate is only for the pros, and that you need a thermometer to get it just right, had me believing it was an impossible feat. But, as I delved deeper into the world of chocolate, I discovered that what is tempering chocolate without a thermometer is not just a technique, but an art form. With a little patience and practice, anyone can master the skill of tempering chocolate without any fancy gadgets.
In this article, I’ll share my personal approach to tempering chocolate without a thermometer, and provide you with practical tips to help you achieve the perfect temper every time. You’ll learn how to work with chocolate to create a stable crystal structure that will give your chocolates a smooth, glossy finish. I’ll cut through the noise and give you honest, no-hype advice on how to temper chocolate like a pro, even without a thermometer. By the end of this article, you’ll be equipped with the knowledge and confidence to temper chocolate like a master chocolatier, and take your chocolate creations to the next level.
Table of Contents
- Guide Overview: What You'll Need
- Step-by-Step Instructions
- Tempering Chocolate Raw
- Tempering Like a Rebel: 5 Key Tips to Master the Art
- Tempering Chocolate Without a Thermometer: Key Takeaways
- The Art of Thermometer-Free Tempering
- The Art of Tempering Chocolate Without a Thermometer: A Masterclass Conclusion
- Frequently Asked Questions
Guide Overview: What You'll Need
Total Time: 30 minutes to 1 hour
Estimated Cost: $10 – $20
Difficulty Level: Intermediate
Tools Required
- Double Boiler (or a heatproof bowl set over a pot of simmering water)
- Whisk
- Spreader or Offset Spatula (for smoothing chocolate)
- Cooling Surface (such as a marble or granite countertop)
Supplies & Materials
- Chocolate at least 1 pound of high-quality chocolate with a high cocoa butter content
- Water for the double boiler
- Paper Towels for drying the chocolate
Step-by-Step Instructions
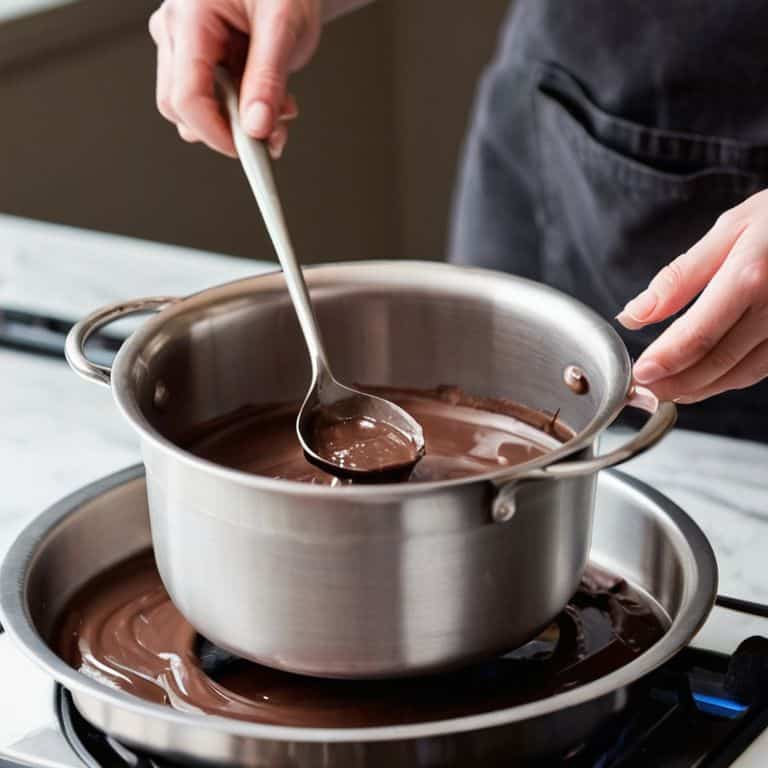
- 1. First, let’s get started with the basics: you’ll need to melt your chocolate to around 105°F to 115°F (40°C to 46°C). Now, I know what you’re thinking – “Juliette, why no thermometer?” And my response is, with a little practice, you can develop a sense of when your chocolate has reached the perfect melting point. It’s all about feeling the temperature and understanding how different types of chocolate behave.
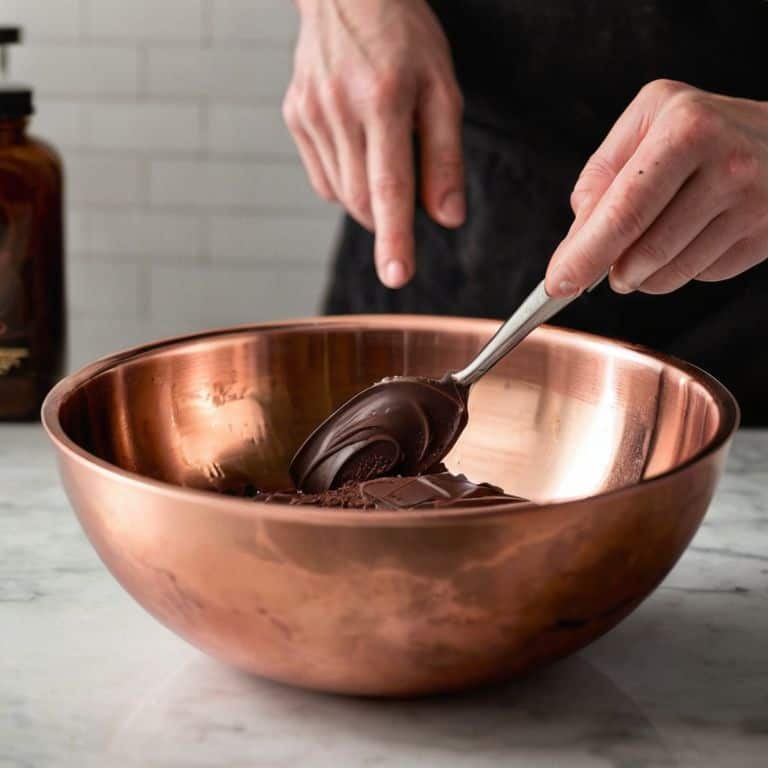
- 2. Next, you’ll want to seed your chocolate by introducing a small amount of already-tempered chocolate into the melted mixture. This helps to encourage the formation of stable crystals, which is essential for achieving that perfect snap and shine. I like to think of it as giving my chocolate a little kickstart – it helps the tempering process along and ensures a smooth, even finish.
- 3. Now, it’s time to cool your chocolate down to around 82°F to 86°F (28°C to 30°C). This is where the magic happens, folks – as your chocolate cools, the crystals will start to form and your chocolate will begin to set. It’s essential to work quickly during this stage, as you want to catch your chocolate at the perfect moment – when it’s still slightly warm but starting to firm up.
- 4. With your chocolate at the optimal temperature, it’s time to test the temper. I like to use the old-school method – simply dip a knife or spatula into the chocolate and place it in the refrigerator for a few minutes. If the chocolate comes out with a smooth, even finish and a satisfying snap, you know you’ve got it just right.
- 5. Once you’ve achieved the perfect temper, it’s time to work with your chocolate. This can be the most fun part – shaping, molding, and crafting your chocolate into beautiful creations. Remember to work efficiently, as tempered chocolate can be fragile and prone to blooming (that nasty, streaky effect that can ruin an otherwise perfect piece).
- 6. As you work, keep a close eye on the temperature of your workspace. I always say that temperature is key when it comes to working with chocolate – if your workspace is too warm or too cool, it can affect the temper of your chocolate and cause it to bloom or become too soft. Aim for a comfortable room temperature, around 70°F to 75°F (21°C to 24°C), and you’ll be golden.
- 7. Finally, don’t be discouraged if your first attempts at tempering chocolate without a thermometer don’t yield perfect results. It takes practice and patience to develop the skills and instincts needed to temper chocolate like a pro. Keep trying, and remember that every mistake is an opportunity to learn – with time and practice, you’ll be tempering like a master chocolatier in no time.
Tempering Chocolate Raw

When working with couverture chocolate, it’s essential to understand the importance of precise temperature control. This type of chocolate is known for its high cocoa butter content, which can make it more temperamental when it comes to tempering. To achieve the perfect temper, I always make sure to melt the chocolate to the correct temperature, usually between 105°F and 115°F. This ensures that the chocolate is fully melted and ready for seeding.
Seeding the chocolate is a crucial step in the tempering process, and it’s often where beginners go wrong. Common mistakes include not using enough seed chocolate or not cooling it to the correct temperature. To avoid these mistakes, I always use a small amount of already-tempered chocolate as my seed, and I make sure to cool it to around 82°F to 86°F. This allows the chocolate to set properly and gives it that perfect snap when broken.
For those looking to try a more unconventional method, tempering chocolate with a hair dryer can be a fun experiment. However, it’s essential to be cautious when using heat to temper chocolate, as it can easily become too warm and lose its temper. I recommend using a low setting and moving the hair dryer constantly to avoid hot spots. With a little practice and patience, you can achieve beautifully tempered chocolate using this method, and it’s a great way to add some creativity to your chocolate work.
Melting Points Without Thermometers
When working with raw chocolate, understanding the melting points of different cocoa butter types is crucial. I recall my time in Belgium, where we’d carefully observe the chocolate’s behavior as it melted, noting the subtle changes in texture and sheen. By doing so, we could gauge the ideal temperature range without relying on thermometers. It’s all about developing a tactile sense of the chocolate’s personality, if you will.
For instance, I’ve found that high-quality dark chocolate tends to melt between 105°F and 115°F, while milk chocolate often requires a slightly lower range. These subtle variations can make all the difference in achieving that perfect temper. With practice, you’ll be able to discern these temperatures by feel, much like a seasoned chocolatier.
Seeding Chocolate Like a Pro
To take your raw chocolate tempering to the next level, you need to master the art of seeding. This is where you introduce a small amount of already-tempered chocolate into your melted mixture, essentially “infecting” it with the right crystal structure. I like to think of it as giving my chocolate a little kickstart. By adding this seed, you’re helping to stabilize the chocolate and encouraging it to set with that perfect snap.
When seeding, it’s all about precision – too little and it won’t take, too much and you’ll be left with an uneven texture. I aim for about 10% of the total weight, but feel free to experiment and find your own sweet spot. Remember, the key is to be gentle, folding the seed into the melted chocolate with a light touch to avoid introducing any air. With practice, you’ll develop a sense of when it’s just right, and your chocolate will thank you.
Tempering Like a Rebel: 5 Key Tips to Master the Art
- Work with high-quality chocolate that has a high cocoa butter content, as it will be more forgiving when tempering without a thermometer
- Understand the concept of ‘melting points’ and how different chocolates behave when heated, to develop a sense of touch and intuition
- Use the ‘seed and melt’ technique to create a stable crystal structure, by introducing a small amount of already-tempered chocolate into the melted mixture
- Pay attention to the chocolate’s texture and appearance, as it cools and sets, to gauge whether it has reached the ideal temper
- Practice, practice, practice – tempering chocolate without a thermometer is an art that requires patience, dedication, and a willingness to experiment and learn from your mistakes
Tempering Chocolate Without a Thermometer: Key Takeaways
Mastering the art of tempering chocolate without a thermometer requires patience, practice, and a deep understanding of the chocolate’s crystalline structure – it’s not just about melting points, but about feeling the chocolate come alive in your hands
Seeding chocolate like a pro involves understanding the optimal melting points and using the right techniques to create a stable crystal structure, which is crucial for achieving that perfect snap and glossy finish
By tempering chocolate without a thermometer, you’ll develop a more intimate connection with the chocolate, learning to read its texture, smell, and behavior, and ultimately becoming a more intuitive and creative chocolatier, capable of crafting truly exceptional desserts
The Art of Thermometer-Free Tempering
Tempering chocolate without a thermometer is not about breaking the rules, it’s about understanding the nuances of temperature and texture so intimately that you can coax perfection out of every piece, every time.
Juliette Le Roux
The Art of Tempering Chocolate Without a Thermometer: A Masterclass Conclusion
As we’ve explored the world of tempering chocolate without a thermometer, it’s clear that precision and patience are key to achieving that perfect crystalline structure. From understanding the melting points of different cocoa types to mastering the art of seeding, every step requires attention to detail and a willingness to experiment. Whether you’re a seasoned chocolatier or a novice baker, the process of tempering chocolate by feel can be both intimidating and liberating. By embracing the nuances of temperature and the unique characteristics of your ingredients, you can unlock new levels of creativity in your pastry work.
So, as you embark on your own journey to master the art of tempering chocolate without a thermometer, remember that perfection is achievable with practice and dedication. Don’t be afraid to push the boundaries of what’s possible, to try new techniques, and to innovate with each new creation. With every perfectly tempered chocolate, you’ll not only delight the senses of those who taste it, but you’ll also hone your craft, and that’s the greatest reward of all.
Frequently Asked Questions
What are the most common mistakes to avoid when tempering chocolate without a thermometer?
The pitfalls of thermometer-free tempering! Common mistakes include overheating, which leads to a gritty texture, and underheating, resulting in a dull finish. Also, be careful not to introduce cold ingredients too quickly, causing the chocolate to seize. Patience and a gentle touch are key to achieving that perfect snap and sheen.
How do I know if my chocolate has reached the optimal tempering point without a thermometer to guide me?
Ah, the million-dollar question! To check if your chocolate has reached the optimal tempering point, perform the ‘snap test’: pour a small amount onto a cool surface, let it set, then gently tap it. If it snaps cleanly and has a smooth, glossy finish, you’ve nailed it. Trust your senses, not just the tools.
Can I still achieve a stable crystal structure in my chocolate if I'm tempering it without a thermometer, and if so, what techniques can I use to ensure this?
Absolutely, you can still achieve a stable crystal structure without a thermometer. I rely on the ‘feel’ of the chocolate, tapping into years of experience. Pay attention to the chocolate’s gloss, snap, and melt; these visual cues will guide you. It’s about understanding the chocolate’s behavior, not just following numbers. With practice, you’ll develop a sixth sense for tempering, and that’s where the magic happens.