I still remember the first time I attempted to color buttercream for a cake – it was a disaster! The colors didn’t mix as I had envisioned, and the final result was a messy, uneven hue. But that experience taught me a valuable lesson: mastering the art of coloring buttercream is crucial for creating stunning cakes. That’s why I’m excited to share with you a guide to coloring buttercream, a comprehensive resource that will walk you through the process of achieving perfect, vibrant colors for your baked masterpieces.
In this article, I promise to cut through the confusion and share my practical tips and tricks for coloring buttercream like a pro. You’ll learn how to choose the right colors, mix them to perfection, and achieve a smooth, even finish. Whether you’re a beginner or an experienced cake decorator, you’ll find valuable insights and advice to help you take your cake decorating skills to the next level. So, let’s dive in and explore the world of colorful buttercream together, with a guide to coloring buttercream as our trusty companion.
Table of Contents
- Guide Overview: What You'll Need
- Step-by-Step Instructions
- A Guide to Coloring Buttercream
- Elevate Your Cake Game: 5 Essential Tips for Coloring Buttercream
- Key Takeaways for Coloring Buttercream like a Pro
- Unlocking the Art of Buttercream
- Bringing Your Buttercream to Life
- Frequently Asked Questions
Guide Overview: What You'll Need
Total Time: 1 hour 15 minutes
Estimated Cost: $10 – $20
Difficulty Level: Easy
Tools Required
- Electric Mixer (for mixing buttercream)
- Measuring Cups (for accurate measurements)
- Colorant (gel or liquid food coloring)
- Spoons (for mixing and blending)
- Piping Bags (optional, for decorating)
Supplies & Materials
- Buttercream Frosting (homemade or store-bought)
- Food Coloring (various colors)
- Buttercream Smoother (optional, for smoothing frosting)
- Wax Paper (for testing colors)
- Piping Tips (optional, for decorating)
Step-by-Step Instructions
- 1. First, let’s start with the basics – preparing your buttercream. To do this, you’ll need to make sure your buttercream is at room temperature, which will make it easier to mix and color. I like to take my buttercream out of the fridge about 30 minutes before I start decorating, and I always give it a good stir before I begin.
- 2. Next, you’ll need to choose your desired color. This is where the fun begins, and you get to think about the overall aesthetic you want to achieve with your cake. Consider the theme, the occasion, and the recipient’s favorite colors. For me, I love using a color wheel to find inspiration and to ensure that my colors are harmonious and visually appealing.
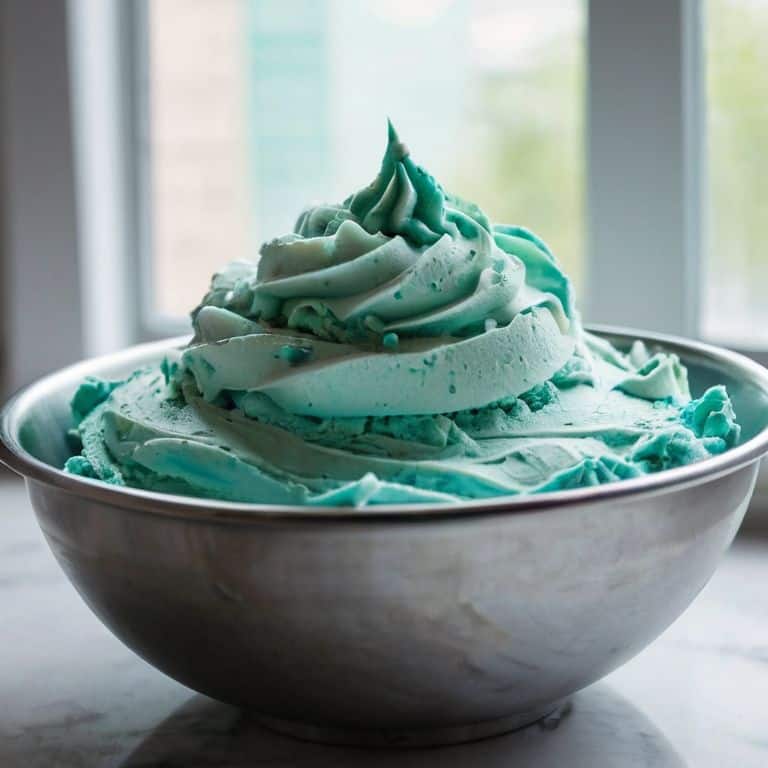
- 3. Now it’s time to add your coloring. You can use either gel or liquid food coloring, but I always recommend gel coloring for its vibrancy and consistency. Start by adding a small amount of coloring to your buttercream – just a tiny drop will do – and then mix well. It’s easier to add more color than it is to take it away, so begin with a small amount and gradually build up to your desired shade.
- 4. Once you’ve added your coloring, it’s time to mix and match until you achieve the perfect hue. This can take some patience, but trust me, it’s worth it. I like to use a stand mixer to mix my buttercream, but you can also do this by hand with a whisk or spatula. Just be sure to scrape down the sides of the bowl regularly to ensure that all of the buttercream is evenly colored.
- 5. As you’re mixing, you may find that your buttercream becomes too thin or too thick. Don’t worry – this is an easy fix. If your buttercream is too thin, you can add a small amount of powdered sugar to thicken it. If it’s too thick, you can add a tiny amount of water or milk. The key is to find the perfect consistency, one that’s smooth and pliable, but still holds its shape.
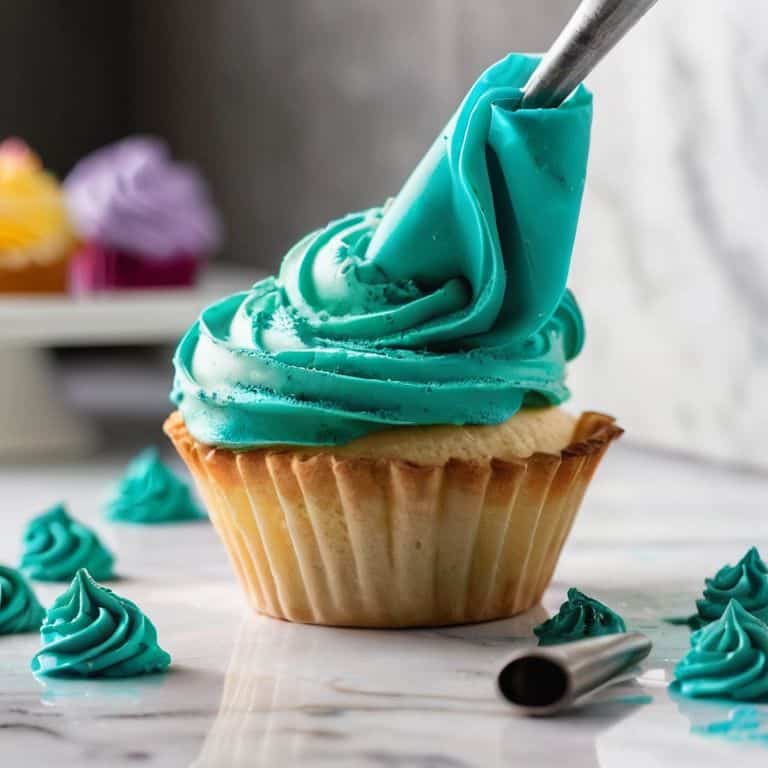
- 6. Now that your buttercream is colored and mixed, it’s time to test the color. I like to do this by applying a small amount of buttercream to a piece of parchment paper or a spare cake. This will give you a sense of how the color will look on your finished cake, and you can make any necessary adjustments before you start decorating.
- 7. Finally, it’s time to start decorating. This is the most fun part, and where you get to be really creative and expressive. Remember, the key to beautiful cake decorating is to take your time and have fun. Don’t be afraid to experiment and try new things – and don’t worry if things don’t turn out exactly as planned. It’s all part of the process, and it’s where the magic happens.
A Guide to Coloring Buttercream
As I always say, the devil is in the details, and when it comes to coloring buttercream, buttercream color theory plays a significant role in achieving the perfect hue. To ensure a seamless blend, it’s essential to consider the color wheel and how different shades interact with each other. This knowledge will help you create stunning ombre effects and unique color combinations that will elevate your cake designs.
When working with buttercream, I recommend using powdered food coloring for more precise control over the color intensity. This is especially important when trying to match buttercream to wedding themes, as the color needs to be exact. To achieve a consistent color, start by adding a small amount of coloring and gradually build up to the desired shade. Remember, it’s easier to add more color than it is to remove excess.
For a beautiful, multi-dimensional effect, try experimenting with tips for achieving ombre effects. By gradually transitioning from one color to another, you can create a stunning visual impact. To maintain buttercream color consistency, make sure to mix the coloring thoroughly and test the shade on a small, inconspicuous area of the cake before applying it to the entire design.
Achieving Ombre With Powdered Food Coloring
To achieve a stunning ombre effect, I love using powdered food coloring. It’s all about gradually blending colors to create a seamless transition from one shade to the next. Start by dividing your buttercream into separate portions, each destined for a different hue. Then, add a small amount of powdered coloring to each portion, mixing well to ensure an even distribution of color.
As you build your ombre effect, remember to work from light to dark, gradually increasing the intensity of the color. This will help you maintain a soft, romantic gradient that’s perfect for weddings or special occasions. With a little practice, you’ll be creating breathtaking ombre masterpieces that are almost too beautiful to eat!
Buttercream Color Theory Basics
Buttercream color theory is all about understanding how to create a harmonious palette that elevates your cake design. It’s essential to consider the 60-30-10 rule: 60% of your cake is the dominant color, 30% is the secondary color, and 10% is the accent color. This balance will create a visually appealing contrast and prevent your design from feeling overwhelming. When selecting colors, think about the mood and atmosphere you want to evoke – soft pastels for a whimsical feel or rich jewel tones for a luxurious look.
Elevate Your Cake Game: 5 Essential Tips for Coloring Buttercream
- Start with a clean slate: Ensure your buttercream is at room temperature and free of any air pockets to guarantee an even color distribution
- Understand your color wheel: Familiarize yourself with the basics of color theory to create harmonious and stunning combinations that will make your cake stand out
- Less is more: Begin with a small amount of coloring agent and gradually build up to your desired hue, as it’s easier to add more color than it is to remove excess
- Consider the finish: Think about the final texture and appearance you want to achieve – whether it’s a smooth, velvety finish or a more rustic, textured look – and choose your coloring method accordingly
- Practice, practice, practice: Don’t be discouraged if your first attempts at coloring buttercream don’t yield the desired results – it’s an art that requires patience, experimentation, and a willingness to try new things
Key Takeaways for Coloring Buttercream like a Pro
Understanding the basics of color theory is crucial for achieving the desired hue and shade in your buttercream, allowing you to create a wide range of colors and effects
By mastering the technique of using powdered food coloring, you can create stunning ombre effects that add an extra layer of sophistication to your cake designs
With practice and patience, you can unlock the full potential of buttercream as a medium for artistic expression, turning each cake into a unique and breathtaking work of art
Unlocking the Art of Buttercream
Coloring buttercream is not just about mixing dyes, it’s about evoking emotions and telling a story through hues, just as a watercolor painting brings a botanical garden to life on canvas.
Chloé Dubois
Bringing Your Buttercream to Life
As we conclude this journey through the world of coloring buttercream, remember that the key to mastering this art form lies in understanding the basics of color theory and being willing to experiment with different techniques, such as achieving ombre with powdered food coloring. Practice makes perfect, and don’t be discouraged if your first attempts don’t yield the desired results. With time and patience, you’ll find that coloring buttercream becomes second nature, allowing you to focus on the truly creative aspects of cake decoration.
As you continue to hone your skills, I encourage you to think of buttercream as a versatile canvas, waiting for your brushstrokes of color and creativity. Unleash your inner artist and don’t be afraid to try new things – whether it’s a bold, bright hue or a subtle, pastel shade, the possibilities are endless, and the joy of creation is what makes this craft so truly special.
Frequently Asked Questions
What are the best types of food coloring to use for achieving pastel colors in buttercream?
For pastel perfection, I swear by gel or paste food coloring – they offer such vibrant, yet delicate hues. A little goes a long way, so start with a tiny amount and build up to your desired shade. Trust me, the payoff is worth it – soft, romantic colors that will make your buttercream blooms truly unforgettable!
How can I ensure that my buttercream color remains consistent throughout the decorating process?
To maintain consistent color, I swear by making a large batch of buttercream and dividing it into portions before coloring. This way, you can ensure each section has the same hue. Plus, it’s always a good idea to mix a little extra, just in case you need to touch up any areas during decorating.
Are there any tips for avoiding over-saturation or mottling when using liquid food coloring in buttercream?
To avoid over-saturation or mottling with liquid food coloring, I recommend adding a tiny amount at a time and mixing thoroughly between each addition. It’s also essential to use a high-quality liquid coloring that’s specifically designed for use in buttercream, as these tend to distribute more evenly and reduce the risk of an uneven finish.