As I stand in my bespoke cake studio, surrounded by the sweet scent of success and the gentle hum of mixers, I’m reminded of the countless times I’ve heard that making choux pastry is a daunting task, a culinary mountain too steep to climb. But I’m here to tell you that’s simply not true – with the right technique and a bit of patience, anyone can master a guide to making choux pastry. I’ve spent years perfecting my craft, from my early days training under a renowned pastry chef in Paris to my current role as a pastry chef and cookbook author, and I’m excited to share my knowledge with you.
In this article, I promise to cut through the noise and provide you with honest, no-hype advice on how to create perfect choux pastry every time. You’ll learn the fundamentals of choux pastry, from the importance of using high-quality ingredients to the precise techniques required to achieve that perfect, airy texture. Whether you’re a beginner looking to elevate your bakes or an experienced baker seeking to refine your skills, I’m committed to guiding you through the process with clarity, precision, and a passion for the art of pastry-making. So, let’s get started on this culinary journey together, and discover the joy of creating exquisite choux pastry that will leave your friends and family in awe.
Table of Contents
Guide Overview: What You'll Need
Total Time: 1 hour 30 minutes
Estimated Cost: $10 – $20
Difficulty Level: Intermediate
Tools Required
- Medium Saucepan for mixing and heating milk
- Hand Mixer for beating eggs
- Measuring Cups for accurate measurements
- Piping Bag for shaping pastry
Supplies & Materials
- All-Purpose Flour 1 1/2 cups
- Butter 1/2 cup, cubed
- Milk 1/2 cup
- Water 1/4 cup
- Eggs 4 large eggs
- Salt 1/4 teaspoon
Step-by-Step Instructions
- 1. First, let’s start by understanding the foundation of a great choux pastry, which is all about using high-quality ingredients. I always say that the difference between a good pastry and a great one lies in the details, and for me, that begins with the type of butter and milk I use. For this recipe, you’ll need 1 cup of whole milk, 1/2 cup of water, 1/4 cup of unsalted butter, and a pinch of salt.
- 2. Next, we need to combine the milk, water, butter, and salt in a medium saucepan and place it over medium heat, stirring occasionally, until the butter has melted and the mixture is just about to reach a boil. This is a crucial step because we want to create a smooth, even texture that will help our pastry dough come together beautifully.
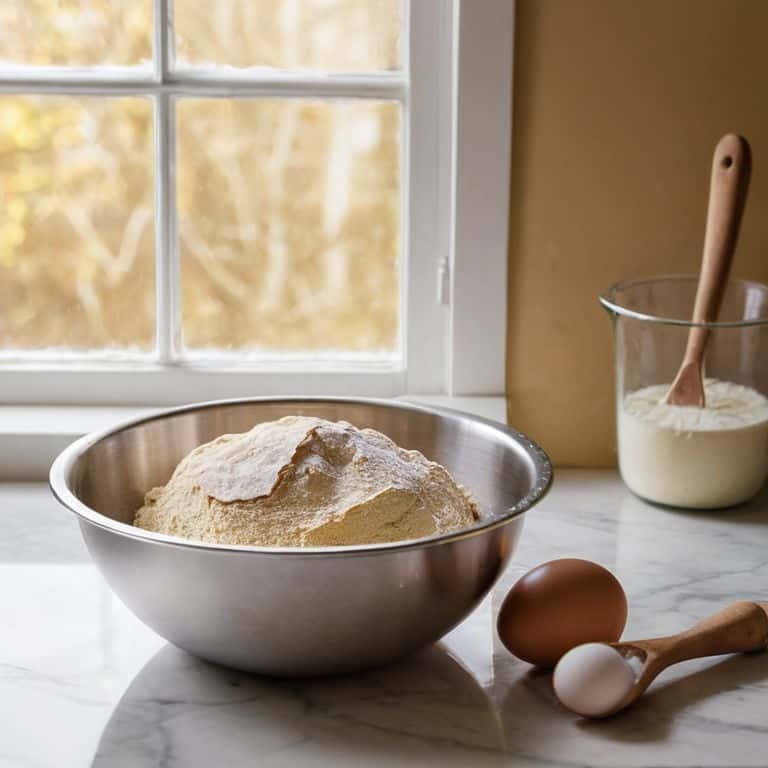
- 3. Now, it’s time to add 1 1/2 cups of all-purpose flour to the saucepan, stirring vigorously with a wooden spoon to ensure everything is well combined. This is where the magic happens, and our mixture starts to transform into a cohesive dough. Be sure to cook the dough for about 2 minutes, stirring constantly, to remove any excess moisture and to help the starches in the flour break down.
- 4. After cooking the dough, we need to let it cool slightly, until it reaches a temperature that’s comfortable to handle. This is an important step because we don’t want to add our eggs to a dough that’s too hot, as this can cause them to scramble. Once the dough has cooled, we can start adding our eggs, one at a time, beating well after each addition. For this recipe, you’ll need 4 large eggs.
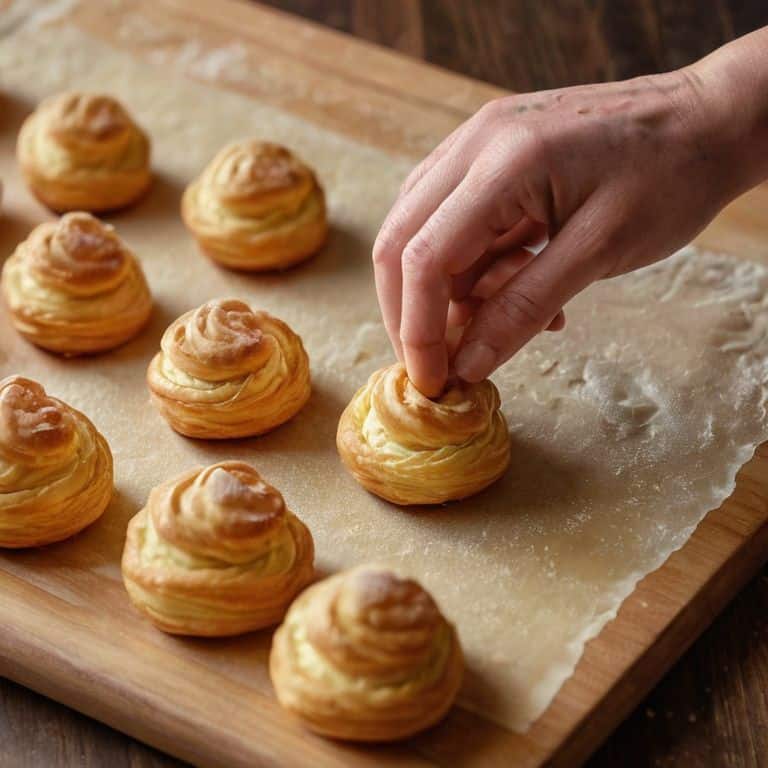
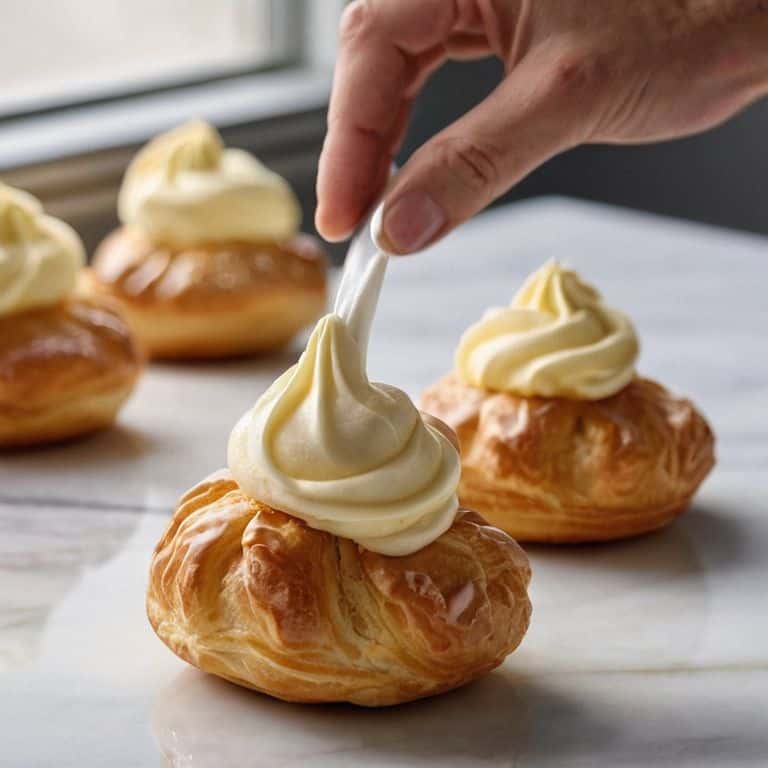
- 5. With our dough now ready, it’s time to pipe it onto a baking sheet lined with parchment paper. I like to use a large round tip to create beautiful, evenly rounded shapes. Simply pipe small, round balls onto the baking sheet, leaving about 1 inch of space between each pastry to allow for even expansion during baking.
- 6. Before we put our pastries in the oven, we need to create a slight indentation on the top of each one using a wet finger. This helps to prevent the pastry from bursting open during baking and gives it a smooth, even surface. Then, we can gently brush the tops with a little bit of egg wash to give them a beautiful, golden brown color.
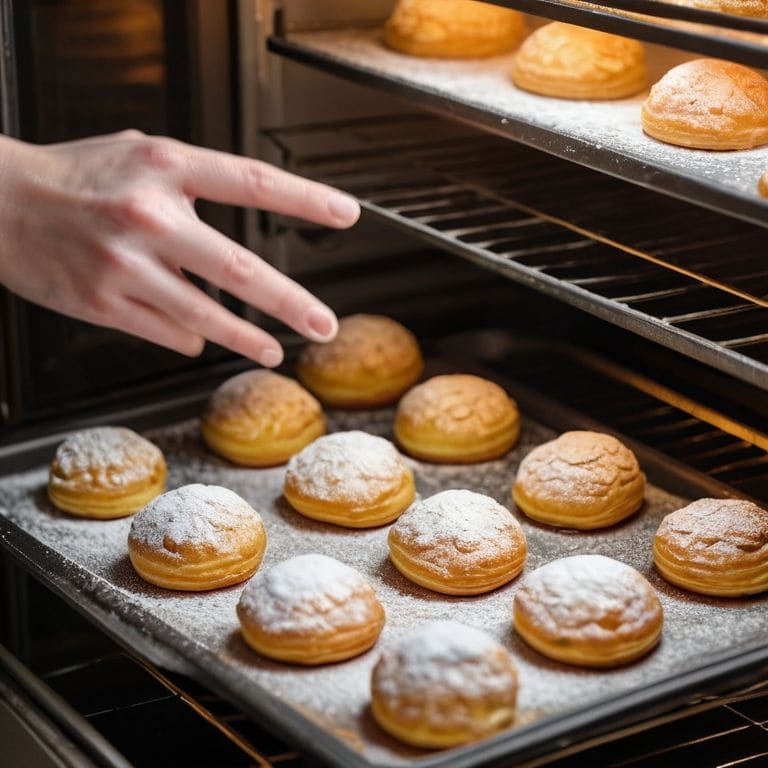
- 7. Finally, it’s time to bake our choux pastry. Preheat your oven to 400°F (200°C), and bake the pastries for about 15-20 minutes, or until they’re golden brown and firm to the touch. Once they’re done, remove them from the oven and let them cool on a wire rack. This is the most rewarding part – seeing your beautiful, delicate pastries come to life, ready to be filled with your favorite cream or topping.
A Guide to Making Choux Pastry
As I often tell my students, mastering the art of choux pastry is all about understanding the nuances of this delicate dough. One of the most common mistakes people make when working with choux is not monitoring the baking temperature closely enough, which can lead to unevenly cooked pastries. To avoid this, make sure your oven is at the right temperature, and consider investing in an oven thermometer to ensure accuracy.
When it comes to choux pastry troubleshooting, I always say that patience and practice are key. Don’t be discouraged if your first few attempts at making choux don’t turn out as expected – it’s all part of the learning process. Instead, focus on tips for piping choux pastry, such as using the right type of piping bag and tip, and taking your time to create smooth, even shapes.
For those looking to take their choux pastry to the next level, I recommend experimenting with different choux pastry filling ideas, such as classic French dessert recipes like cream puffs or eclairs. Remember to have fun and be creative with your fillings and toppings – after all, the beauty of choux pastry lies in its versatility and the endless possibilities it offers.
Mastering Tips for Piping Perfection
To achieve piping perfection, it’s essential to understand the importance of temperature and consistency. Your choux pastry should be at room temperature, and the butter should be softened to a creamy state. This harmony of temperatures will allow the pastry to flow smoothly through the piping bag, creating even, rounded shapes. I always make sure to test the consistency by piping a small amount onto a piece of parchment paper – if it holds its shape beautifully, I know I’m ready to create.
As you pipe, remember to apply gentle, consistent pressure. This will help you maintain control and achieve the desired shape. For intricate designs, I recommend using a smaller piping tip to allow for more precision and detail. With practice, you’ll develop a sense of intuition, knowing exactly when to apply more or less pressure to achieve the perfect shape.
Troubleshooting Common Choux Mistakes
As I often see in my bespoke cake studio, even with precise instructions, choux pastry can be finicky. One common mistake is overmixing the dough, leading to a dense, rather than light and airy, texture. To avoid this, mix your ingredients just until they come together in a shaggy mass, then stop – don’t overwork it. Another issue is opening the oven door too soon, causing the pastry to collapse. Resist the temptation to peek until at least 25 minutes have passed, allowing your choux to set properly.
If your choux pastry doesn’t puff as expected, it might be due to old baking powder or incorrect oven temperature. Always use fresh baking powder and invest in an oven thermometer to ensure accuracy. With these tips, you’ll be well on your way to mastering the art of choux pastry, and your bakes will be all the more exquisite for it.
Elevating Your Choux Game: 5 Essential Tips
- Use room temperature ingredients, especially eggs, to ensure a smooth and even incorporation into the dough
- Invest in high-quality butter, as it will significantly impact the flavor and texture of your choux pastry
- Don’t overmix the dough, as this can lead to a dense and tough final product – stop mixing as soon as the ingredients come together
- Age your choux pastry dough for at least 30 minutes to allow the flour to hydrate and the gluten to relax, resulting in a more tender and easier-to-pipe pastry
- Bake your choux pastry at the right temperature – if it’s too low, it won’t puff properly, and if it’s too high, it will burn before it’s fully cooked, so aim for a sweet spot around 375°F (190°C)
Essential Takeaways for Elevating Your Choux Pastry
Understand the importance of precise temperature and ingredient measurement to achieve the perfect choux pastry puff
Master the technique of cooking the roux to the right consistency, which is crucial for the pastry’s structure and ability to hold its shape
Practice patience and control when piping to ensure smooth, even shapes that will make your pastries visually stunning and professional-looking
The Art of Choux Pastry
As we delicately craft each choux pastry, we’re not just measuring ingredients, we’re orchestrating a symphony of textures and flavors that will leave a lasting impression on all who taste it.
Alison Lawson
Elevating Your Bakes to New Heights
As we conclude this journey through the world of choux pastry, it’s essential to summarize the key points that will make your bakes truly exceptional. From the initial steps of combining water, butter, and salt, to the precise technique of cooking the mixture to the perfect consistency, each element plays a crucial role in the final product. The art of piping, whether you’re creating intricate designs or simple, elegant shapes, is where your creativity and skill come together to produce a masterpiece. Remember, mastering choux pastry is not just about following a recipe, but about understanding the science behind the ingredients and how they interact.
Now that you’ve armed yourself with the knowledge and skills to create exquisite choux pastries, it’s time to unleash your inner artist. Don’t be afraid to experiment with new flavors, designs, and presentation styles. The world of pastry is endlessly inspiring, and with each new creation, you’ll find yourself drawn deeper into its beauty and magic. So, go ahead, take the first step, and watch your bakes transform into stunning, edible works of art that will leave everyone in awe.
Frequently Asked Questions
What is the ideal temperature and humidity for piping choux pastry to achieve the perfect shape and texture?
For optimal piping, I recommend a room temperature between 68°F to 72°F and a humidity level of 50% to 60%. This environment allows the choux to hold its shape while remaining tender and smooth, ensuring those perfect, delicate peaks and a beautiful, even texture.
How do I ensure my choux pastry dough is properly cooked and dried to prevent it from becoming too soggy or dense?
To achieve perfectly cooked choux pastry, it’s crucial to dry out the dough properly. After cooking, allow it to cool slightly, then return it to the oven at a low temperature, around 300°F, for about 10 minutes to remove excess moisture, ensuring a light and airy texture.
Can I flavor my choux pastry with different extracts, such as almond or coffee, and if so, how much extract should I add to the dough?
Absolutely, dear baker! You can infuse your choux pastry with almond or coffee extracts. Start with a small amount, about 1/4 teaspoon of extract per 1 1/2 cups of flour, and adjust to taste. Remember, a little extract goes a long way, so it’s better to err on the side of caution and add more as needed.