As I stand in my bespoke cake studio, surrounded by the sweet scent of butter and vanilla, I’m often reminded of the common misconception that how to make classic éclairs is a daunting task, reserved only for the most skilled pastry chefs. But, I’m here to tell you that this couldn’t be further from the truth. In reality, crafting these delicate, creamy pastries is a journey that requires patience, precision, and a deep understanding of the science behind the ingredients. I’ve spent years perfecting my technique, from the flaky pastry to the silky smooth filling, and I’m excited to share my knowledge with you.
In this article, I promise to guide you through the process of how to make classic éclairs with ease and confidence. I’ll share my top tips and tricks of the trade, gained from years of working in Michelin-starred restaurants and running my own cake studio. My goal is to empower you with the skills and knowledge to create truly unforgettable éclairs, whether you’re a beginner or an experienced baker. By the end of this journey, you’ll be equipped with the skills to craft éclairs that are not only delicious but also visually stunning, making them the perfect addition to any special occasion or gathering. So, let’s get started on this sweet adventure together!
Table of Contents
Recipe Details
Ingredients
- 1 cup all-purpose flour (sifted)
- 1/2 cup confectioners' sugar (sifted)
- 1/4 teaspoon salt
- 1/2 cup unsalted butter (melted)
- 1/2 cup whole milk
- 4 large egg yolks
- 1/2 cup granulated sugar
- 1/4 teaspoon vanilla extract
- Confectioners' sugar (for dusting)
- Chocolate glaze or whipped cream (for topping, optional)
Tools & Supplies
- Large mixing bowl
- Medium saucepan
- Hand mixer or whisk
- Piping bag with a large round tip
- Baking sheet lined with parchment paper
Recipe Instructions
Step 1
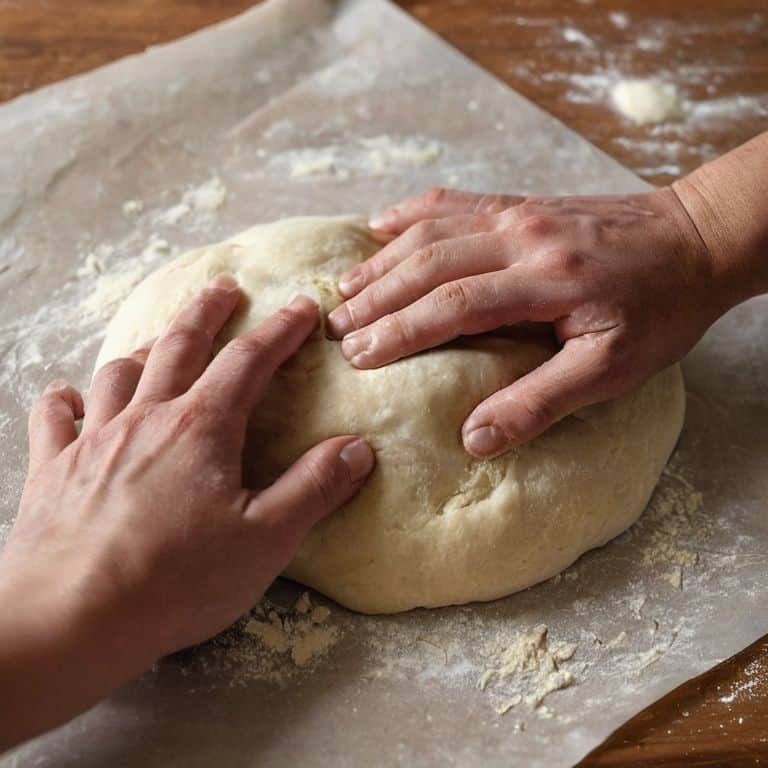
To begin our journey to crafting the perfect classic éclairs, we must first start with the foundation of any good pastry: the dough. I always say that making the pâte à choux is an art form in itself, requiring patience and precision. In a medium saucepan, combine 1/2 cup of milk, 1/2 cup of water, and 1/4 teaspoon of salt. Bring this mixture to a boil over medium heat, then add 1/2 cup of unsalted butter, cut into small pieces, and let it melt completely.
Step 2
Once the butter has melted, add 1 1/2 cups of all-purpose flour to the saucepan, stirring vigorously with a wooden spoon to combine. This mixture will start to form a ball and pull away from the sides of the pan, which is exactly what we want. Remove the saucepan from the heat and let it cool for a minute or two, until it’s just warm to the touch. It’s essential to not skip this step, as it will help prevent the eggs from scrambling when we add them. Now, let’s add 4 large eggs, one at a time, beating well after each addition, until the dough is smooth and shiny.
Step 3
Now that our pâte à choux is ready, it’s time to pipe it onto a baking sheet lined with parchment paper. To do this, transfer the dough to a piping bag fitted with a large round tip, and pipe long, thin strips, about 1/2 inch in diameter and 4-5 inches long. You should end up with around 12-15 éclairs. Gently tap the baking sheet on the counter to remove any air bubbles, and then use a fork to create a decorative edge on each éclair.
Step 4
Before baking, it’s crucial to let the éclairs rest at room temperature for about 30 minutes, allowing the gluten to relax. This step will help them rise more evenly in the oven. Preheat your oven to 400°F (200°C), and bake the éclairs for 15 minutes, then reduce the oven temperature to 350°F (180°C) and continue baking for an additional 20-25 minutes, or until they’re golden brown and puffed.
Step 5
While the éclairs are baking, we can start preparing the filling. In a medium bowl, whip 1 cup of heavy cream until it forms stiff peaks. In a separate bowl, whisk together 1/2 cup of whole milk, 1/4 cup of granulated sugar, and 1/4 teaspoon of vanilla extract. Add this mixture to the whipped cream and fold gently until well combined. Set the filling aside in the refrigerator until the éclairs are ready to be filled.
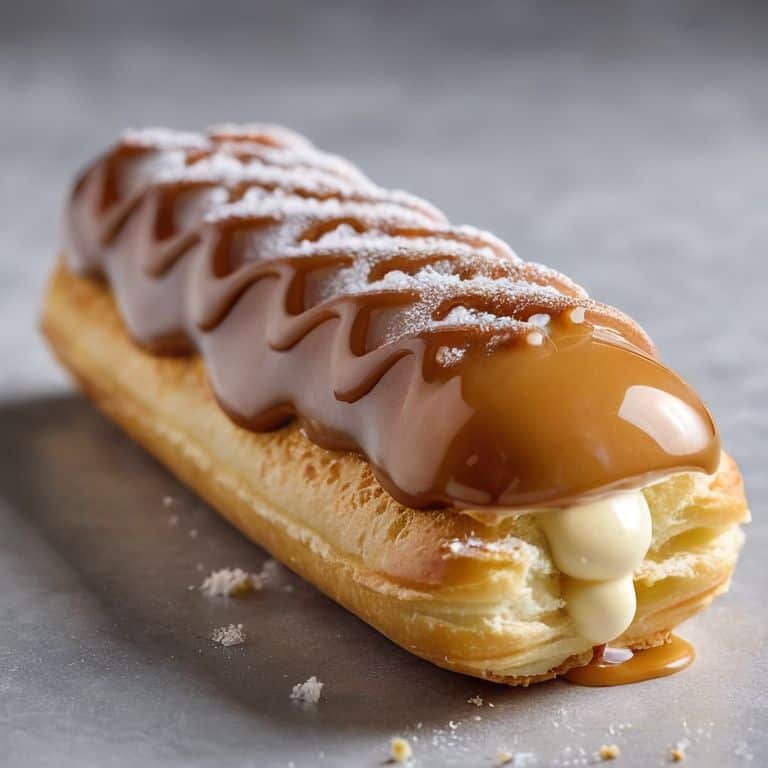
Step 6
To fill the éclairs, let them cool completely on a wire rack. Once cooled, use a sharp knife or a pastry bag with a small round tip to create a small hole at one end of each éclair. Fill a piping bag with the prepared cream, and pipe it into the éclairs through the hole, until they’re plump and full. Finally, dip the tops of the éclairs in a glaze made from 1 cup of powdered sugar and 2 tablespoons of milk, and serve immediately.
Crafting Classic Clairs
As I delve into the world of French pastry techniques, I’m reminded of the importance of precision and patience when crafting classic éclairs. Baking choux pastry shells to the perfect golden brown is an art form in itself, requiring a delicate balance of temperature and timing. To achieve this, I always ensure that my oven is at the correct temperature, and I carefully monitor the shells’ progress to prevent overcooking.
When it comes to filling these delicate shells, a homemade pastry cream filling is the only way to go. The process of tempering the cream and sugar is a crucial step, as it allows the filling to set properly and provides a smooth, velvety texture. I find that using high-quality ingredients, such as farm-fresh eggs and real vanilla, makes all the difference in the world. Tempering chocolate for glaze is another essential step, as it adds a rich, velvety texture to the éclairs.
For those looking to add a personal touch to their éclairs, éclair decorating ideas are endless. From simple powdered sugar dustings to intricate chocolate designs, the possibilities are vast. I enjoy experimenting with different techniques, such as piping borders or creating delicate sugar flowers, to add an extra layer of elegance to these classic French desserts. By mastering the art of crafting classic éclairs, you’ll be well on your way to creating classic French dessert recipes that are sure to impress.
Baking Perfect Choux Pastry Shells
To achieve the perfect choux pastry shells, it’s essential to understand the importance of temperature and timing. I always say that baking is a delicate dance between ingredients, heat, and patience. When piping the choux pastry dough onto the baking sheet, make sure to maintain a consistent size and shape, as this will ensure even baking. As the shells bake, they will puff up, and it’s crucial to avoid opening the oven door during this process, as the sudden rush of cold air can cause them to collapse.
By baking the shells at the right temperature, usually around 400°F (200°C), and for the correct amount of time, typically 15-20 minutes, you’ll be rewarded with a beautifully golden-brown, crispy exterior and a soft, airy interior. This foundation is the key to creating exquisite éclairs that are both visually stunning and deliciously divine.
Mastering French Pastry Techniques
As I delve into the world of classic éclairs, I’m reminded of the importance of mastering French pastry techniques. It’s the foundation upon which these delicate pastries are built. For me, it’s all about precision and patience, from the initial puff pastry creation to the final choux pastry piping. The key to success lies in understanding the intricacies of temperature, texture, and timing.
By honing these skills, you’ll be able to craft éclairs that are not only delicious but also visually stunning. I always say that practice makes perfect, and when it comes to French pastry, this couldn’t be more true. With each attempt, you’ll refine your technique, and before long, you’ll be creating éclairs that rival those found in the finest Parisian patisseries.
Elevating Your Éclairs: 5 Essential Tips for Perfection

- Use only the highest quality ingredients, including European-style butter and pure vanilla extract, to give your éclairs a rich and authentic flavor
- Ensure your choux pastry dough is at the perfect temperature before piping, as this will greatly affect the texture and rise of your shells
- Don’t overmix the pastry dough or the cream filling, as this can lead to tough, dense éclairs that lack the signature lightness and airiness
- Practice your piping technique to achieve smooth, even shells that are a delight to fill and decorate
- Allow your éclairs to cool completely on a wire rack before filling and glazing, as this will help prevent them from becoming soggy or misshapen
Key Takeaways for Crafting Unforgettable Classic Éclairs
To achieve the perfect éclairs, it’s crucial to master the art of making light and airy choux pastry, which requires precision in temperature, ingredient measurement, and mixing technique.
The filling is just as important as the pastry shell; using high-quality ingredients like rich, creamy butter and pure vanilla extract can elevate the flavor of your éclairs to new heights.
Presentation is everything; taking the time to carefully pipe smooth, rounded tops and delicately drizzle with glaze can transform your éclairs from mere pastries to edible works of art.
The Heart of Éclair Perfection
To craft classic éclairs that are truly sublime, one must balance the lightness of the choux pastry with the richness of the filling, all while embracing the beauty of imperfection – for it’s in the delicate, handmade touches that we find the soul of French patisserie.
Alison Lawson
The Sweet Reward of Perfection
As we conclude our journey through the world of classic éclairs, let’s take a moment to reflect on the key elements that make these pastries truly special. From the flaky, buttery pastry to the silky smooth filling, each component requires attention to detail and a commitment to using only the highest quality ingredients. By mastering the art of crafting perfect choux pastry shells and filling them with a rich, creamy custard, you’ll be well on your way to creating éclairs that are sure to impress even the most discerning palates.
So, as you embark on your own éclair-making journey, remember that the true beauty of baking lies not just in the end result, but in the process itself. The careful measuring, the precise piping, and the gentle baking all come together to create a truly transcendent culinary experience. With practice, patience, and a passion for perfection, you’ll be creating classic éclairs that are almost too beautiful to eat – almost.
Frequently Asked Questions
What is the best way to ensure my choux pastry shells don't collapse after baking?
To prevent collapse, it’s crucial to not open the oven door during baking, as this can cause the shells to sink. Also, ensure your choux pastry is properly dried out in the oven after baking, by leaving the door ajar for a few minutes. This step will help maintain their structure and prevent collapse.
How do I achieve a smooth and stable éclair filling that won't separate or weep?
To achieve a smooth and stable éclair filling, it’s all about balance and tempering. I swear by a classic French pastry cream, made with high-quality milk, real vanilla, and a touch of stability from cornstarch. Tempering the mixture is key, so be sure to slowly pour the hot milk into the egg yolks, whisking constantly to prevent scrambling.
Can I flavor my éclair filling with anything other than traditional vanilla, and if so, what are some unique options to consider?
While traditional vanilla is timeless, I adore experimenting with unique flavors. Consider infusing your éclair filling with rose petal, lemon zest, or espresso for a sophisticated twist. You can also try using high-quality flavor extracts like almond or hazelnut to add depth and complexity. The key is to balance flavors, so don’t be afraid to get creative and taste as you go.