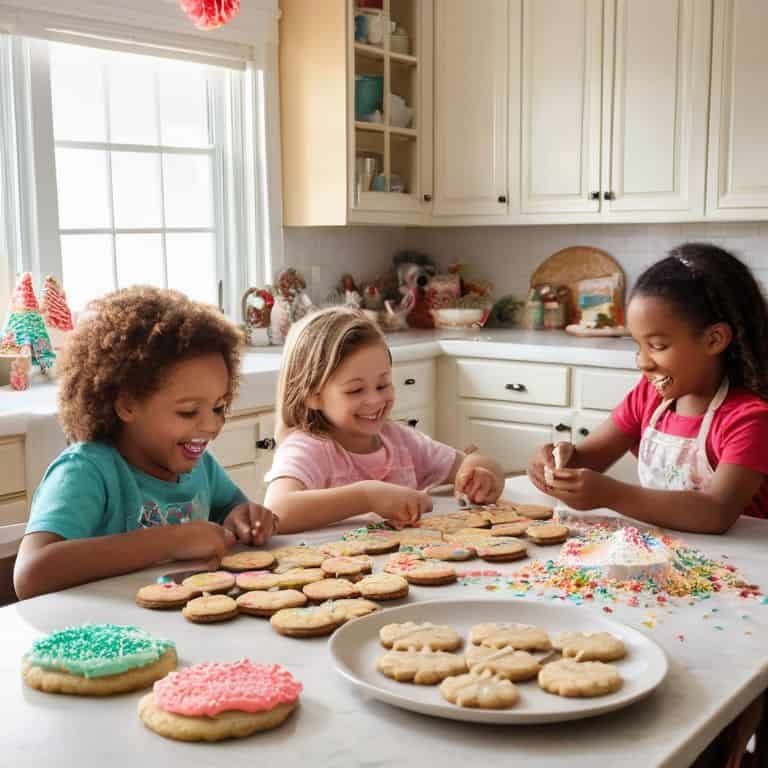
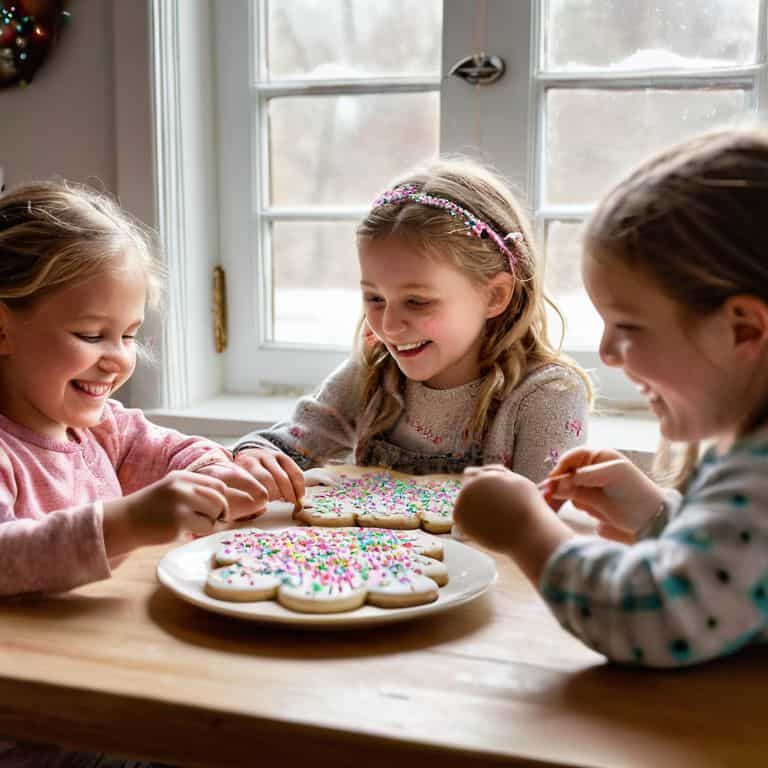
I still remember the first time my niece and I got our hands flour-covered and decorated a batch of cookies together – it was absolute chaos, but the kind that sparks joy and makes you want to do it all over again! As I delved into the world of baking, I realized that a fun project: decorating cookies with kids is often misunderstood as a tedious, messy task. However, I’ve learned that with the right approach, it can be a wonderful way to bond with your little ones and create something truly special.
In this article, I promise to share my honest, tried-and-tested tips on how to make decorating cookies with kids a enjoyable experience for the whole family. You’ll learn how to prepare your workspace, choose the right ingredients, and guide your tiny pastry chefs in creating their own masterpieces. I’ll also share some of my favorite cookie decorating techniques that are easy to follow and require minimal supervision. By the end of this guide, you’ll be equipped with the knowledge and confidence to tackle this fun project with your kids and create memories that will last a lifetime.
Table of Contents
- Guide Overview: What You'll Need
- Step-by-Step Instructions
- A Fun Project Decorating Cookies
- Sugar and Smiles: 5 Essential Tips for Decorating Cookies with Kids
- Sweet Success: 3 Key Takeaways from Decorating Cookies with Kids
- The Sweetest Memories
- Sweet Memories: A Lasting Legacy
- Frequently Asked Questions
Guide Overview: What You'll Need
Total Time: 1 hour 30 minutes
Estimated Cost: $10 – $30
Difficulty Level: Easy
Tools Required
- Cookie Cutters various shapes and sizes
- Piping Bags for frosting
- Spoons and Spatulas for mixing and spreading
Supplies & Materials
- Sugar Cookies homemade or store-bought
- Frosting various colors
- Sprinkles and Decorations e.g., nonpareils, candies, and edible glitter
- Baking Sheets lined with parchment paper, approximately 12 inches x 18 inches
- Aprons for kids to wear, approximately 20 inches wide and 25 inches long
Step-by-Step Instructions
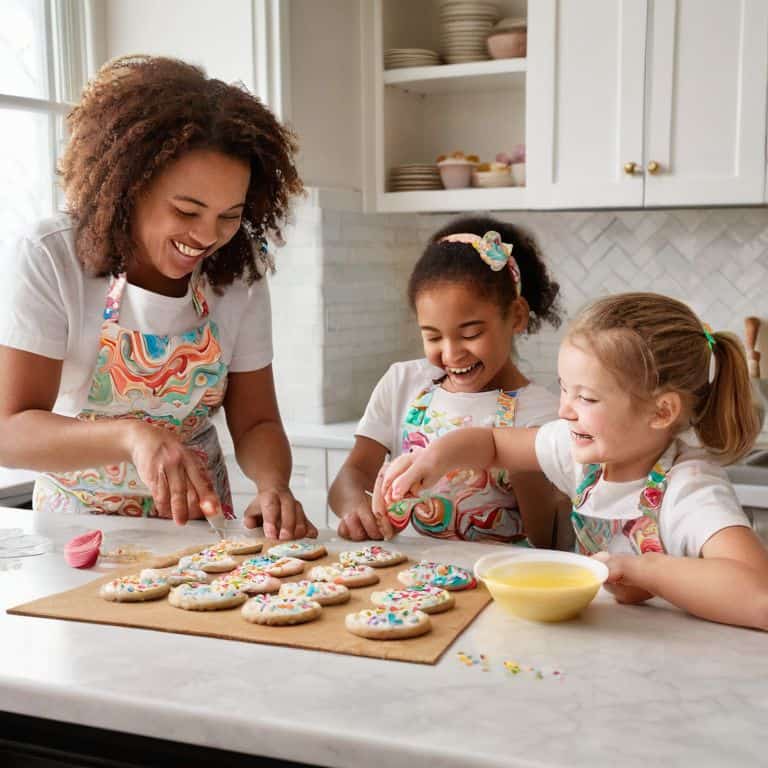
- 1. First, gather your troops and get the kids involved in the process of making the cookies from scratch – it’s a great opportunity to teach them about measurements and the joy of mixing and matching ingredients. I still remember my niece’s face lighting up when she learned that she could make her own cookie dough from flour, sugar, and butter.
- 2. Next, preheat your oven to the right temperature, usually around 375°F, and line your baking sheets with parchment paper to ensure the cookies bake evenly and don’t stick. This is also a good time to get the kids to help with placing the cookie balls onto the baking sheet, teaching them about spacing and patience.
- 3. Once your cookies are baked and cooled, it’s time to get creative with the decorations. Set up a decorating station with a variety of colorful icings, sprinkles, and other toppings, and let the kids’ imagination run wild. I find that using a turntable or a rotating cake stand can make it easier for the kids to access and decorate their cookies from all sides.
- 4. Now, introduce the kids to the world of piping and flooding, teaching them how to use piping bags and tips to create borders, patterns, and designs on their cookies. This can be a bit messy, but it’s a great way to encourage fine motor skills and hand-eye coordination.
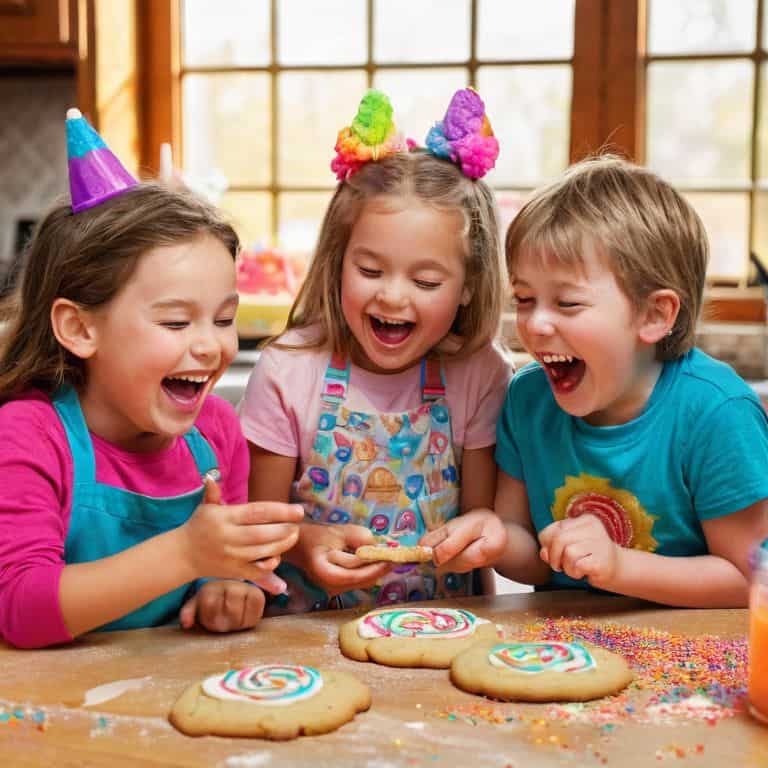
- 5. As the kids work on their masterpieces, take a step back and let them take ownership of their creations. Encourage them to experiment with different colors, patterns, and designs, and praise their efforts and imagination. This is also a great opportunity to take some beautiful, photojournalistic photos of the kids in action, surrounded by their creations.
- 6. Once the cookies are fully decorated, it’s time to add the finishing touches, such as sprinkles, nonpareils, or other edible decorations. This is a great way to add some extra texture and visual interest to the cookies, and the kids will love the process of making their creations even more special and unique.
- 7. Finally, gather around the table and admire the kids’ handiwork, enjoying the fruits of their labor and the joy of sharing a fun and creative experience together. Take some time to reflect on the process, asking the kids about their favorite part of the experience and what they learned, and make plans to do it all again soon.
A Fun Project Decorating Cookies
As I reflect on my experiences with decorating cookies, I’m reminded of the importance of simplicity. When it comes to kids cookie decorating ideas, it’s essential to keep things easy and enjoyable. I’ve found that using easy royal icing recipes can make all the difference in creating a fun and stress-free experience for everyone involved. With a few basic ingredients and some simple instructions, kids can let their creativity shine and produce some truly amazing designs.
One of the things I love about decorating cookies is the way it can bring people together. Holiday cookie decorating traditions are a great way to create lasting memories with family and friends. Whether you’re making a special batch of cookies for a holiday party or just want to spend some quality time with your kids, decorating cookies is a great way to foster a sense of community. With the right cookie decorating tools for kids, such as sprinkle-filled containers and colorful icing, the possibilities are endless.
As I’ve experimented with different sprinkle cookie decorating techniques, I’ve come to appreciate the value of patience and practice. Decorating cookies can be a bit messy, but with the right mindset and a few helpful tips, it can also be a truly rewarding experience. Using child friendly cookie decorating kits can be a great way to get started, as they often include everything you need to create beautiful and delicious cookies.
Royal Treatment Easy Royal Icing Recipes for Kids
As I watched my niece’s eyes light up with her first royal icing experience, I knew I had to share the magic with others. Royal icing is the perfect medium for little artists to unleash their creativity. I’ve experimented with a few easy recipes that are perfect for kids. One of my favorites is a simple powdered sugar and egg white mixture that yields a smooth, pipable icing. Another is a clever hack using powdered sugar, milk, and a touch of almond extract. Both are easy to make and fun to work with, allowing kids to focus on the best part – decorating!
Sweet Masterpieces Kids Cookie Decorating Ideas
As I watched my niece’s eyes light up with every swirl of colorful icing, I realized that decorating cookies is about so much more than just creating something sweet. It’s an art form that lets kids unleash their imagination and creativity. I love seeing the unique masterpieces they come up with – from polka dots to stripes, and even the occasional cookie that’s completely covered in sprinkles. These sweet creations are a reflection of their little personalities, and it’s amazing to see them take pride in their work.
Whether it’s a simple sprinkle design or an elaborate landscape, every cookie is a one-of-a-kind masterpiece. I’ve seen kids use icing to draw on mustaches, create patterns with M&M’s, and even make miniature cookie scenes. The possibilities are endless, and it’s wonderful to see them explore their creativity and have so much fun in the process.
Sugar and Smiles: 5 Essential Tips for Decorating Cookies with Kids
- Make it a mess-free zone (or at least, try to): Cover your kitchen table with parchment paper, butcher paper, or a plastic tablecloth to contain the chaos and make cleanup a breeze
- Let them get creative: Provide a variety of cookie decorations like sprinkles, colored sugar, and royal icing in different colors to inspire their imagination and creativity
- Keep it simple, silly: Use pre-made cookie dough or store-bought cookies to save time and focus on the fun part – decorating
- Be a kid again: Join in on the fun and decorate some cookies yourself – it’s a great way to bond with your little ones and create memories that will last a lifetime
- Practice patience and have fun: Remember, it’s about the experience, not perfection – encourage your kids to experiment, try new things, and enjoy the process of creating their own sweet masterpieces
Sweet Success: 3 Key Takeaways from Decorating Cookies with Kids
I learned that the true magic of decorating cookies with kids lies not in the perfection of the final product, but in the messy, creative journey you undertake together – it’s a chance to unleash imagination and have fun in the kitchen
Royal icing is a game-changer when it comes to decorating cookies with kids – not only is it easy to make, but it also provides a versatile canvas for their creativity, from intricate designs to playful patterns and colors
Perhaps the most important ingredient in any cookie decorating session with kids is patience – it’s about embracing the chaos, enjoying the quality time, and celebrating the unique, sweet masterpieces that your little pastry chefs create
The Sweetest Memories
Decorating cookies with kids is a masterclass in the beauty of imperfection, where every smudge and smear tells a story of laughter, love, and the unbridled joy of creation.
David Dunne
Sweet Memories: A Lasting Legacy
As I reflect on the joy of decorating cookies with kids, I’m reminded of the importance of creativity and self-expression in our lives. From the initial steps of gathering ingredients and supplies to the final touches of royal icing and sprinkles, this fun project is a journey of discovery and imagination. The process of decorating cookies with kids is not just about creating sweet masterpieces, but also about fostering a sense of community and togetherness. Whether you’re a parent, guardian, or simply a baking enthusiast, this project offers a unique opportunity to connect with the younger generation and create lasting memories.
As we conclude this journey of decorating cookies with kids, I want to leave you with a final thought: the art of baking is a gift that keeps on giving. It’s a chance to slow down, appreciate the simple things, and nurture our sense of wonder. So, go ahead and get creative, make a mess, and enjoy the sweet chaos of decorating cookies with the kids in your life. For in the end, it’s not just about the cookies – it’s about the love, laughter, and memories we create along the way.
Frequently Asked Questions
What are some tips for keeping kids engaged and patient during the cookie decorating process?
I’ve found that letting kids take the reins, even if it means a bit of a mess, is key. Encourage them to experiment with different icing colors and decorations. Setting up a ‘decorating station’ with all the supplies within reach also helps. And, of course, having plenty of examples and inspiration on hand can spark their creativity and keep them engaged.
How can I ensure that the royal icing is easy for kids to work with and doesn't become too frustrating?
To make royal icing kid-friendly, I swear by a simple trick: thinning it out to the perfect consistency. You want it to be just thick enough to hold its shape, but still flow smoothly off a knife or piping bag. I like to aim for a consistency similar to honey – it’s all about finding that sweet spot where creativity flows freely, and frustration melts away.
Are there any specific cookie recipes that are better suited for decorating with kids, and if so, what makes them ideal?
I’ve found that classic sugar cookies and snickerdoodles are perfect for little decorators – their soft, tender texture holds up beautifully to tiny hands and enthusiastic frosting applications. Plus, they’re forgiving if a decoration doesn’t quite turn out as planned, making them ideal for a fun, stress-free creative session.