As I stand in my bespoke cake studio, surrounded by the sweet scent of butter and the gentle hum of mixers, I am reminded of the countless times I’ve been asked about the secret to making flawless, flaky croissants. The answer, my friends, lies in mastering a guide to laminating dough for croissants. It’s a process that’s often shrouded in mystery, but trust me, with a little patience and practice, you’ll be creating layers of golden, crispy goodness in no time. I recall my days training under a renowned pastry chef in Paris, where I learned the art of laminating dough and discovered that it’s not just about following a recipe, but about understanding the science behind it.
In this article, I promise to share my honest, no-hype advice on how to laminate dough for croissants, covering everything from the importance of using high-quality ingredients to the technique of folding and rolling the dough. You’ll learn how to achieve the perfect laminated layers, and I’ll provide you with practical tips and tricks to help you overcome common challenges. By the end of this guide, you’ll be equipped with the knowledge and confidence to create your own delicious, flaky croissants that will impress anyone. So, let’s get started on this journey to mastering the art of laminating dough, and discover the magic that happens when butter, dough, and patience come together in perfect harmony.
Table of Contents
- Guide Overview: What You'll Need
- Step-by-Step Instructions
- A Guide to Laminating Dough for Croissants
- Elevating Your Croissant Game: 5 Essential Tips for Laminating Dough
- Mastering the Art of Laminating Dough: 3 Key Takeaways
- The Heart of Croissant Magic
- The Art of Laminating: A Journey to Flaky, Buttery Bliss
- Frequently Asked Questions
Guide Overview: What You'll Need
Total Time: 2 hours 30 minutes
Estimated Cost: $10 – $20
Difficulty Level: Intermediate
Tools Required
- Clean Work Surface large enough to roll out dough
- Rolling Pin for rolling out dough
- Measuring Cups for precise measurements
- Butter Block or alternative for layering
- Dough Scraper for handling dough
Supplies & Materials
- Croissant Dough homemade or store-bought
- Unsalted Butter softened for layering, about 1 pound
- Flour for dusting work surface, about 1 cup
- Pastry Brush for egg wash or water
- Egg for egg wash, optional
Step-by-Step Instructions
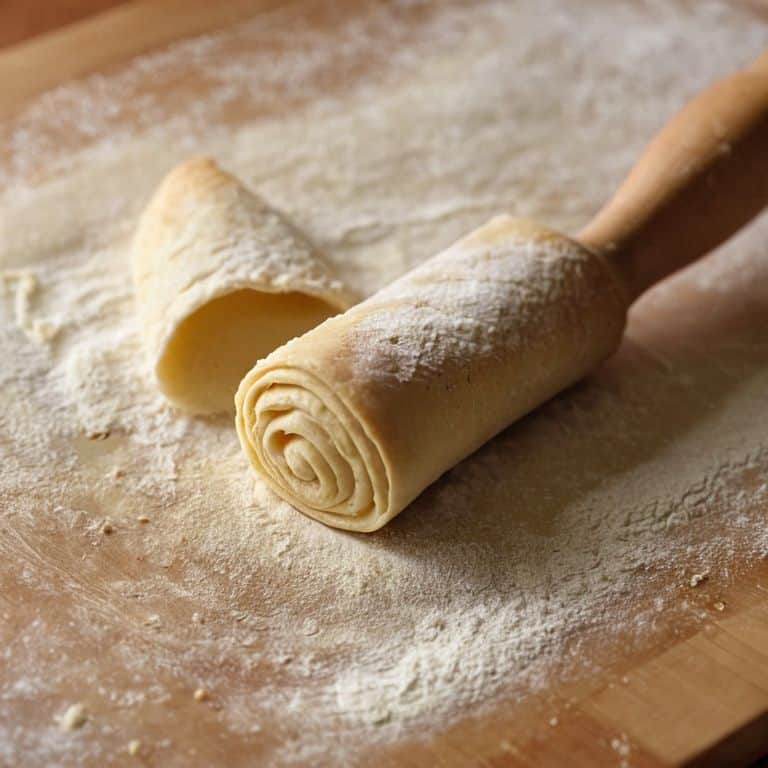
- 1. First, let’s start by preparing our dough and butter block, also known as the beurre manié, which is the foundation of our croissant’s signature layers. To do this, we’ll need to make sure our dough is at room temperature and our butter is softened to a pliable state, perfect for rolling.
- 2. Next, we’ll need to roll out our dough to a thickness of about 1/4 inch, making sure to maintain a consistent shape and size to ensure even lamination. As we roll, we should focus on applying gentle pressure, using the weight of the rolling pin to do the work, rather than applying too much force, which can lead to a tough, dense dough.
- 3. With our dough rolled out, it’s time to place our butter block in the center, making sure to leave a 1/2 inch border around the edges. This border is crucial, as it will help prevent the butter from escaping during the lamination process, and ensure that our croissants have a beautiful, flaky texture.
- 4. Now, we’ll begin the process of folding and turning our dough, which is where the magic of lamination really happens. To do this, we’ll fold the dough in half lengthwise, like a letter, and then rotate it 90 degrees, so that the folded edge is facing us. This process, known as a turn, will help to create the layers of butter and dough that give our croissants their signature flavor and texture.
- 5. As we continue to laminate our dough, we’ll need to repeat the process of rolling, folding, and turning several times, allowing the dough to rest and relax between each turn. This resting period, known as the relaxation time, is crucial, as it will help to prevent the dough from becoming too tense and developing a tough, chewy texture.
- 6. After several turns, our dough should start to take on a smooth, silky texture, and we’ll begin to see the layers of butter and dough forming. At this point, we can start to think about cutting and shaping our croissants, using a pastry cutter or a knife to create the signature crescent shape.
- 7. Finally, as we shape our croissants, we’ll need to make sure to leave enough space between each one to allow for even proofing and baking. This is where the final touch of finesse comes in, as we gently place our croissants on a baking sheet lined with parchment paper, and let them rise to perfection, before baking them to a golden, flaky brown.
A Guide to Laminating Dough for Croissants
As I delve deeper into the world of croissant making, I’m reminded of the importance of temperature in lamination. It’s a crucial factor that can make or break the flaky, buttery layers we all adore. To achieve the perfect laminating dough techniques, it’s essential to maintain a consistent temperature, around 75°F to 78°F, to allow the yeast to ferment and the butter to remain pliable.
When working with croissant dough, I always emphasize the role of yeast in croissant dough. It’s what gives these pastries their light, airy texture and subtle tang. However, it’s equally important to balance the yeast’s activity with the right amount of sugar and salt to avoid over-proofing. A good croissant dough recipe from scratch will always take into account the delicate interplay between these ingredients.
To take your croissant game to the next level, consider the effect of butter quality on lamination. Using high-quality, European-style butter with a high fat content will result in a more tender, flaky crust. Additionally, be mindful of common mistakes in croissant lamination, such as over-working the dough or not allowing it to rest long enough. By avoiding these pitfalls and focusing on precise technique, you’ll be well on your way to creating croissants that are truly tips for achieving flaky layers worthy of a French patisserie.
Butter and Temperature the Laminating Duo
Butter and Temperature: The Laminating Duo
When it comes to laminating dough, two elements reign supreme: butter and temperature. The quality of your butter is paramount – I only use high-quality, European-style butter with a high fat content. This ensures that my croissants are not only flaky but also rich and tender. Temperature, on the other hand, is all about control. Keeping your dough and butter at the right temperature is crucial for creating the perfect layers.
By maintaining a consistent temperature, you allow the butter to remain solid, creating a beautiful, flaky texture as it melts during baking. It’s a delicate dance between warm and cool, and one that requires patience and precision. With the right balance of butter and temperature, you’ll be well on your way to crafting croissants that are truly divine.
Yeast and Layers Crafting Flaky Croissant Dough
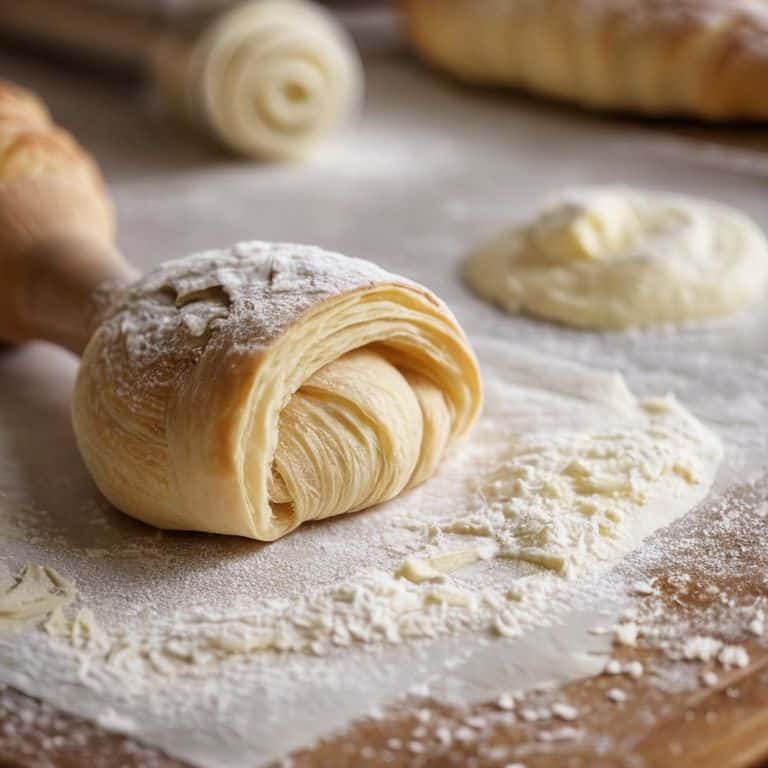
As I mix and knead the dough, I’m reminded that yeast is the unsung hero of our croissant’s rise. It’s essential to understand the delicate balance between yeast activity and the layers of butter we’ve so carefully crafted. The yeast ferments the sugars, producing carbon dioxide bubbles that get trapped between the layers, causing the dough to puff up and creating the signature flaky texture. To ensure our yeast is happy and active, we’ll maintain a warm, draft-free environment and provide it with plenty of sugar to feed on.
With each fold and roll, the layers of dough and butter multiply, creating the intricate, flaky texture that makes croissants irresistible. I like to think of this process as a delicate dance between the yeast, butter, and dough, each element working in harmony to create something truly magical. By controlling the temperature and handling the dough with care, we can coax out the full potential of our ingredients and craft croissants that are both beautiful and delicious.
Elevating Your Croissant Game: 5 Essential Tips for Laminating Dough
- Laminating in the morning: Start with a relaxed dough, and remember to keep your butter at the perfect temperature – not too hard, not too soft – to ensure seamless integration
- Rotate, don’t overwork: Gently rotate your dough 90 degrees after each fold to maintain even layers and avoid developing the gluten, which can lead to tough, dense croissants
- Respect the rest: Allow your dough to rest and relax between laminations, giving the yeast time to do its magic and the gluten to unwind – this step is crucial for achieving that signature flakiness
- Keep it cool: Maintain a consistent, cool environment for your dough to prevent the butter from melting and the yeast from over-activating, ensuring your croissants rise with elegance and poise
- Fold with finesse: Use a light touch when folding your dough, applying gentle pressure to avoid pushing out the butter and compacting the layers – think of it as a delicate waltz between the dough, butter, and your skilled hands
Mastering the Art of Laminating Dough: 3 Key Takeaways
Laminating dough is an art that requires patience, precision, and a deep understanding of the intricate dance between butter, temperature, and yeast – with practice, you’ll be crafting flaky, golden croissants like a Parisian pro
Temperature control is crucial: ensuring your butter is at the perfect temperature and your dough is rested at the right time can make all the difference between a tender, layered croissant and a dense, disappointing one
Remember, the true magic of laminating dough lies not just in the technique, but in the attention to detail – from the quality of your ingredients to the gentle touch with which you fold and roll your dough, every element contributes to the creation of a truly exceptional, edible work of art
The Heart of Croissant Magic
Laminating dough is not just a technique, it’s an art form that requires patience, precision, and a deep understanding of the harmonious marriage between butter, layers, and temperature – it’s where the ordinary becomes extraordinary, and the essence of a perfect croissant is born.
Alison Lawson
The Art of Laminating: A Journey to Flaky, Buttery Bliss

As we conclude our journey through the world of laminating dough for croissants, let’s take a moment to reflect on the key elements that make this process truly special. From the importance of temperature control to the delicate balance of yeast and layers, each step plays a crucial role in crafting that perfect, flaky crust. By mastering the art of laminating, you’ll be well on your way to creating croissants that are not only delicious but also visually stunning, with a texture that’s both crispy and tender.
So, as you embark on your own laminating adventures, remember that the true magic lies not just in the technique, but in the creative freedom it affords. Don’t be afraid to experiment, to try new flavors and designs, and to push the boundaries of what’s possible with this ancient, yet endlessly versatile, art form. With practice, patience, and a willingness to take risks, you’ll be creating buttery, flaky masterpieces that will impress even the most discerning palates, and leave everyone wondering: what’s your secret?
Frequently Asked Questions
What happens if my butter is too soft or too hard for laminating, and how can I adjust it for perfect layering?
The butter conundrum! If it’s too soft, it will melt and tear the dough, while too-hard butter won’t distribute evenly. To adjust, simply leave soft butter in the fridge for 10 minutes or let hard butter sit at room temperature for 30 minutes. This will yield the perfect consistency for delicate, flaky layers.
Can I use a stand mixer with a dough hook attachment to laminate the dough, or is it better to do it by hand?
While a stand mixer with a dough hook can help with initial mixing, I recommend finishing the lamination process by hand to maintain control and gentle handling, ensuring those delicate layers form perfectly.
How do I know when my croissant dough has been laminated enough, and what are the signs of over- or under-laminating?
The laminating process is an art that requires a bit of intuition. For me, it’s all about the feel and appearance of the dough – when it’s smooth, even, and has a subtle sheen, I know I’ve reached the perfect balance of layers. Over-laminating will leave your dough tough and dense, while under-laminating will result in a lackluster flake.