As a chocolatier and pastry consultant, I’ve often heard that mastering a guide to laminated dough is a daunting task, reserved for the most skilled bakers. But I’m here to tell you that this couldn’t be further from the truth. With a little patience and practice, anyone can create those flaky, crispy pastries that are the hallmark of a well-made laminated dough. I still remember my first attempt at making croissants – it was a disaster, but it sparked a passion in me to understand the intricacies of layering butter and dough.
In this article, I’ll share my honest, no-hype advice on how to create perfect laminated dough from scratch. You’ll learn the importance of temperature control and how to layer the dough to achieve those signature flakes. I’ll walk you through the process, step by step, and provide you with the practical tips and tricks I’ve gathered from my years of experience working in top pastry kitchens. By the end of this guide, you’ll be equipped with the knowledge and confidence to tackle even the most challenging laminated dough recipes, and you’ll be well on your way to creating delicious, professional-quality pastries in the comfort of your own home.
Table of Contents
Guide Overview: What You'll Need
Total Time: 2 hours 30 minutes
Estimated Cost: $20 – $40
Difficulty Level: Intermediate
Tools Required
- Stand Mixer (with a dough hook attachment)
- Rolling Pin (for rolling out dough)
- Measuring Cups (for accurate ingredient measurement)
- Measuring Spoons (for precise ingredient measurement)
- Pastry Brush (for egg wash application)
- Bench Scraper (for scraping dough off surfaces)
- Sharp Knife (for trimming dough edges)
- Cutting Board (for a clean surface to work on)
Supplies & Materials
- All-Purpose Flour (for dough creation)
- Salt
- Sugar
- Unsalted Butter (softened, for laminating)
- Eggs (for egg wash)
- Water (for dough hydration)
- Yeasts (optional, for fermentation)
Step-by-Step Instructions
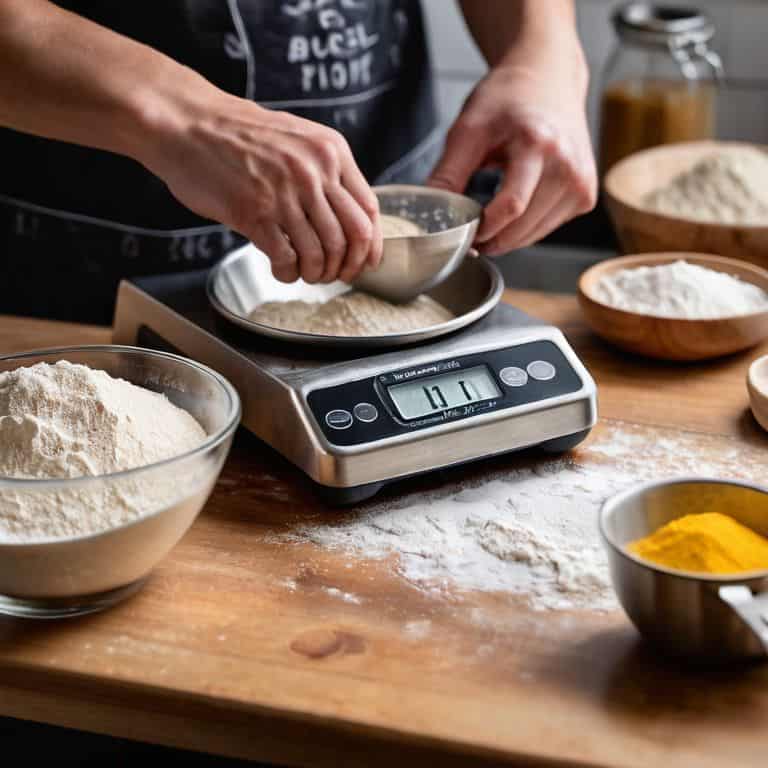
- 1. First, let’s start with the foundation of laminated dough: temperature control. It’s essential to keep your ingredients at the right temperature to achieve the perfect layering. I always make sure my butter is at room temperature, around 72°F to 76°F (22°C to 24°C), and my flour is fresh and stored in a cool, dry place.
- 2. Next, combine 1 1/2 cups of warm milk (around 105°F to 115°F or 40°C to 46°C) with 1/4 teaspoon of active dry yeast and 1 tablespoon of granulated sugar in a small bowl. Stir gently to dissolve the yeast and let it sit for about 5 to 10 minutes, or until the mixture becomes frothy and _emits a yeasty aroma_. This step is crucial for the dough to rise properly.
- 3. In a large mixing bowl, whisk together 3 1/2 cups of all-purpose flour, 1 teaspoon of salt, and 1/4 cup of granulated sugar. Add the yeast mixture, 1/2 cup of unsalted butter, melted, and 1 large egg, beaten. Mix the dough using a stand mixer with a dough hook attachment or a wooden spoon until it comes together in a smooth, elastic ball.
- 4. Knead the dough on a lightly floured surface for about 10 minutes, until it becomes _smooth and elastic_. You can also use a stand mixer with a dough hook attachment for this step. Make sure to knead the dough long enough to develop the gluten, which will give your laminated dough its characteristic layers.
- 5. Once the dough is kneaded, shape it into a ball and place it in a lightly oiled bowl, turning the dough to coat it evenly. Cover the bowl with plastic wrap and let the dough rise in a warm, draft-free place for about 1 hour, or until it has _doubled in size_. This step is essential for the dough to develop its flavor and texture.
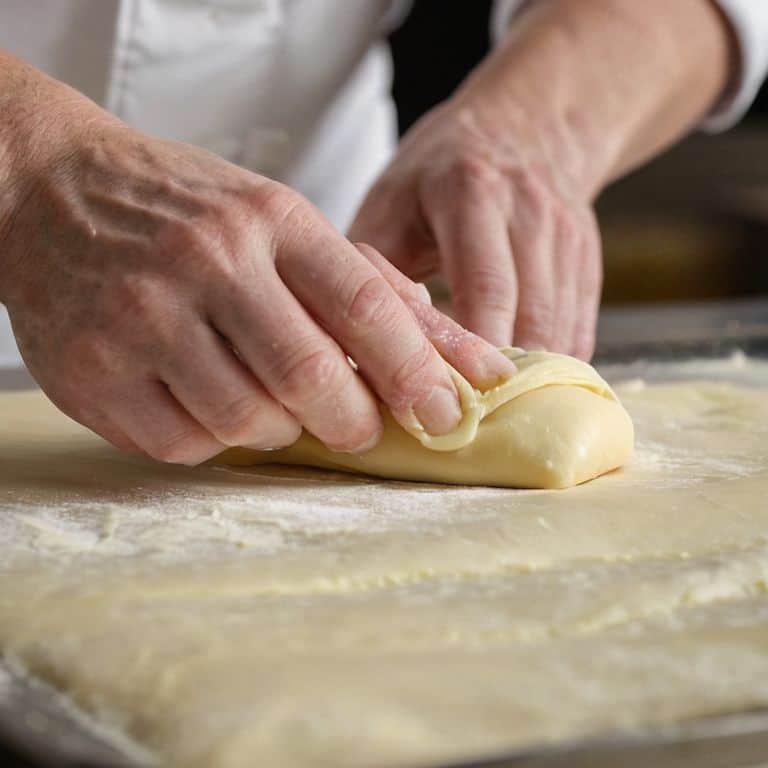
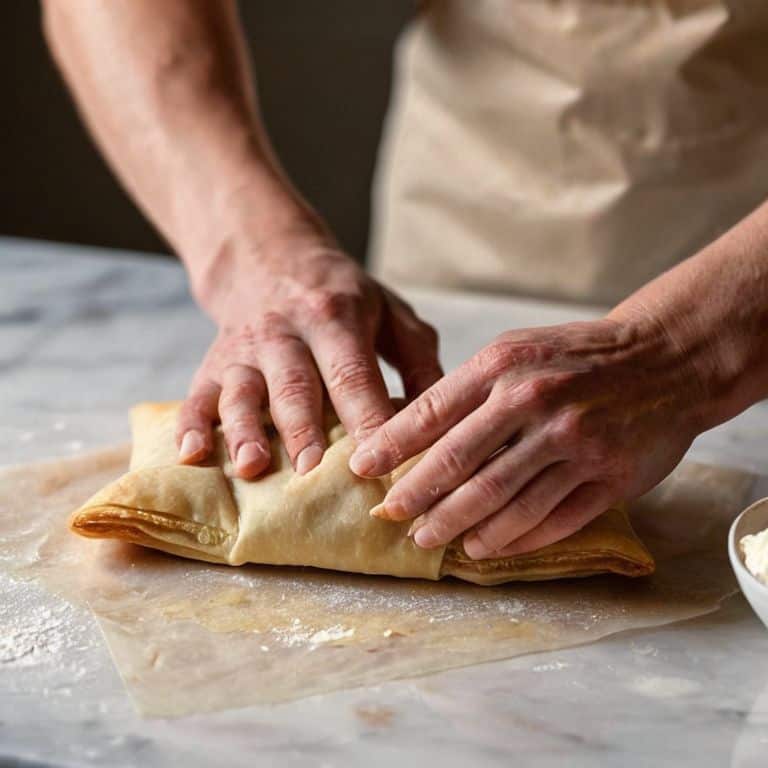
- 6. On a lightly floured surface, roll out the dough to a rectangle about 1/4-inch thick. Spread 1/2 cup of unsalted butter, softened, evenly over the center of the dough, leaving a 1-inch border on either side. Fold the 1-inch border over the butter, then fold the dough in half lengthwise, like a letter. This is the first lamination, and it’s crucial to get it right for the layers to develop properly.
- 7. Rotate the dough 90 degrees, so the folded edge is facing you. Roll out the dough to a rectangle again, about 1/4-inch thick. Repeat the lamination process two more times, for a total of three folds. After the final fold, use a pastry brush to remove any excess flour from the dough and wrap it tightly in plastic wrap. Refrigerate the dough for at least 30 minutes to allow the gluten to relax and the butter to firm up.
A Guide to Laminated Dough
As I work with laminated dough, I’ve come to realize that laminating dough techniques are all about precision and patience. It’s essential to understand that layering butter in pastry is not just about slapping on some butter and folding the dough; it’s an art that requires finesse. One of the most common mistakes in laminated dough is overworking the dough, which can lead to a tough, dense pastry.
To avoid this, it’s crucial to allow the dough to relax, giving the gluten time to unwind. This is where understanding dough relaxation comes into play. By giving the dough ample time to rest, you’ll be able to roll it out smoothly and evenly, avoiding any tears or cracks. When it comes to tips for rolling laminated dough, I always say that it’s all about gentle, consistent pressure.
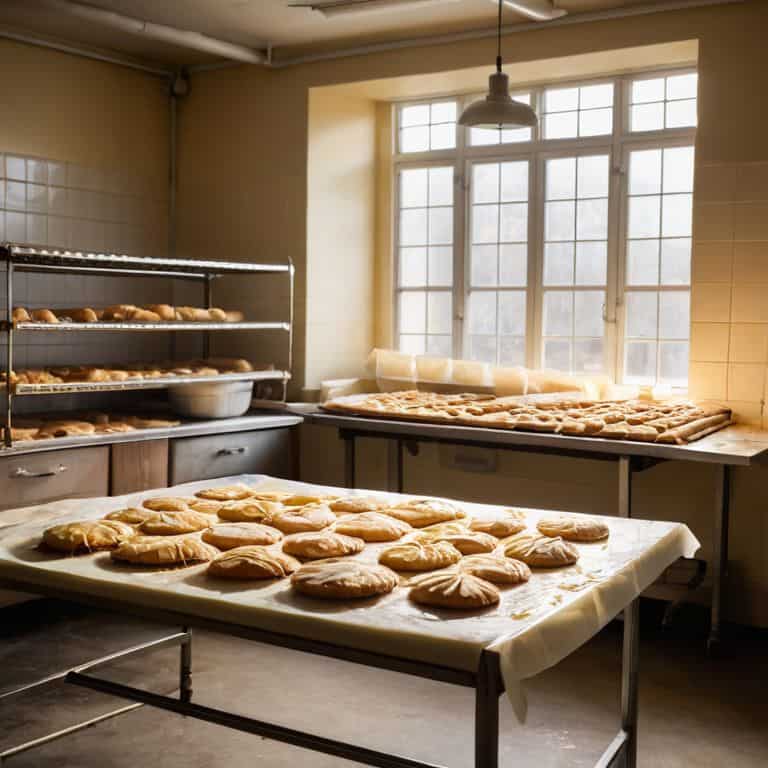
For those who want to plan ahead, freezing laminated dough for later use is a great option. Simply wrap the dough tightly in plastic wrap or aluminum foil and store it in the freezer for up to several months. When you’re ready to use it, simply thaw the dough overnight in the refrigerator and proceed with your recipe. By following these tips and techniques, you’ll be well on your way to creating beautiful, flaky pastries that are sure to impress.
Avoiding Common Mistakes in Layering
When layering, it’s crucial to maintain a consistent temperature, as this affects the butter’s pliability. I’ve seen many a novice chocolatier and pastry chef struggle with this, resulting in a tough, dense dough. To avoid this, ensure your butter is at room temperature and your dough is chilled, but not frozen. As you roll out the dough, pay attention to its texture – if it starts to tear or becomes too soft, refrigerate it for a few minutes to firm up.
By being mindful of these details, you’ll be able to achieve the perfect layers, and your pastries will be all the better for it. Remember, precision is key in laminating dough, and with practice, you’ll develop the touch and intuition to create flawless, flaky layers every time.
Laminating Dough Techniques Uncovered
To master laminated dough, one must understand the intricacies of layering. It’s a delicate dance between butter and dough, where temperature and timing are paramount. I recall my days in Belgium, where I learned the art of laminating from a seasoned patissier. The key, I found, lies in maintaining a consistent temperature – around 18°C to 20°C – to ensure the butter remains pliable and the dough relaxed. As you fold and roll the dough, you’ll begin to see the layers form, and with each successive fold, the pastry will become more refined and delicate.
By controlling the lamination process, you’ll unlock the secrets to creating flaky, tender croissants and danishes that shatter in your mouth. It’s a technique that requires patience, precision, and practice, but trust me, the reward is well worth the effort. With each successful batch, you’ll find yourself honing your skills, and soon, you’ll be crafting pastries that rival those of the finest bakeries.
Elevating Your Craft: 5 Essential Tips for Mastering Laminated Dough
- Maintain a consistent refrigerator temperature between 38°F and 40°F to ensure proper dough relaxation and butter firmness
- Use a high-quality, European-style butter with a high fat content (around 82%) for optimal layering and flakiness
- Always keep your workspace and tools at room temperature, as cold surfaces can cause the butter to firm up too quickly, leading to uneven lamination
- Limit the number of folds to 3-4 times, as over-folding can lead to a dense, tough pastry – remember, patience is key when working with laminated dough
- Rest your dough for at least 24 hours after the final fold to allow the gluten to relax, resulting in a more tender, flaky, and crispy final product
Mastering Laminated Dough: Key Takeaways
Laminating dough is not just about following a recipe, but understanding the chemistry behind the layering process, where temperature and timing are crucial for achieving the perfect flaky texture
Precision is key: maintaining the right temperature for your butter and dough, and ensuring each layer is evenly rolled out, will make all the difference in the quality of your final pastry
Practice makes perfect, and don’t be discouraged by initial failures – with patience and persistence, you’ll develop the skills to create exquisite, professional-grade laminated dough pastries that will impress even the most discerning palates
The Heart of Laminated Dough
Laminated dough is not just about folding butter and flour together, it’s an art of precision, patience, and passion – where each layer tells a story of dedication and each flake a testament to perfection.
Juliette Le Roux
Mastering the Art of Laminated Dough
As we conclude this journey through the world of laminated dough, remember that precision and patience are your greatest allies. We’ve covered the fundamentals of layering, from the initial mixing of ingredients to the delicate process of folding and resting the dough. By mastering these techniques and avoiding common mistakes, you’ll be well on your way to creating flaky, crispy pastries that impress and delight. Whether you’re a seasoned baker or just starting out, the key to success lies in understanding the why behind each step, and being willing to practice and refine your craft.
As you continue to experiment and push the boundaries of what’s possible with laminated dough, keep in mind that perfection is achievable with dedication and practice. Don’t be afraid to try new things, to innovate and experiment with different ingredients and techniques. With time and effort, you’ll develop a sense of intuition and creative freedom that will allow you to craft truly unique and breathtaking pastries. So go ahead, get your hands flour-covered, and join me in the pursuit of pastry perfection!
Frequently Asked Questions
What is the ideal temperature for laminating dough to achieve the perfect flaky texture?
For me, the ideal temperature for laminating dough is between 18°C and 20°C. This cool environment helps to prevent the butter from melting, allowing it to layer beautifully and create that perfect flaky texture. Trust me, temperature control is key to achieving pastry perfection.
How do I prevent the butter from melting during the lamination process?
To prevent butter from melting, I always keep my ingredients and workspace at a consistent, cool temperature. I also handle the dough gently, minimizing pressure that can cause the butter to soften. Remember, precision is key – a thermometer is your best friend during lamination. Aim for a dough temperature between 18°C and 20°C for optimal layering.
Can I use a stand mixer with a dough hook attachment to simplify the laminating process?
While a stand mixer with a dough hook can help with initial mixing, I advise against relying solely on it for laminating. The process requires a delicate touch, and over-mixing can lead to tough, dense pastries. Use the mixer for the initial dough development, then finish with gentle, manual folding to preserve the layers.