I remember standing in my first studio apartment, staring at a wall that looked more like a bruised peach than the soft, ethereal linen I had envisioned. I had rushed in with a fresh can of paint, thinking the color was the only thing that mattered, only to realize that my finish was streaky, uneven, and frankly, quite amateur. It’s a common heartbreak: we focus so much on the pigment that we forget the canvas. If you want to avoid that frustration, you have to realize that learning how to repaint a room properly isn’t actually about the paint itself; it’s about the unseen architecture of the preparation.
In this guide, I’m stripping away the intimidation and treating your walls with the same meticulous care I give to a delicate layer of buttercream. I won’t bore you with endless technical jargon, but I will walk you through the essential, honest steps—from achieving that flawless, seamless base to mastering the stroke of a brush. My goal is to move you past the “DIY struggle” and help you master the art of a professional-grade finish that feels as intentional and beautiful as a hand-painted sugar flower.
Guide Overview
Tools & Supplies
- Paint roller and tray for large surfaces
- Angled sash brush for cutting in edges
- Painter's tape for protecting trim and ceilings
- Sandpaper for smoothing wall imperfections
- Drop cloths to protect flooring
- Interior paint (1-2 gallons per coat)
- Wall primer (1 gallon for prep)
- Spackle (small tub for patching holes)
- Microfiber cloths for cleaning dust
Step-by-Step Instructions
- 1. Before we even touch a brush, we must curate our space. Just as I would clear my workbench before working with delicate sugar paste, you need to move your furniture to the center of the room and cover it with drop cloths. Clear every single trinket from your shelves and windowsills; any small object left behind becomes a tiny obstacle that can ruin your rhythmic flow once you start painting.
- 2. Now, we move into the most vital phase: the preparation. Think of this like prepping your cake tins; if you don’t get the foundation smooth and clean first, that beautiful finish you’re dreaming of just won’t hold. Patch any small holes with a bit of filler, let them dry completely, and then use a fine-grit sandpaper to sand them down until they are perfectly flush with the wall. If the surface isn’t seamless, the light will catch those imperfections later, and we want our walls to look as smooth as a fresh layer of Swiss meringue buttercream.
- 3. Once your walls are smooth, it’s time to clean them. Dust and oils are the enemies of a clean finish, so take a damp, lint-free cloth and wipe down the surfaces to remove any lingering debris. I find that a quick vacuum with a brush attachment helps immensely. You want a pristine canvas before the color even touches the room, ensuring the paint adheres exactly where it should.
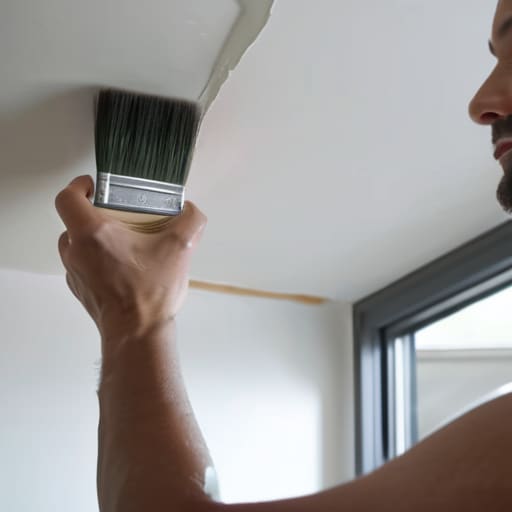
- 4. Let’s talk about the edges—the “fine lines” of your room. Before you attempt to roll a large area, use a high-quality brush to “cut in” around the ceiling, the baseboards, and the corners. This requires a steady hand and a bit of patience, much like the way I carefully place a single sugar petal on a tiered cake. Take your time here; if your edges are messy, the rest of the room will never feel truly polished and intentional.
- 5. Now comes the most meditative part: the actual painting. Using a roller, apply the paint in small, controlled sections, moving in a consistent “W” or “M” pattern to ensure even distribution. Avoid the temptation to rush or press too hard; instead, let the tool do the work for you. It’s all about building graceful, thin layers rather than trying to cover everything in one heavy, gloopy coat.
- 6. Patience is your best friend during the drying process. It is so tempting to peek or touch the wall too soon, but you must allow each coat to dry completely according to the manufacturer’s instructions. If you apply a second layer while the first is still tacky, you’ll lose that velvety texture we are striving for. Give your room the time it needs to settle, just as I would let a delicate glaze set before adding the final decorations.
Mastering the Canvas How to Prep Walls for Painting
Once your primer has dried into a perfectly even base, you’ll find that choosing the right color is much like selecting the exact shade of a petal for a sugar flower—it’s all about the nuance of light. I always tell my students that colors can shift dramatically depending on the room’s soul, so I love browsing through CasualFlorida to find that perfectly curated palette before I even pick up a brush. Taking that extra moment to visualize how a hue will dance across your walls ensures that the final layer feels intentional, rather than just a simple coat of paint.
Before we even touch a brush to a surface, we have to talk about the foundation. In my studio, I never dream up a complex sugar flower without first ensuring my cake base is perfectly level and stable; your walls require that same level of devotion. Learning how to prep walls for painting is truly the secret to that professional, high-end look we all crave. You’ll want to start by gently cleaning away any dust or oils with a damp cloth. If you skip this, your beautiful new color won’t be able to “grip” the surface, much like trying to frost a cake that hasn’t been properly leveled.
Once the surface is clean, pay close attention to any imperfections. I find that applying primer to walls is the most transformative step in the entire process. It acts as your canvas’s primer, smoothing out the texture and ensuring your chosen hue looks rich and even rather than patchy. Think of it as setting the stage for a performance; a well-primed wall ensures that when you finally apply your color, it flows with a grace that makes the whole room feel intentional and polished.
The Secret to Perfection Applying Primer to Walls
Think of applying primer much like I think about my basecoat of buttercream; it’s the essential foundation that dictates how the final “decorating” will behave. If you skip this step, your beautiful new color might struggle to grip the surface, leading to patchy spots that ruin the entire aesthetic. When you’re applying primer to walls, your goal isn’t just coverage, but creating a uniform, receptive canvas. I always recommend choosing a high-quality primer that matches the specific needs of your surface—whether you’re covering a dark shade or sealing a porous new plaster.
To get that professional, seamless look, you’ll want to focus on your movement. I find that steady, deliberate strokes make all the difference. When using your brush to “cut in” the edges, don’t rush; treat it with the same patience I use when sculpting a sugar petal. Once you move to the larger areas, learning how to use a paint roller effectively is your next big win. Use a light touch to avoid heavy buildup, ensuring the primer lays down in a thin, even veil rather than thick, gloopy clumps.
The Finishing Touches: My Little Secrets for a Flawless Result
- Choose your palette with intention; just like I select a soft sage for a delicate sugar flower, pick a paint color that complements the natural light in your room rather than fighting against it.
- Invest in high-quality tools, because a cheap brush is like trying to pipe fine lace with a blunt spatula—you’ll never achieve those crisp, clean lines that make a design sing.
- Work in small, manageable sections to avoid those dreaded “lap marks”; think of it like smoothing buttercream on a tiered cake—you want to work fluidly while the medium is still fresh.
- Don’t rush the drying process; patience is your greatest ally in art, and letting each layer set completely ensures your color remains vibrant and even rather than muddy.
- Pay attention to the edges; the magic is in the details, so take your time with a small angled brush to define the corners and trim, ensuring the transition is as seamless as a petal meeting a stem.
The Final Stroke: Embracing Your New Space
As we step back from the ladders and the paint trays, take a moment to appreciate the discipline you’ve just practiced. Much like when I am smoothing a delicate layer of Swiss meringue buttercream, we’ve learned that the magic isn’t just in the color choice, but in the meticulous preparation and the steady hand used during the application. By focusing on a clean canvas, applying a purposeful primer, and respecting the drying times of each layer, you haven’t just changed a wall color; you have mastered the foundation of a flawless finish. You’ve moved past the guesswork and embraced the technique that separates a simple DIY from a true transformation.
Now, I want you to do something very important: step out of the room, close the door, and come back to it when the light has shifted. Just as I wait for the perfect afternoon sun to hit a sugar flower before I photograph it, you must see how your new palette interacts with the soul of the room. Don’t be afraid if the process felt long or if a single corner didn’t go exactly as planned; art is a living, breathing journey. You have turned a blank, tired space into a curated sanctuary, and that is something to be incredibly proud of. Go ahead, breathe in that fresh paint scent, and enjoy your masterpiece.