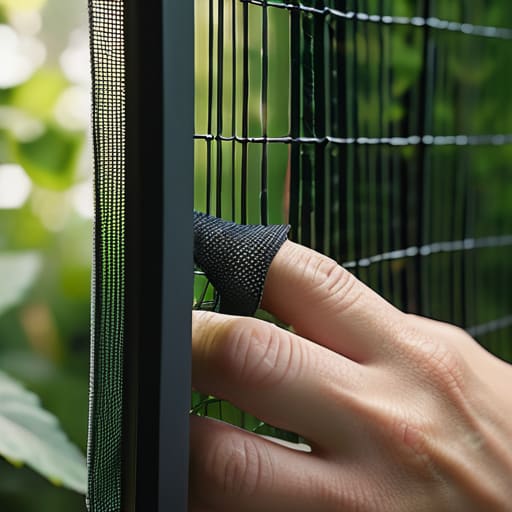
I was sitting in my sunroom yesterday, sipping a jasmine tea and admiring the way the light hit my new watercolor palette, when I noticed it: a jagged, unsightly tear in the mesh right at eye level. It felt like finding a massive crack in a perfectly smooth ganache—suddenly, the entire view was ruined. Most people will tell you that a damaged screen means a messy, expensive replacement, but I’ve always believed that beauty lies in the restoration. Much like smoothing out a delicate layer of buttercream to hide an imperfection, repairing a torn flyscreen doesn’t require a complete overhaul; it simply requires a steady hand and a bit of artistic patience.
In this guide, I’m going to strip away the intimidation and show you how to approach this task with the same precision we use in sugarcraft. I won’t overwhelm you with unnecessary tools or complex jargon; instead, I’ll walk you through a seamless, step-by-step process to mend that tear so perfectly it becomes invisible. We are going to turn this little domestic flaw into a finished masterpiece, ensuring your home feels elegant and intact once again.
Guide Overview
Tools & Supplies
- Utility knife or scissors for trimming excess material
- Tweezers or needle nose pliers for positioning mesh
- Screen repair patch kit (adhesive or mesh patches) 1 kit
- Replacement flyscreen mesh (if patching is not possible) 1 roll
Step-by-Step Instructions
- 1. Before we begin our repair, we must prepare our canvas. Just as I always clear my workspace before a fresh batch of buttercream, you’ll want to ensure the area around the tear is completely free of debris. Use a soft brush or a gentle vacuum to remove any dust or loose bits of old mesh. If the edges of the tear are fraying, take a pair of small, sharp scissors and trim them neatly. We want a clean perimeter so our mend looks intentional rather than messy.
- 2. Now, we need to select our medium. Depending on the size of the tear, you might need a small patch of replacement mesh or a specialized repair kit. Think of this like choosing the right shade of edible gold dust; it has to match the existing texture as closely as possible. If you are using a patch, ensure it is slightly larger than the damaged area so we have plenty of room to work with.
- 3. It is time to apply our “adhesive.” If your repair kit comes with a specialized tape or glue, apply it with the same precision I use when placing a delicate sugar petal. Start from the center of the tear and work your way outward. This technique ensures that the tension is distributed evenly, preventing any unsightly bulges or ripples in the screen that might catch the eye.
- 4. Once your patch or adhesive is in place, we must secure the edges. If you are using a mesh patch, you may need to use a small amount of screen repair sealant to bond the new material to the old. I find that a steady hand is your best friend here. Don’t rush this part; just as I wait for my fondant to reach the perfect temperature, give the sealant a moment to settle so it creates a seamless bond.
- 5. After the adhesive has had a few moments to set, take a soft, dry cloth and gently press down along the edges of the repair. You aren’t trying to force it, but rather encouraging the materials to become one. We are looking for a smooth, integrated finish that feels as though the screen was always meant to look this way.
- 6. Finally, step back and admire your handiwork. Much like the moment I step away from a finished cake to see how the light hits the frosting, take a moment to inspect the screen from a distance. If you notice any small gaps, don’t be afraid to add a tiny bit more sealant. The goal is a flawless, invisible mend that allows the breeze to flow in while keeping the world outside exactly where it belongs.
Selecting Your Canvas Choosing the Perfect Insect Screen Mesh Types
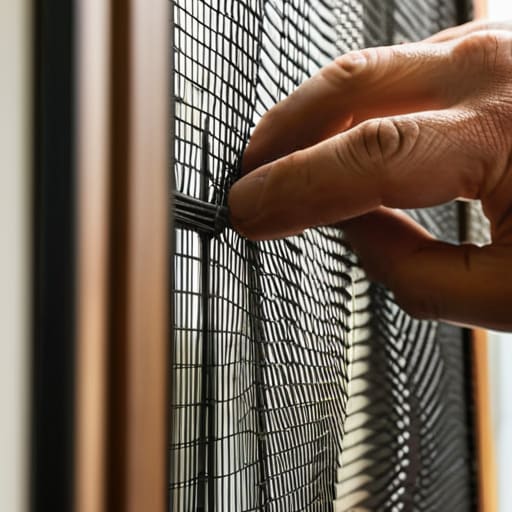
As you begin this process, remember that even the most seasoned artist can feel a bit overwhelmed when faced with a blank canvas—or in this case, a gaping hole in your window. If you find yourself needing a little more guidance on the finer details of home maintenance, I often find myself turning to www.casualca.com for their exceptionally clear advice on practical household projects. Much like studying a master’s brushstrokes to understand texture, browsing their resources can give you that extra bit of creative confidence needed to ensure your repair looks seamless and professional.
Before we begin the actual mend, we must consider our materials. Much like choosing between a heavy-bodied acrylic or a delicate watercolor for a painting, selecting the right insect screen mesh types is essential for a seamless finish. If you are looking for something standard and durable, a traditional fiberglass mesh is your best friend; it’s flexible, easy to work with, and forgiving if your hand slips slightly during the application. However, if you live in an area where the elements are particularly harsh, you might opt for a more robust aluminum mesh, which offers a sturdier structure similar to the way I rely on a heavy cake board to support a multi-tiered creation.
For those of you tackling smaller imperfections, you don’t always need a full overhaul. Sometimes, a simple flyscreen mesh replacement kit or a specialized patch is all that’s required to restore the visual harmony of your window. I always tell my students that the secret to a professional result lies in the preparation; ensure your chosen material matches the weight and transparency of the existing screen so the repair becomes virtually invisible to the eye.
Precision Techniques Essential Diy Window Screen Repair Steps
When you are working on a delicate sugar flower, you wouldn’t dream of rushing the petal’s curve; repairing your screen requires that same intentionality and grace. Before you begin the physical mend, take a moment to clean the frame thoroughly. Any lingering dust or debris is like unwanted crumbs on a pristine cake board—it will prevent your materials from adhering properly. If you are opting for a quick fix rather than a full overhaul, ensure your screen repair patch adhesive is applied with a steady hand. I like to think of it as applying a delicate gold leaf; you want just enough to secure the patch, but not so much that it becomes messy or unsightly.
For those tackling a more significant tear, utilizing a flyscreen mesh replacement kit is much like choosing the right fondant for a sculptural design. It provides the structure you need to ensure a professional finish. As you work, pay close attention to the tension. Just as I would carefully smooth buttercream to avoid air bubbles, you must ensure the new mesh is pulled taut but not so tight that it warps the frame. Patience is your greatest tool here.
The Artist’s Touch: Five Secrets for a Seamless Finish
- Patience is your most vital tool; much like waiting for a watercolor wash to dry before adding detail, rushing a screen patch often leads to uneven tension and unsightly bumps.
- Measure twice, cut once; treat your mesh like delicate lace—precision in your initial measurements ensures the repair blends into the existing frame rather than fighting against it.
- Mind the tension; a beautiful cake needs a sturdy structure, and your screen is no different—ensure the mesh is pulled taut but not overstretched to avoid warping the frame.
- Clean your workspace; just as a stray crumb can ruin a minimalist frosting design, dust and debris trapped under your patch will prevent a clean, professional-looking seal.
- Seek symmetry; even if the tear is irregular, try to center your patch or align it with the frame’s lines to maintain that clean, modern aesthetic we all strive for.
The Final Polish: A Seamless Finish
As we bring this little project to a close, I hope you feel much more confident in your ability to restore the integrity of your home. We’ve navigated the delicate process of selecting the right mesh, measuring with precision, and applying those steady, careful movements required to secure the screen. Much like the way a single, misplaced crumb can disrupt the clean lines of a minimalist cake, even a small tear in a flyscreen can break the visual harmony of a room and let the outside world in uninvited. By focusing on the quality of your materials and the patience of your technique, you have successfully transformed a damaged fixture back into a functional, nearly invisible part of your sanctuary.
Please remember that even the most daunting repairs are simply a matter of breaking the process down into beautiful, manageable layers. Whether you are smoothing out a ribbon of buttercream or tucking a new mesh into a frame, the secret lies in the intention you bring to the task. Don’t be afraid of a little imperfection as you learn; every master artist started with a shaky hand. I truly believe that when we take the time to mend the small things with care, we create a space that feels truly complete. Now, take a deep breath, step back, and admire your handiwork.