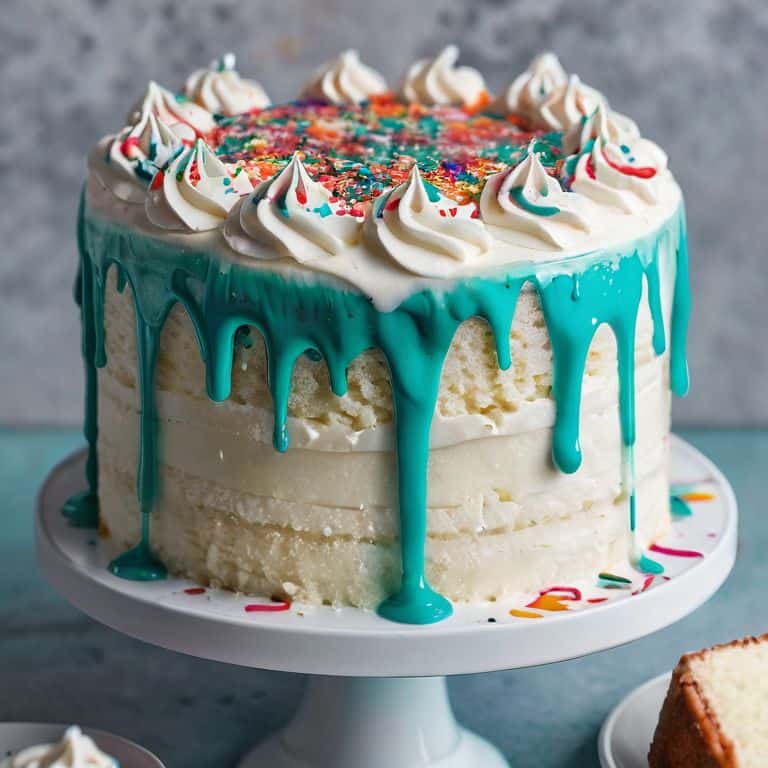
I still remember the first time I attempted to create a colored drip for a cake – it was a disaster! I had watched countless tutorials on how to make a colored drip for a cake, but somehow, my drips ended up looking more like blobs. It wasn’t until I experimented with different techniques and ingredients that I discovered the secret to achieving that perfect, oozing effect. Now, I’m excited to share my knowledge with you, so you can avoid the frustrations I faced and create a stunning colored drip that elevates your cake from ordinary to extraordinary.
In this article, I’ll guide you through the simple, yet precise steps to create a beautiful colored drip for your cake. You’ll learn how to select the right ingredients, mix the perfect consistency, and achieve a flawless finish. I’ll share my personal tips and tricks for crafting a stunning colored drip, and by the end of this tutorial, you’ll be equipped with the skills and confidence to turn your baking into beautiful art. Whether you’re a beginner or an experienced baker, this guide will provide you with the honest, no-hype advice you need to take your cake decorating to the next level.
Table of Contents
- Guide Overview: What You'll Need
- Step-by-Step Instructions
- Mastering Colored Drip Cakes
- Elevating Designs With Vibrant Chocolate Glaze Recipes
- Unleashing Vibrant Colors With Gel Food Coloring
- Elevating Your Cake Game: 5 Essential Tips for a Stunning Colored Drip
- Key Takeaways for Crafting a Breathtaking Colored Drip Cake
- The Art of Drip Perfection
- Bringing Your Colored Drip Cake to Life
- Frequently Asked Questions
Guide Overview: What You'll Need
Total Time: 1 hour 15 minutes
Estimated Cost: $10 – $20
Difficulty Level: Easy
Tools Required
- Piping bag (with small round tips)
- Electric mixer (for whipping cream or frosting)
- Measuring cups (for accurate measurements)
- Spoon or spatula (for mixing and handling colored drip mixture)
Supplies & Materials
- White chocolate or candy melts (for creating colored drip)
- Food coloring (in various colors)
- Shortening or oil (for thinning colored drip mixture)
- Cake (to apply colored drip to)
- Parchment paper (for protecting work surface)
Step-by-Step Instructions
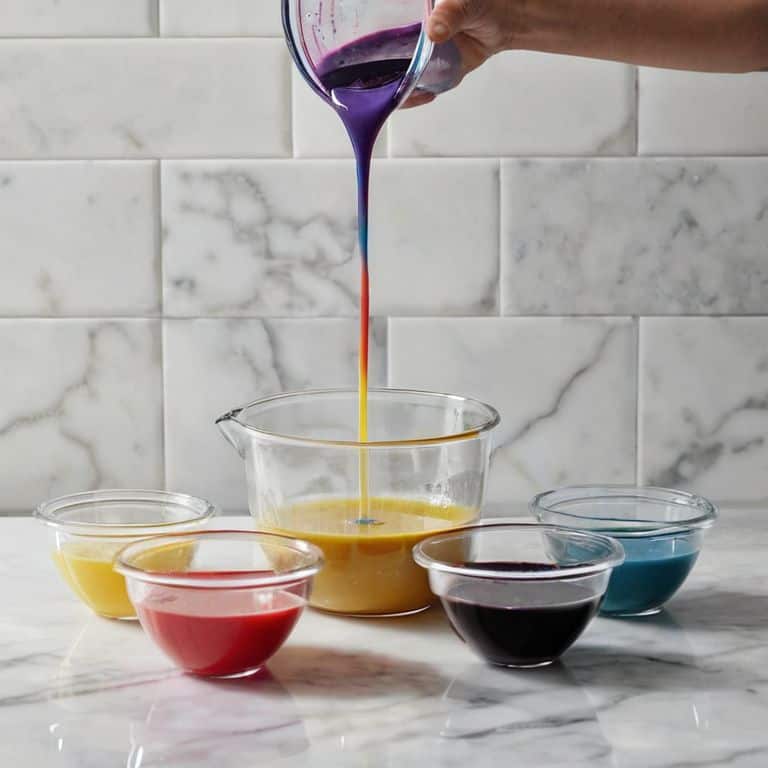
- 1. To start creating our stunning colored drip, we first need to prepare the color palette we intend to use. This involves selecting the food coloring that will give our drip its unique hue. I always find myself drawn to pastel shades for a soft, elegant look, but feel free to experiment with different colors to match your cake’s theme or the occasion it’s for.
- 2. Next, we need to make the colored drip mixture itself. This is done by combining a small amount of water with powdered sugar in a bowl until we achieve a smooth, thin consistency that’s not too runny but still easily pourable. The key here is to ensure it’s fluid enough to create a beautiful drip effect but not so thin that it loses its vibrancy.
- 3. Now, let’s add the coloring to our mixture. Start with a small amount of food coloring and mix well, gradually adding more until you achieve the desired intensity of color. Remember, it’s easier to add more color than it is to remove excess, so proceed with caution and test the color as you go.
- 4. With our colored mixture ready, it’s time to prepare our cake for the drip effect. Ensure your cake is completely frosted and set, as any imperfections will be highlighted by the drip. If necessary, add a crumb coat and a final layer of frosting to achieve a smooth surface.
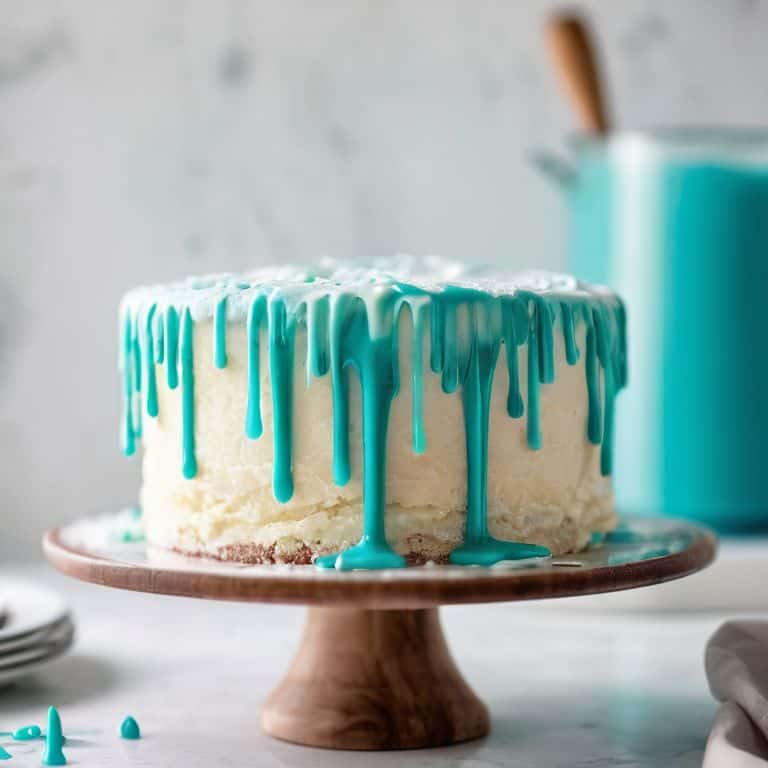
- 5. To create the drip effect, you’ll need to pour the colored mixture over the edges of the cake. Start by placing the cake on a turntable or a surface that can get messy, as the drip can be unpredictable. Using a spoon or a piping bag without a tip, slowly pour the mixture over the edge of the cake, allowing it to drip down the sides naturally.
- 6. Once you’ve achieved the desired drip effect, allow the mixture to set and harden completely. This step is crucial, as it ensures the colored drip doesn’t smear or smudge when handled. Depending on the humidity and temperature, this could take anywhere from 15 minutes to an hour.
- 7. Finally, to add an extra touch of elegance to your cake, consider enhancing the drip with additional decorations such as small sugar flowers, sprinkles, or even writing. This step allows you to personalize your cake further and make it truly unique. Remember, the key to a beautiful cake is in the details, so don’t be afraid to get creative and make it your own.
Mastering Colored Drip Cakes
As I delve deeper into the world of colorful cake designs, I’ve come to realize that mastering the drip cake technique is all about experimentation and patience. For beginners, I recommend starting with a simple drip cake technique for beginners tutorial, where you can practice the basics of creating a smooth, even drip. One of my favorite tricks is to use a high-quality best gel food coloring for cakes to achieve vibrant, rich colors that really make the cake pop.
When it comes to creating a truly show-stopping colored drip cake, it’s all about the details. I love using vibrant chocolate glaze recipes to add an extra layer of depth and flavor to my cakes. And for a really unique touch, try using cake decorating ideas with white chocolate to create a beautiful contrast with the colored drip. This technique can also be applied to cupcakes, where a colored drip effect on cupcakes can add a fun and playful touch to any dessert table.
To take your colored drip cakes to the next level, don’t be afraid to think outside the box and try new things. Whether it’s experimenting with different flavor combinations or pushing the boundaries of traditional cake design, the key is to have fun and be creative. With a little practice and patience, you’ll be well on your way to creating stunning, one-of-a-kind cakes that are sure to impress.
Elevating Designs With Vibrant Chocolate Glaze Recipes
To take your colored drip cakes to the next level, consider pairing them with a vibrant chocolate glaze. I adore experimenting with different flavors and colors to create unique glaze recipes. By combining high-quality chocolate with a touch of food coloring, you can craft a glaze that not only tastes divine but also adds an extra layer of visual appeal to your cake. For a bold look, try mixing dark chocolate with a hint of red or orange food coloring to create a deep, rich glaze.
One of my favorite techniques is to drizzle the chocolate glaze over the colored drip, allowing the two to meld together in a beautiful, swirling pattern. This adds texture and depth to the cake, making it a true showstopper. With a little practice, you’ll be able to achieve a flawless, glossy finish that elevates your cake from ordinary to extraordinary.
Unleashing Vibrant Colors With Gel Food Coloring
As I delve into the world of colored drip cakes, I’m reminded of the importance of vibrant hues in elevating a design. Gel food coloring is my go-to medium for achieving those stunning, saturated colors. With a few drops, you can transform your drip from bland to grand. I love experimenting with different shades to create unique ombre effects or to match a specific theme. The key is to start with a small amount and gradually build up the color, allowing you to maintain control over the intensity of the hue.
When working with gel food coloring, it’s essential to consider the color’s viscosity and how it will interact with the chocolate or glaze. This knowledge will help you predict the final result and make adjustments as needed. By mastering the art of combining colors and techniques, you’ll unlock a world of creative possibilities for your colored drip cakes.
Elevating Your Cake Game: 5 Essential Tips for a Stunning Colored Drip
- Choose the right consistency: Your colored drip should be thin enough to flow smoothly, but not so thin that it loses its vibrant color and becomes too runny – think of it as the perfect watercolor paint consistency
- Experiment with layering: Don’t be afraid to layer different colors to achieve a unique, ombre effect that adds depth and visual interest to your cake design
- Pay attention to temperature: The temperature of your cake and the colored drip can affect how well they set and blend together – make sure your cake is completely cooled and your drip is at room temperature for the best results
- Select the perfect color palette: Your colored drip should complement the colors of your cake and decorations – consider the occasion, the recipient’s favorite hues, and the overall aesthetic you want to achieve
- Practice, practice, practice: Like any art form, mastering the colored drip technique takes time and patience – don’t be discouraged if it doesn’t turn out perfectly on the first try, and have fun experimenting with different colors and designs
Key Takeaways for Crafting a Breathtaking Colored Drip Cake
By mastering the art of colored drip cakes, you can transform any dessert into a stunning work of art that combines elegance with a touch of whimsy, perfect for special occasions or everyday celebrations.
Experimenting with vibrant colors through gel food coloring and rich, velvety chocolate glaze recipes can add an extra layer of sophistication and visual appeal to your cakes, making them truly unforgettable.
With practice and patience, you can unlock the full potential of colored drip cakes, turning each one into a unique masterpiece that reflects your personal style and creativity, whether you’re a novice baker or an experienced pastry chef.
The Art of Drip Perfection
A colored drip is not just a design element, it’s the crowning glory that turns a simple cake into a masterpiece – with every delicate, velvety stream, you’re telling a story of elegance and whimsy.
Chloé Dubois
Bringing Your Colored Drip Cake to Life

As we conclude our journey through the world of colored drip cakes, remember that the key to creating a stunning masterpiece lies in the details. From mastering the perfect consistency of your colored drip to elevating your designs with vibrant chocolate glaze recipes, every step plays a crucial role in turning your cake into a work of art. Whether you’re a beginner or an experienced baker, the art of making a colored drip for a cake is all about experimentation and having fun with the process. Don’t be afraid to try out new gel food coloring combinations or to push the boundaries of what’s possible with your chocolate glaze.
As you put down your piping bag and step back to admire your handiwork, remember that the true beauty of cake decorating lies not just in the final product, but in the creative journey itself. So, don’t be discouraged if your first attempts don’t turn out exactly as you envisioned – with practice and patience, you’ll soon be crafting breathtaking colored drip cakes that are almost too beautiful to eat. Keep pushing the limits of your imagination, and most importantly, have fun and enjoy the process of turning your cakes into unforgettable masterpieces.
Frequently Asked Questions
What type of cake is best suited for a colored drip design?
For a stunning colored drip design, I recommend using a dense, moist cake that can hold its shape, such as a pound cake or a flourless chocolate cake. These cakes provide a smooth surface for the drip to adhere to, allowing the colors to flow beautifully and creating a truly show-stopping effect.
How do I achieve a smooth and even colored drip effect without it becoming too runny or too thick?
To achieve a smooth and even colored drip, I recommend adjusting the consistency of your glaze by adding small amounts of liquid or powdered sugar. This will help you reach the perfect viscosity. Also, make sure your cake is completely chilled, as this will help the glaze set evenly and prevent it from becoming too runny.
Can I use natural food coloring alternatives, such as beet juice or turmeric, to create a unique and vibrant colored drip for my cake?
Absolutely, you can experiment with natural food coloring alternatives like beet juice or turmeric to create a unique colored drip. Keep in mind that the colors may be more subdued, but the result can be beautifully earthy and organic. Just be sure to test the consistency and flavor before drizzling it over your cake.