As I stood in my kitchen, staring at a drip cake that had quickly devolved into a sloppy mess, I couldn’t help but think about the common drip cake mistakes to avoid that had led me to this point. It’s a hard lesson to learn, but one that has become a cornerstone of my teaching philosophy: even the most beautiful cakes can be ruined by a few simple errors. I’ve seen it time and time again, both in my own work and in the work of my students – a cake that’s almost perfect, but for a few small mistakes that make all the difference.
In this article, I’ll be sharing my top tips for avoiding those mistakes and creating a truly show-stopping drip cake. I’ll walk you through the common pitfalls that can trip you up, from incorrect temperature and humidity to poor pouring technique. By the end of this guide, you’ll have a clear understanding of how to avoid the most frequent errors and create a drip cake that’s not only delicious, but also visually stunning. Whether you’re a seasoned baker or just starting out, my goal is to provide you with the practical advice and confidence you need to take your cake decorating to the next level.
Table of Contents
Guide Overview: What You'll Need

Total Time: 1 hour 15 minutes
Estimated Cost: $10 – $30
Difficulty Level: Intermediate
Tools Required
- Rubber Spatula (for scraping and smoothing)
- Offset Spatula (for creating sharp edges)
- Turntable (optional, for easy cake display and access)
Supplies & Materials
- Cake Turntable
- Piping Bags (various sizes)
- Piping Tips (round and star tips)
- Cake Boards (at least 6 inches in diameter)
- Fondant or Buttercream (for decorating and creating the drip effect)
Step-by-Step Instructions
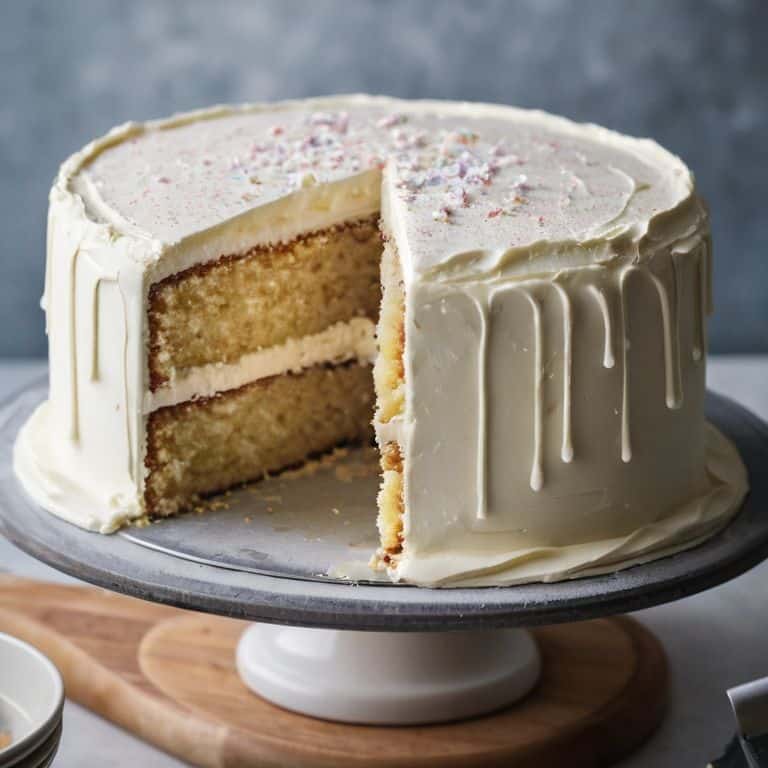
- 1. First, let’s start with the foundation of a perfect drip cake: the cake itself. To avoid a soggy mess, make sure your cake is completely cooled before you begin decorating. This might seem like a no-brainer, but trust me, it’s a crucial step that can make or break your masterpiece. Take the time to properly crumb-coat your cake, and don’t be afraid to get a little aggressive with that spatula to ensure a smooth surface.
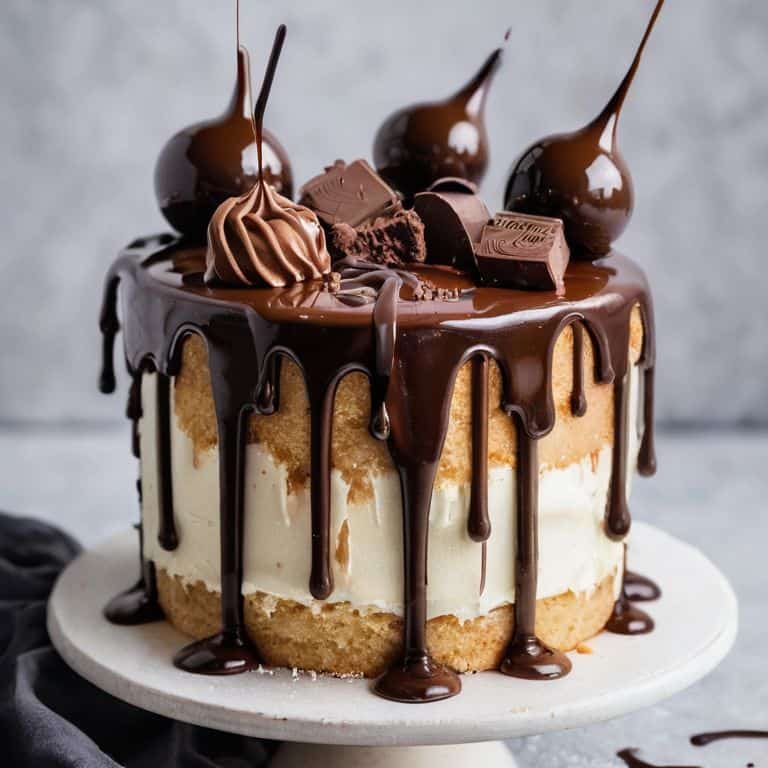
- 2. Next up, we have the drip itself. This is where things can get a little tricky, so pay close attention. To achieve that perfect, smooth drip, you’ll want to use a high-quality chocolate or glaze that’s specifically designed for drip cakes. Don’t skimp out on the good stuff, or you might end up with a drippy disaster. When heating your chocolate or glaze, be careful not to overheat it, as this can cause it to seize up and become unusable.
- 3. Now that we have our cake and drip ready, it’s time to think about the overall design. A common mistake people make when creating a drip cake is not considering the visual balance of the design. Take a step back and think about the colors, textures, and overall aesthetic you’re going for. Do you want a bold, bright look, or something more subdued and elegant? Whatever your vision, make sure to plan ahead and have a clear idea of what you want to achieve.
- 4. With your design in mind, it’s time to start adding the finishing touches. This is where the magic happens, and your cake starts to come to life. When adding decorations like fresh flowers or sprinkles, be mindful of the scale and proportion of your design. You don’t want to over-accessorize and end up with a cake that looks cluttered or busy. Instead, opt for a few, well-placed decorations that will add a touch of elegance to your masterpiece.
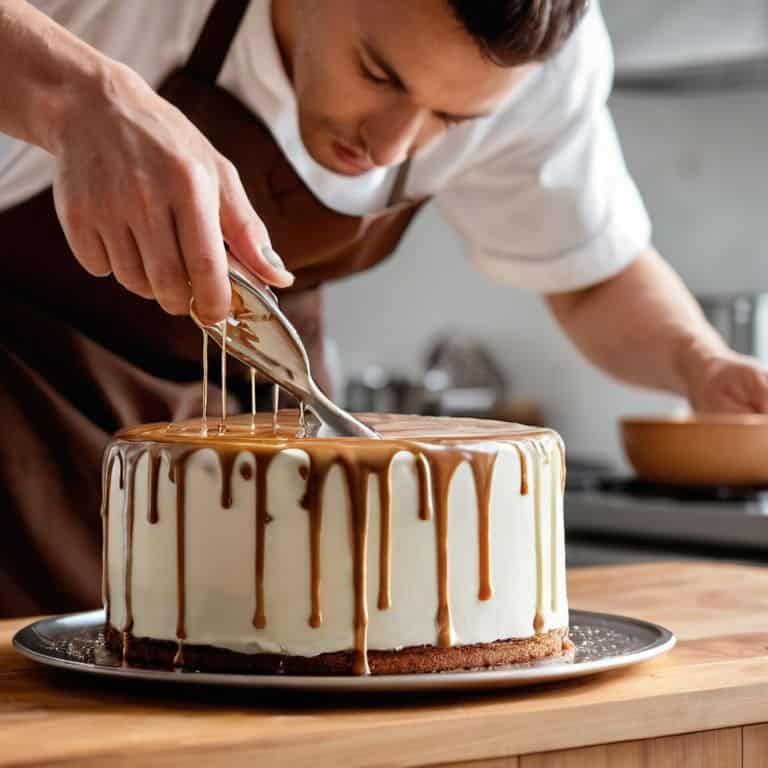
- 5. One of the most critical steps in creating a stunning drip cake is getting the drip itself just right. To achieve a smooth, even drip, you’ll want to work from the outside in. Start by drizzling a small amount of chocolate or glaze around the edges of the cake, and then slowly work your way inwards. This will help you avoid any pesky puddles or uneven drips.
- 6. As you’re working on your drip cake, it’s essential to stay flexible and adapt to any mistakes that might happen along the way. Don’t be too hard on yourself if things don’t turn out exactly as planned – after all, that’s all part of the creative process. Instead, take a deep breath, and think of any mistakes as an opportunity to get creative and try something new.
- 7. Finally, once you’ve completed your drip cake, take a step back and admire your handiwork. This is the moment when all your hard work pays off, and you get to see your beautiful creation in all its glory. To add an extra touch of elegance to your design, consider adding a decorative cake stand or pedestal. This will not only add visual interest to your cake but also help to create a sense of drama and occasion.
Avoiding Drip Cake Disasters
As I always say, perfecting drip cake consistency is key to achieving a stunning dessert. To avoid a drippy mess, it’s essential to control the temperature of your workspace and ingredients. A slight fluctuation in temperature can cause the chocolate to set too quickly or slowly, resulting in an uneven drip effect. I’ve found that working in a cool, draft-free area helps to maintain a consistent temperature, allowing me to focus on crafting the perfect drip.
When it comes to troubleshooting drip cake issues, I’ve learned that it’s all about paying attention to the smallest details. A small mistake, such as using the wrong type of chocolate or not preparing the cake surface properly, can lead to a disaster. To avoid this, I always make sure to follow a reliable drip cake recipe for beginners, and I take my time when decorating the cake. It’s also important to have a clear vision of your drip cake design inspiration before you start, to ensure that your final product turns out as desired.
By taking the time to master the basics of drip cake decorating, you’ll be well on your way to creating stunning desserts that impress. Remember, practice makes perfect, so don’t be discouraged if your first few attempts don’t turn out as expected. With patience and attention to detail, you’ll soon be crafting beautiful drip cakes that are almost too pretty to eat. Whether you’re a beginner or an experienced baker, the key to success lies in common sense and creativity, so don’t be afraid to experiment and try new things.
Perfecting Drip Cake Consistency Secrets
To achieve that perfect, velvety drip, it’s all about the consistency of your glaze. I like to think of it as the secret sauce that brings your entire cake design together. When your glaze is too thin, it can be overwhelming and pool at the bottom of your cake stand – not exactly the elegant look we’re going for. On the other hand, a glaze that’s too thick won’t flow smoothly, leaving you with an uneven, chunky texture.
So, how do you get it just right? For me, it’s all about finding that sweet spot where your glaze is still pourable, but not so thin that it loses its body. I achieve this by adjusting the ratio of powdered sugar to liquid in my recipe, and I always make sure to test it before pouring it over my cake.
Troubleshooting Temperature Control Mistakes
When it comes to temperature control, even the slightest miscalculation can throw off your entire drip cake design. I’ve found that working in a room that’s too warm can cause the chocolate to set too quickly, resulting in an uneven drip. On the other hand, a room that’s too cool can slow down the setting process, leaving you with a soggy mess. To avoid these temperature control mistakes, I recommend checking the temperature of your workspace before you start decorating. Ideally, you want to be in a room with a consistent temperature between 68-72°F (20-22°C).
By keeping a close eye on the temperature, you can ensure that your chocolate sets smoothly and evenly, giving you a beautiful, velvety drip that’s the perfect finishing touch for your cake. Remember, patience is key when it comes to temperature control, so don’t rush the process – take your time and work in a comfortable, controlled environment to achieve the best results.
My Top 5 Tips to Save Your Drip Cake from Disaster
- Ditch the rush: never pour the chocolate or candy melt too quickly, as this can cause an uneven drip and a messy finish
- Temperature tantrums are real: keep your workspace at a comfortable temperature to avoid melting or thickening the drip mixture, which can lead to a cake that’s more sloppy than sophisticated
- Get your ratios right: too much or too little drip mixture can throw off the entire design, so make sure to measure and mix with precision for a smooth, velvety finish
- Don’t skip the crumb coat: a thin layer of buttercream or ganache under the drip mixture can make all the difference in achieving a clean, sharp edge and preventing a messy cake
- Practice makes perfect: don’t be too hard on yourself if your first few drip cakes don’t turn out as expected – with time and practice, you’ll develop the skills and instincts to create stunning, one-of-a-kind masterpieces
My Top 3 Takeaways for a Drip Cake Masterpiece
To achieve a smooth, even drip, it’s crucial to perfect the consistency of your chocolate or candy melt, which I like to think of as the ‘goldilocks’ zone – not too thick, not too thin
Temperature control is key to avoiding disasters like a drippy mess or a cake that’s too sticky, so make sure you’re working in a room with a consistent temperature and using high-quality chocolate
Don’t be afraid to experiment and have fun with different colors and patterns – after all, that’s what makes a drip cake truly unforgettable, and with a little practice, you’ll be creating showstoppers that rival my own Instagram creations
A Word of Wisdom
The most exquisite drip cakes are not just about the chocolate that drips, but about the patience that pours – avoiding mistakes is not just about technique, it’s about understanding the art of subtlety in every delicate drizzle.
Chloé Dubois
Bringing It All Together: Creating Drip Cake Perfection
As we’ve explored the world of drip cakes, it’s clear that avoiding common mistakes is key to creating a showstopper. From perfecting the consistency of your drip glaze to troubleshooting temperature control issues, every step counts in achieving a smooth, sweet masterpiece. By following the steps and tips outlined in this guide, you’ll be well on your way to creating drip cakes that are almost too pretty to eat. Remember, it’s all about attention to detail and a willingness to experiment until you find the perfect balance of flavors and textures.
So, the next time you’re tempted to rush through the process or skip a crucial step, take a deep breath and remind yourself that the end result is worth the extra effort. With practice and patience, you’ll be creating stunning drip cakes that impress and delight your friends and family. Don’t be afraid to get creative and try new things – after all, that’s what makes cake decorating such a fun and rewarding hobby. Happy decorating, and I look forward to seeing your beautiful creations!
Frequently Asked Questions
What are some common mistakes to avoid when coloring the drip on a drip cake?
When coloring the drip, I see many bakers overmixing the dye, leading to an uneven, speckled effect. To avoid this, gently fold in a small amount of gel or paste coloring until you achieve the desired hue, then stop – it’s all about subtle restraint for a smooth, ombre-like gradient.
How do I prevent the drip from becoming too thick or too thin and ruining the overall design?
To achieve the perfect drip, I swear by a simple ratio: 1 part chocolate to 2 parts heavy cream. Adjusting this balance will help you nail the ideal consistency. If it’s still too thick, warm it gently; if too thin, let it cool slightly. Remember, patience is key – it’s all about finding that sweet spot!
Can you share some tips on how to fix a drip cake that has already started to go wrong, such as if the drip starts to set too quickly or unevenly?
Don’t worry, my friends, I’ve been there too. If your drip starts to set too quickly, try gently warming it with a hair dryer or a warm cloth. For uneven drips, use a toothpick or a small knife to coax the chocolate into place. Remember, it’s all about patience and gentle touch – with a little TLC, you can still achieve a stunning, smooth finish.