I still remember the first time I tried to temper chocolate at home – it was a disaster. The seeding method seemed like a mystery, and I ended up with a batch of chocolate that was more suitable for the trash can than a fancy dessert plate. But I was determined to master the art of tempering chocolate, and after years of practice, I can confidently say that it’s not as complicated as it seems. In fact, learning how to temper chocolate at home (seeding method) is a game-changer for any baker or chocolate lover. It’s a skill that requires patience, attention to detail, and a basic understanding of the science behind chocolate.
As we dive into the world of chocolate tempering, I promise to guide you through the process with clarity and precision. You’ll learn the why behind every step, from melting and cooling to seeding and tempering. By the end of this article, you’ll be equipped with the knowledge and confidence to temper chocolate like a pro, using the seeding method that has become my go-to technique. Whether you’re a beginner or an experienced baker, I’ll share my tips and tricks to help you achieve that perfect snap and shine in your homemade chocolate creations. So, let’s get started on this delicious journey and unlock the secrets of how to temper chocolate at home (seeding method).
Table of Contents
Guide Overview: What You'll Need
Total Time: 1 hour 15 minutes
Estimated Cost: $10 – $20
Difficulty Level: Intermediate
Tools Required
- Double Boiler (or a heatproof bowl set over a pot of simmering water)
- Thermometer (digital or candy thermometer)
- Spreader or Offset Spatula (for smoothing chocolate)
- Cutting Tool (such as a sharp knife or chocolate cutter)
Supplies & Materials
- Chocolate (high-quality dark, milk, or white chocolate with a high cocoa butter content)
- Seed Chocolate (pre-tempered chocolate for seeding)
- Parchment Paper (for lining the surface)
- Cooling Surface (such as a marble slab or a plate placed in the refrigerator)
Step-by-Step Instructions
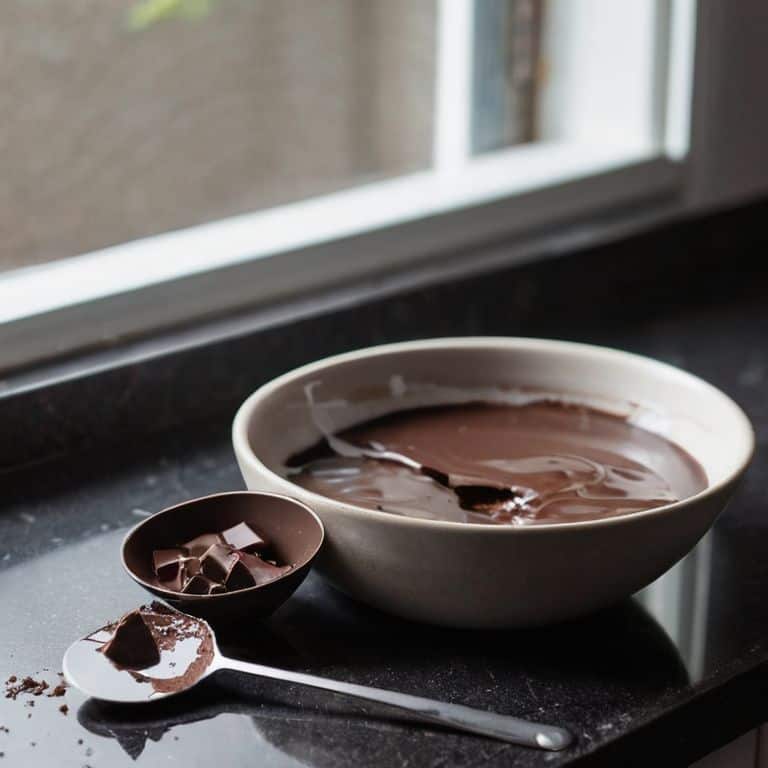
- 1. First, let’s start with the fundamentals of tempering: it’s essential to understand that tempering chocolate is all about creating a stable crystal structure that gives the chocolate its glossy appearance and satisfying snap. To begin, you’ll need to melt about two-thirds of your chocolate to around 105°F to 115°F (40°C to 46°C), which is slightly above the melting point of most chocolates.
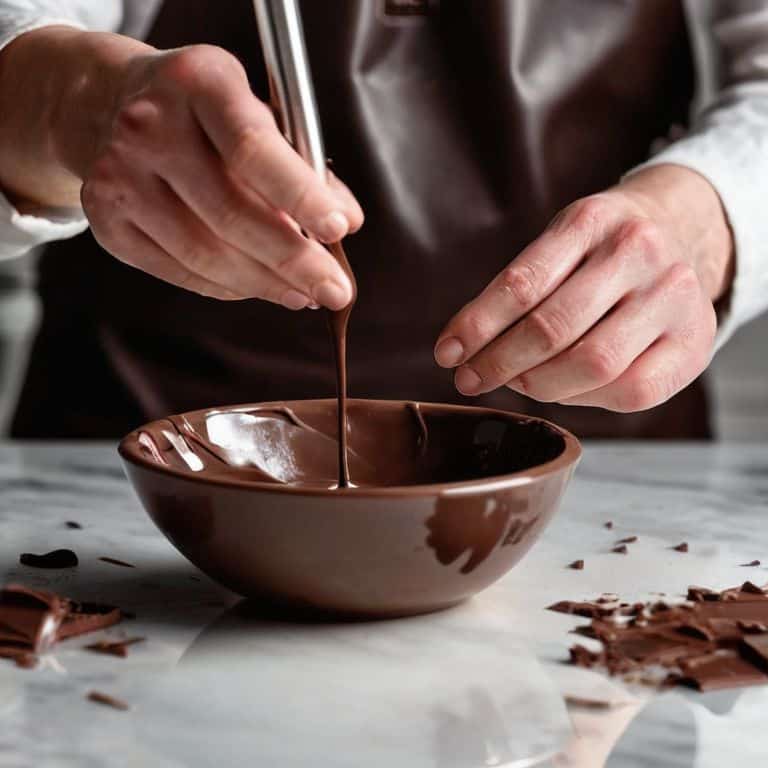
- 2. Next, remove the melted chocolate from the heat source and let it cool down to around 82°F to 86°F (28°C to 30°C). This step is crucial as it allows the chocolate to start forming the desired crystal structure. Be patient, as this process might take a bit of time, but it’s worth the wait for that perfect temper.
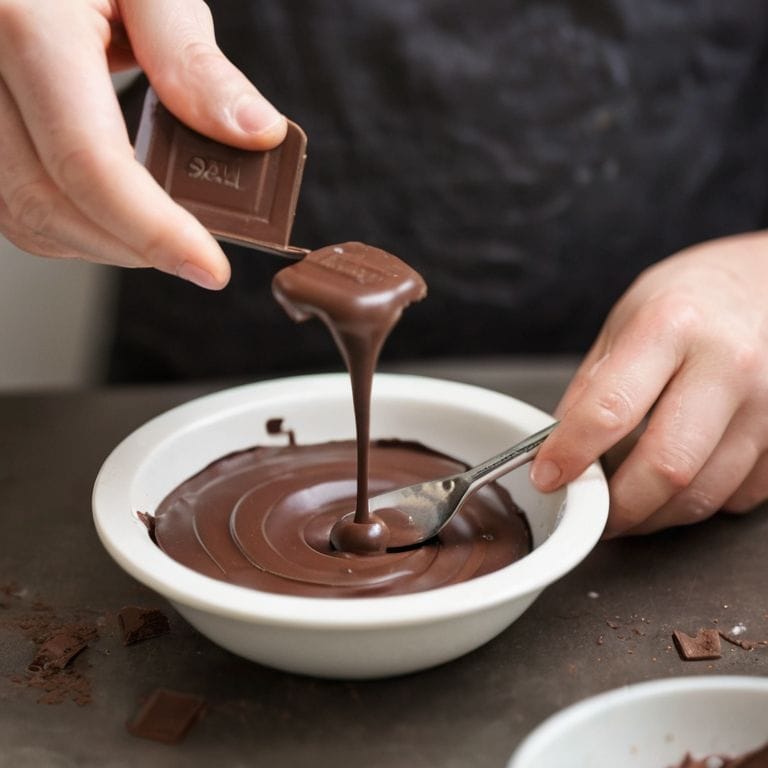
- 3. Now, it’s time to add the “seed” to your melted chocolate. The seed is the remaining one-third of your chocolate that you haven’t melted yet. This chocolate should be at room temperature. By adding the seed, you’re introducing the right crystal structure into the melted chocolate, which will then grow and stabilize as it cools.
- 4. Gently stir the mixture of melted and solid chocolate. It’s essential to be gentle to avoid introducing air into the chocolate, which can lead to a less-than-desirable texture. As you stir, you’ll start to notice the chocolate reaching its working temperature, usually between 86°F and 90°F (30°C and 32°C), at which point it’s ready to use for dipping, molding, or whatever your chocolate project requires.
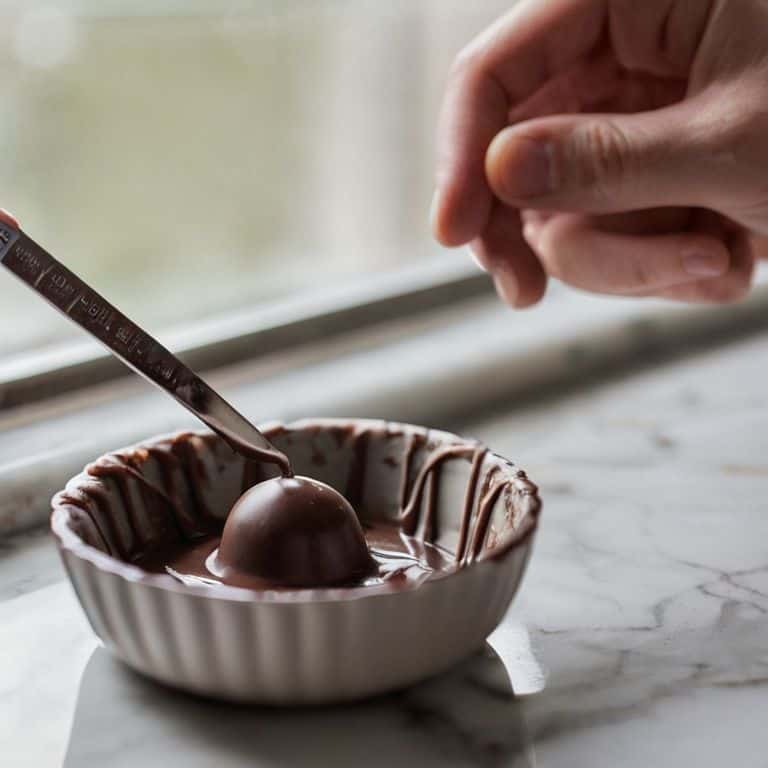
- 5. To ensure that your chocolate has reached the perfect temper, you can perform a simple temper test. Dip a knife or a small tool into the chocolate, and then place it in the refrigerator for about 5 minutes. If the chocolate comes out with a smooth, even finish and a satisfying snap when broken, you’ve successfully tempered your chocolate. If not, don’t worry, it might just need a bit more cooling or stirring.
- 6. With your chocolate now perfectly tempered, it’s time to use it. Whether you’re making truffles, dipping strawberries, or creating intricate chocolate designs, remember that tempered chocolate sets faster than untempered chocolate. So, work efficiently and neatly to get the most out of your beautifully tempered chocolate.
- 7. Finally, to maintain the temper of your chocolate, especially if you’re not using it immediately, store it in a cool, dry place. Avoid refrigerating or freezing tempered chocolate, as this can cause it to lose its temper. If you do need to store it for an extended period, consider re-tempering it before use to ensure it still has that perfect snap and sheen.
Mastering Chocolate Tempering
As you become more comfortable with the seeding method, it’s essential to understand the importance of temperature control in chocolate tempering. This is where many beginners go wrong, and their chocolate ends up with a dull appearance or soft texture. To avoid this, make sure to work within the ideal chocolate working temperature range, which is typically between 82°F and 90°F (28°C and 32°C).
When it comes to choosing the best chocolate for tempering, look for high-quality chocolates with a high cocoa butter content. Dark chocolate and milk chocolate can be tempered using the seeding method, but it’s crucial to select a type that is suitable for your desired application. Some chocolates are better suited for molding, while others are ideal for dipping or coating.
To take your chocolate tempering skills to the next level, consider experimenting with different chocolate tempering techniques for beginners, such as the tabling method or using a thermometer. By understanding the pros and cons of each method, you’ll be able to troubleshoot common mistakes and achieve perfect temper every time. Remember, practice makes perfect, so don’t be discouraged if it takes a few tries to get the hang of it – with patience and persistence, you’ll be a chocolate tempering pro in no time.
Avoiding Common Mistakes in Tempering
When tempering chocolate, it’s easy to get tripped up by minor mishaps. One of the most common mistakes is overheating the chocolate, which can cause it to seize up or become too thick. To avoid this, make sure to monitor the temperature closely, and never heat it above 115°F (46°C). Another pitfall is introducing moisture into the chocolate, which can cause it to bloom or develop an unappealing white coating. To prevent this, ensure your workspace and tools are completely dry before starting the tempering process.
By being mindful of these potential pitfalls, you’ll be well on your way to achieving perfectly tempered chocolate every time. Remember, practice makes perfect, so don’t be discouraged if it takes a few attempts to get the hang of it. With patience and attention to detail, you’ll soon be creating beautiful, professional-looking chocolates that are sure to impress.
Seeding Method Secrets for Beginners
As a beginner, it’s essential to understand that the seeding method is all about introducing a small amount of already-tempered chocolate into the melted chocolate. This “seed” helps to create a stable crystal structure, giving your chocolate that perfect snap. To get it just right, make sure your seed chocolate is at the ideal temperature – around 82°F to 86°F (28°C to 30°C).
When adding the seed to the melted chocolate, do it gradually, stirring gently to avoid introducing air. You’ll know it’s working when you see the chocolate start to thicken and develop a smooth, glossy finish. With a little practice, you’ll be able to coax even the most stubborn chocolate into perfect temper, every time.
Tempering Like a Pro: 5 Essential Tips for the Seeding Method
- Use High-Quality Chocolate: The best results come from using high-quality chocolate with a high cocoa butter content, as it will give you a smoother and more stable temper
- Melt Chocolate Correctly: When melting your chocolate, make sure to do it slowly and gently, as high temperatures can cause the chocolate to seize up or become too thick
- Monitor Temperatures Closely: Temperature control is crucial in the seeding method, so invest in a good thermometer and keep a close eye on the temperature of your chocolate as you work
- Don’t Over-Seed: While seeding is essential for creating a stable temper, over-seeding can lead to a grainy or streaked finish, so start with a small amount of seed chocolate and add more as needed
- Practice Makes Perfect: Tempering chocolate is an art that takes time and practice to master, so don’t be discouraged if your first few attempts don’t turn out perfectly – keep trying and you’ll soon get the hang of it
Key Takeaways for Tempering Chocolate at Home
Tempering chocolate is a science that can be mastered with the seeding method, which involves cooling and heating chocolate to create a stable crystal structure that gives it a smooth, glossy finish and a satisfying snap
By understanding the importance of temperature control and patience in the seeding method, you can avoid common mistakes such as overheating or undercooling the chocolate, which can lead to a dull or soft finish
With practice and attention to detail, you can unlock the full potential of tempered chocolate and create beautiful, professional-looking chocolates at home, perfect for gifts, decorations, or simply enjoying as a sweet treat
The Art of Tempering
Tempering chocolate is not about following a recipe, it’s about understanding the dance between heat, time, and crystal formation – with the seeding method, you’ll be the maestro of this delicious symphony!
Beatrice Quinn
Unlocking the Art of Chocolate Tempering
As we conclude our journey into the world of tempering chocolate at home using the seeding method, it’s essential to recap the key elements that make this process successful. From understanding the importance of temperature control to mastering the technique of seeding, each step plays a crucial role in achieving that perfect, snappy chocolate. Remember, practice makes perfect, and it’s completely normal to encounter a few setbacks along the way. The crucial thing is to learn from those mistakes and adjust your approach accordingly. By doing so, you’ll not only improve your chocolate tempering skills but also develop a deeper understanding of the science behind the process.
As you continue to explore and refine your chocolate tempering skills, always keep in mind that the art of tempering is a journey, not a destination. It’s about experimenting with different types of chocolate, trying out new recipes, and pushing the boundaries of what’s possible. So, don’t be afraid to get creative and try new things – and most importantly, have fun with it! With patience, persistence, and a willingness to learn, you’ll be well on your way to becoming a chocolate tempering expert, capable of creating exquisite, professional-quality chocolates that will impress anyone.
Frequently Asked Questions
What is the ideal temperature range for seeding chocolate to ensure proper tempering?
For ideal seeding, aim for a temperature range of 82°F to 86°F (28°C to 30°C). This narrow window allows the cocoa butter crystals to form, giving your chocolate that perfect snap and sheen. Trust me, precision is key here, so invest in a good thermometer to ensure you’re within this sweet spot.
How do I know if the chocolate has reached the correct temper, and what are the visual cues to look for?
To check if your chocolate has reached the perfect temper, look for a smooth, even finish and a sharp snap when broken. Visually, well-tempered chocolate will have a glossy appearance and a satisfying ‘click’ when you tap it gently with your finger. If it’s dull or soft, it’s not yet tempered.
Can I use the seeding method to temper different types of chocolate, such as white or dark chocolate, and are there any special considerations for each?
While the seeding method works beautifully for milk and dark chocolate, white chocolate requires a bit more finesse due to its higher cocoa butter content. For dark chocolate, a slightly lower seeding temperature is ideal, around 82°F to 86°F. As for white chocolate, it’s best to seed at a warmer temperature, around 90°F to 94°F, to prevent it from becoming too brittle.