I still remember the first time I tried to pipe a perfect border on a croquembouche – it was a disaster. The how to pipe with precision was a mystery to me, and I ended up with a wobbly, uneven mess. But I was determined to master the technique, and after years of practice, I can confidently say that precision piping is not just about steady hands, but about understanding the why behind the technique. It’s about temperature, pressure, and movement – all working together in harmony to create a seamless, professional finish.
In this article, I’ll share my hard-won secrets for piping with precision, from preparing the perfect piping bag to executing flawless, punctuation-perfect joints. You’ll learn how to troubleshoot common mistakes, like uneven pressure and incorrect temperature, and how to develop the muscle memory needed to pipe like a pro. By the end of this guide, you’ll be equipped with the practical, no-nonsense advice you need to take your piping skills to the next level and create stunning, professional-looking desserts that will impress even the most discerning palates. Whether you’re a beginner or an experienced baker, my goal is to help you master the art of precision piping and unlock a world of creative possibilities.
Table of Contents
Guide Overview: What You'll Need
Total Time: 1 hour 15 minutes
Estimated Cost: $15 – $30
Difficulty Level: Intermediate
Tools Required
- Pipe Cutter (for precise cuts)
- Pipe Wrench (for gripping and turning pipes)
- Tubing Bender (for bending pipes to desired angles)
- Measuring Tape (for accurate measurements)
- Level (for ensuring pipes are level and plumb)
- Pencil and Marker (for marking pipes and fittings)
Supplies & Materials
- Copper Pipe (in various sizes, e.g., 1/2 inch, 3/4 inch, 1 inch)
- Pipe Fittings (e.g., elbows, tees, couplers)
- Pipe Flux (for soldering)
- Solder (for joining pipes and fittings)
- Teflon Tape (for sealing threaded connections)
Step-by-Step Instructions
- 1. First, let’s start with the basics: investing in quality equipment is essential for precision piping. I always recommend using a piping bag made from a durable, food-grade material, and a set of round tips in various sizes to achieve different effects. Make sure to choose tips that are comfortable to work with and suitable for the type of decoration you want to create.
- 2. Next, it’s time to prepare your piping bag. To do this, you’ll need to cut a small hole at the bottom of the bag, just large enough to fit your chosen piping tip. This will help you achieve a smooth, consistent flow of frosting or chocolate. Don’t make the hole too big, or you’ll end up with a mess on your hands!
- 3. Now, let’s talk about the importance of temperature. As a chocolatier, I can tell you that temperature is crucial when working with chocolate or frosting. Make sure your piping bag and tips are at room temperature, and that your frosting or chocolate is at the optimal temperature for piping (usually around 80°F to 90°F). This will help you achieve a smooth, pliable consistency that’s easy to work with.
- 4. With your piping bag prepared and your frosting or chocolate at the right temperature, it’s time to fill the bag. To do this, simply scoop the frosting or chocolate into the bag, making sure to fill it about 2/3 full. This will give you enough room to maneuver the bag without making a mess.
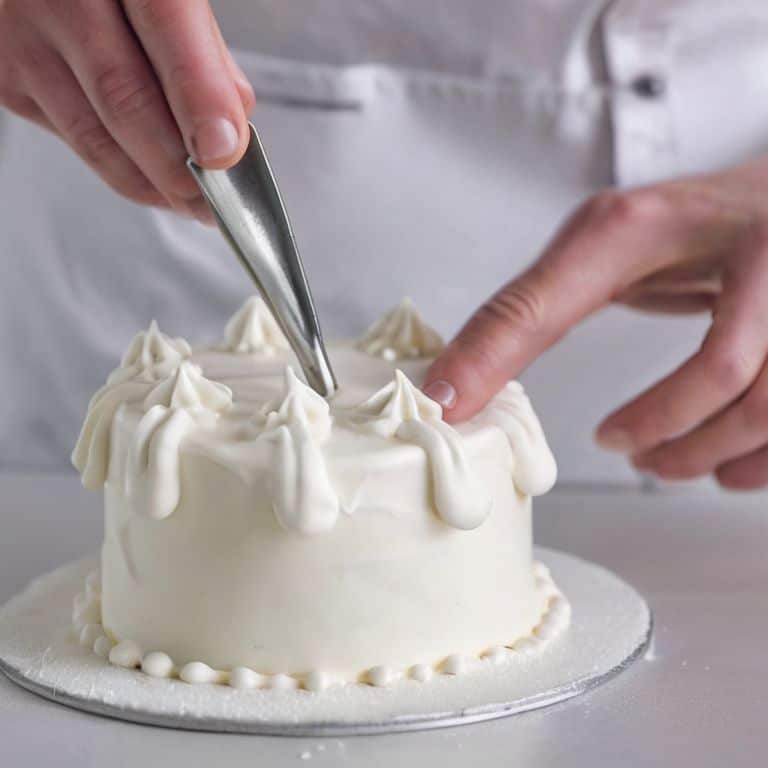
- 5. Now it’s time to get piping! To achieve smooth, consistent lines, hold the piping bag at a 90-degree angle to your surface, with the tip just barely touching the surface. Squeeze the bag gently but firmly, using a consistent pressure to control the flow of frosting or chocolate. Remember to keep your hands steady and your wrists straight to avoid wobbling or shaking.
- 6. As you pipe, pay attention to the pressure and flow of the frosting or chocolate. If the flow is too slow, you can increase the pressure slightly. If the flow is too fast, you can decrease the pressure or stop piping for a moment to let the frosting or chocolate set. Practice makes perfect, so don’t be discouraged if it takes a few tries to get the hang of it.
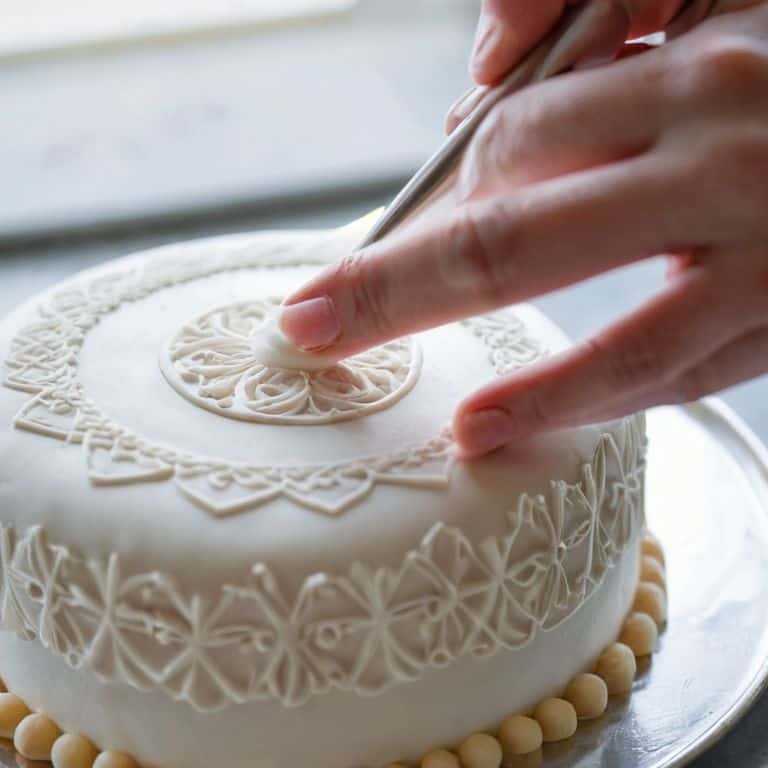
- 7. To create intricate designs or patterns, you’ll need to use a combination of piping techniques, such as star tips or leaf tips. To use these tips, simply attach them to your piping bag and adjust the pressure and flow as needed to achieve the desired effect. Remember to practice each technique separately before combining them to create complex designs.
- 8. Finally, to achieve a professional finish, make sure to clean and dry your piping bag and tips thoroughly after each use. This will help prevent the buildup of bacteria and other contaminants, and keep your equipment in good working order. With a little practice and patience, you’ll be piping like a pro in no time!
How to Pipe With Precision
As I reflect on my journey to mastering piping techniques, I realize that it’s all about developing a sense of touch and feel. When working with royal icing, for instance, it’s essential to achieve the right consistency to ensure smooth flow and even lines. I’ve found that temperature plays a significant role in this process, and I always make sure to work in a cool, dry environment to prevent the icing from becoming too runny.
One of the most common mistakes beginners make is not having proper piping bag control methods in place. This can lead to uneven pressure, resulting in wobbly lines and inconsistent designs. To avoid this, I recommend practicing with different piping bag sizes and types to find what works best for you. It’s also crucial to understand the importance of tips for smooth buttercream flow, such as using the right type of tip and applying gentle, consistent pressure.
By focusing on these key aspects, you’ll be well on your way to achieving precision piping for beginners. Remember, it’s all about patience, practice, and attention to detail. Don’t be discouraged if your early attempts don’t turn out as expected – with time and dedication, you’ll develop the skills and confidence to create stunning, professional-looking designs. And when you do, you’ll understand the true value of common piping mistakes to avoid, and how to overcome them with ease.
Avoiding Common Mistakes in Royal Icing Consistency
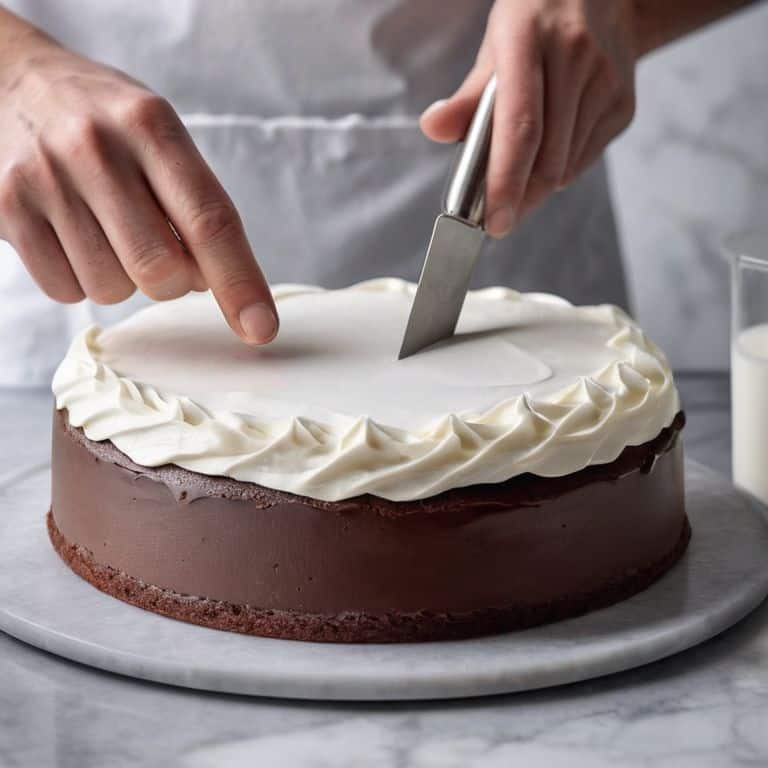
When working with royal icing, consistency is key. I’ve seen many a beginner struggle with icing that’s either too thin or too thick. To avoid this, make sure to sift your powdered sugar thoroughly and use room temperature egg whites. If your icing is too thin, don’t be afraid to let it sit for a few minutes to allow the cornstarch to absorb excess moisture. On the other hand, if it’s too thick, a small amount of water can be added, but do so sparingly – it’s easier to add than to remove.
By paying close attention to your icing’s consistency, you’ll be able to achieve smooth, even lines and intricate details that will elevate your piped designs. Remember, practice makes perfect, so don’t be discouraged if it takes a few tries to get it just right. With patience and precision, you’ll be piping like a pro in no time.
Mastering Piping Techniques for Beginners
As a master pastry chef, I’ve seen many beginners struggle with piping techniques. It’s all about developing muscle memory and understanding the intricacies of pressure and flow. To start, practice piping simple borders and lines, focusing on consistent pressure and steady movement. Don’t be discouraged if your early attempts are messy – it’s a skill that takes time to develop.
Remember, precision piping is not just about the tool, but also the temperature and consistency of your mixture. I always say, “temperature is the most important ingredient in pastry.” Ensure your mixture is at the ideal temperature, and you’ll be amazed at how much easier it is to achieve smooth, consistent lines. With patience and practice, you’ll be piping like a pro in no time, and the possibilities for creative expression will be endless.
My Top 5 Tips for Piping with Precision
- Piping bags must be at room temperature, around 72°F to 75°F (22°C to 24°C), for optimal control and flow
- Selecting the right piping tip is crucial – I prefer round tips for details and star tips for borders and textures, but experiment to find your favorites
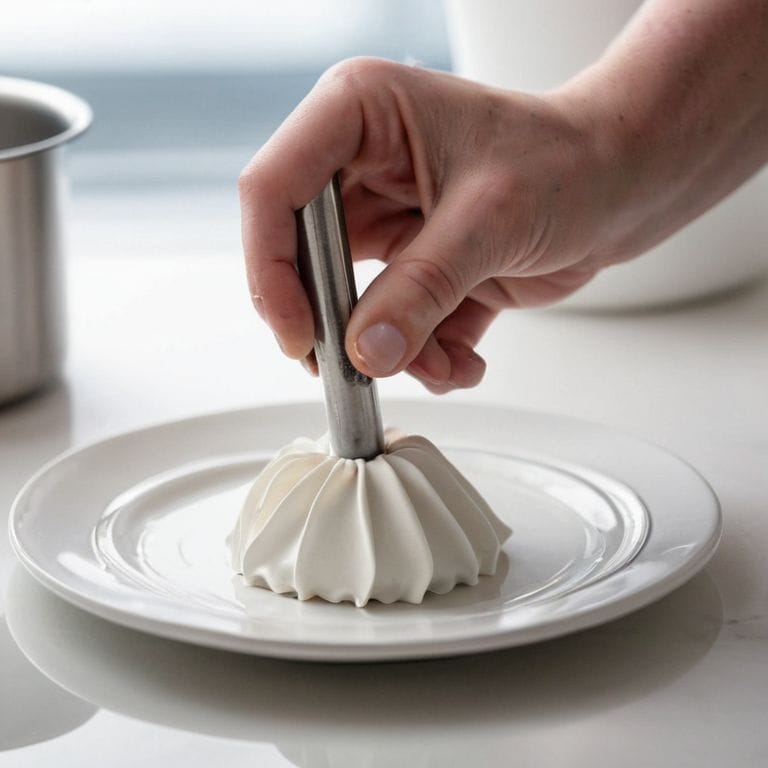
- Royal icing consistency is key: it should be stiff enough to hold its shape but still flow smoothly – think ‘soft peak’ consistency, like whipped cream
- Practice piping on parchment paper or a silicone mat before decorating your actual cake or pastry – it’s all about building muscle memory and precision
- Temper your environment: keep your workspace at a comfortable temperature, around 68°F to 72°F (20°C to 22°C), to prevent icing from melting or becoming too stiff, and always have a turntable or rotating surface nearby to easily access all sides of your masterpiece
Piping with Precision: 3 Key Takeaways
I’ve learned that mastering the perfect piping consistency is all about temperature control – it’s the foundation upon which all other techniques are built, and it’s what sets professionals apart from amateurs
To achieve flawless piping, it’s crucial to understand the ‘why’ behind each technique, rather than just following a recipe – this is where the magic happens, and your creations start to take on a life of their own
Practice may not make perfect, but precision certainly does – by focusing on the tiny details, like the exact temperature of your chocolate or the consistency of your royal icing, you’ll be well on your way to creating show-stopping pastries that are almost too beautiful to eat
The Art of Precision Piping
Piping with precision is not just about the tools or the technique, it’s about feeling the rhythm of the icing, understanding the nuances of temperature and pressure, and trusting your hands to create beauty – it’s a waltz of wonder, where every step, every squeeze, and every swirl must be deliberate, disciplined, and divine.
Juliette Le Roux
Perfecting the Art of Precision Piping
As we conclude our journey to master the art of precision piping, it’s essential to remember that practice is key. We’ve covered the fundamental steps, from preparing the perfect royal icing consistency to mastering various piping techniques. It’s crucial to avoid common mistakes, such as inconsistent temperature and pressure, which can make all the difference between a smooth, elegant finish and a sloppy, unprofessional one. By focusing on precise temperature control and developing a keen sense of touch, you’ll be well on your way to creating breathtaking designs that impress and inspire.
As you continue to hone your skills, remember that the pursuit of perfection is a lifelong journey, not a destination. Don’t be discouraged by initial setbacks or frustrations – every mistake is an opportunity to learn and grow. With dedication and perseverance, you’ll unlock the secrets of precision piping and discover a world of creative possibilities. So, go ahead, take the leap, and pipe with passion – your creations will be a testament to the transformative power of precision, patience, and practice.
Frequently Asked Questions
What is the ideal consistency for royal icing when piping intricate designs?
For intricate designs, I demand a royal icing consistency that’s just shy of pouring, but still holds its shape. Think 10-15 seconds for it to flatten out when dropped from a spatula – that’s the sweet spot. Any thicker, and it’s too stubborn; any thinner, and it’s too sloppy. Trust me, this is where the magic happens.
How do I prevent my piping bags from clogging with dried royal icing?
To prevent clogging, I always ensure my royal icing is at the perfect consistency – not too thick, not too thin. I also make sure to squeeze out any air pockets in the bag and use a small round tip to help break up any dried bits. Regularly cleaning and drying my tips is also a must, it’s all about maintaining that delicate balance.
Can I use a regular piping bag instead of a specialized one for precision piping?
While you can use a regular piping bag, I must advise against it for precision work. The specialized bags are designed with thicker material and a smoother interior, reducing friction and allowing for more controlled piping. Trust me, the investment is worth it for the perfect, punctuation-perfect joint.