I still remember the first time I worked with edible gold leaf on a cake – it was like a revelation. I was creating a bespoke wedding cake, and the couple wanted a touch of luxury that would make their dessert table shine. As I delicately applied the gold leaf to the cake’s surface, I knew I had found my new favorite decorating technique. Now, I’m excited to share my expertise with you in this a guide to edible gold leaf for cakes, so you can add a hint of glamour to your bakes.
In this article, I’ll cut through the noise and give you practical tips on how to work with edible gold leaf like a pro. You’ll learn how to choose the right type of gold leaf, how to apply it seamlessly, and how to troubleshoot common mistakes. Whether you’re a beginner or an experienced baker, this guide will walk you through the process of creating stunning, gold-accented cakes that are sure to impress. By the end of this a guide to edible gold leaf for cakes, you’ll be confident in your ability to add a touch of luxury to any cake, and I just can’t wait to see what you create.
Table of Contents
Guide Overview: What You'll Need
Total Time: 1 hour 15 minutes
Estimated Cost: $20 – $40
Difficulty Level: Easy
Tools Required
- Brush (small, for applying adhesive)
- Tweezers (for handling gold leaf)
- Cake turntable (optional, for display)
Supplies & Materials
- Edible gold leaf (available in sheets or rolls)
- Adhesive (specifically designed for edible use)
- Cake or dessert (to apply the gold leaf to)
- Confectioner’s brush (for smoothing out gold leaf)
Step-by-Step Instructions
- 1. First, let’s start with the basics: to work with edible gold leaf, you’ll need a few essential tools, including a gold leaf brush, a cutting mat, and a sharp knife or scissors to cut the leaf into manageable pieces. I like to have all my tools laid out in front of me before I begin, it helps me get into a creative flow.
- 2. Next, prepare your cake surface by applying a thin, even layer of edible adhesive, such as piping gel or corn syrup, to the area where you want to apply the gold leaf. This is a crucial step, as it ensures the gold leaf adheres smoothly and evenly to the cake. Make sure to let the adhesive dry completely before moving on to the next step.
- 3. Now it’s time to apply the gold leaf: gently lift a piece of gold leaf from its backing paper using your gold leaf brush, and place it onto the prepared area of the cake. Use a gentle tapping motion with your brush to secure the leaf and remove any air bubbles. Repeat this process, overlapping the gold leaf pieces slightly as you go, until you’ve covered the desired area.
- 4. To achieve a more intricate design, you can use a small paintbrush to apply a tiny amount of water to the back of the gold leaf, allowing you to shape and mold it into delicate curves and patterns. This technique takes a bit of practice, but the results are well worth the effort – just be careful not to apply too much water, as this can cause the gold leaf to tear.
- 5. Once you’ve applied the gold leaf to your desired design, use a sealant such as confectioners’ glaze or varnish to protect the leaf and give it a beautiful, lustrous finish. This step is especially important if you’re planning to serve the cake in a humid environment, as it will help prevent the gold leaf from tarnishing or disintegrating.
- 6. For a truly show-stopping effect, consider combining your edible gold leaf with other decorative elements, such as fresh flowers or sugar decorations. The key is to balance your design elements carefully, so that each component complements the others without overwhelming the overall look of the cake. Don’t be afraid to experiment and try out new combinations – it’s all part of the creative process.
- 7. Finally, to add a bit of extra dimension to your design, you can use a small tool or skewer to create subtle texture and pattern on the surface of the gold leaf. This can be as simple as creating a series of gentle, swirling patterns, or as complex as crafting intricate, layered designs – the possibilities are endless, and it’s up to you to decide what works best for your unique cake creation.
A Guide to Edible Gold Leaf for Cakes
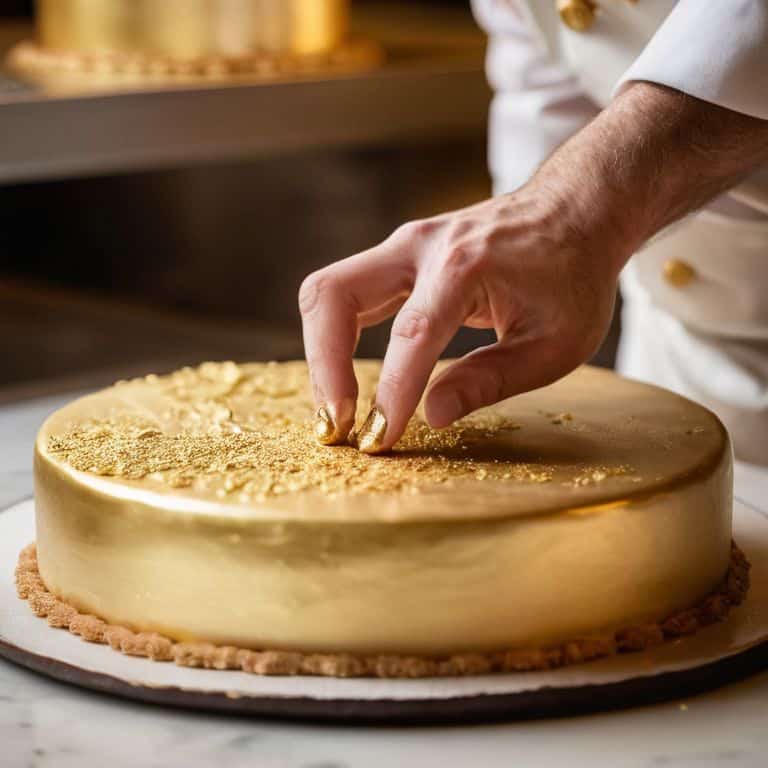
As I delve deeper into the world of edible gold leaf sheets for baking, I’m always excited to share my latest discoveries with you. One of the most important things to keep in mind when working with edible gold leaf is handling with care, as it can be quite delicate. To ensure a smooth application process, make sure to handle the gold leaf sheets by the edges, and avoid touching the gold surface to prevent oil from your skin interfering with the adhesive.
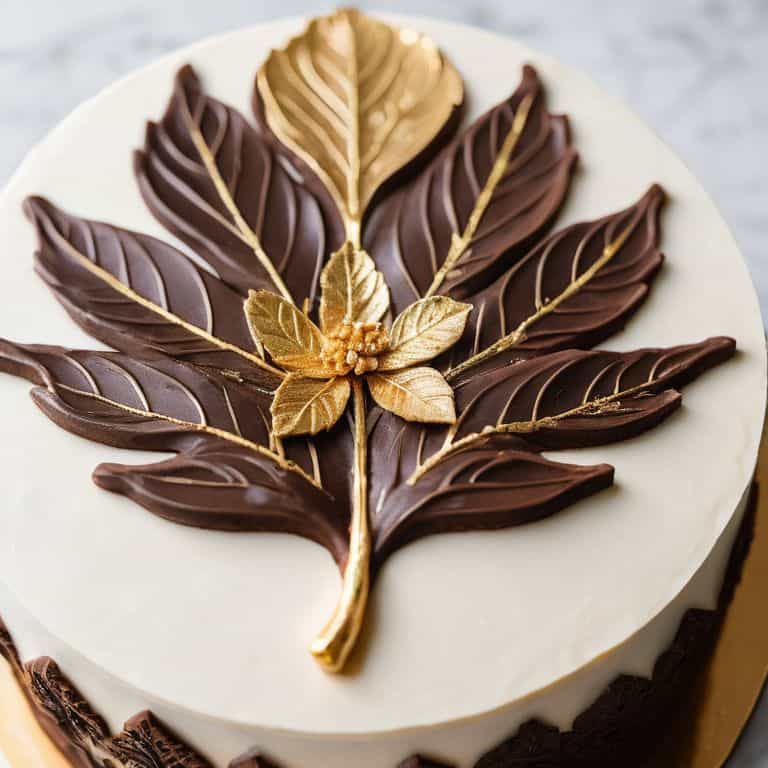
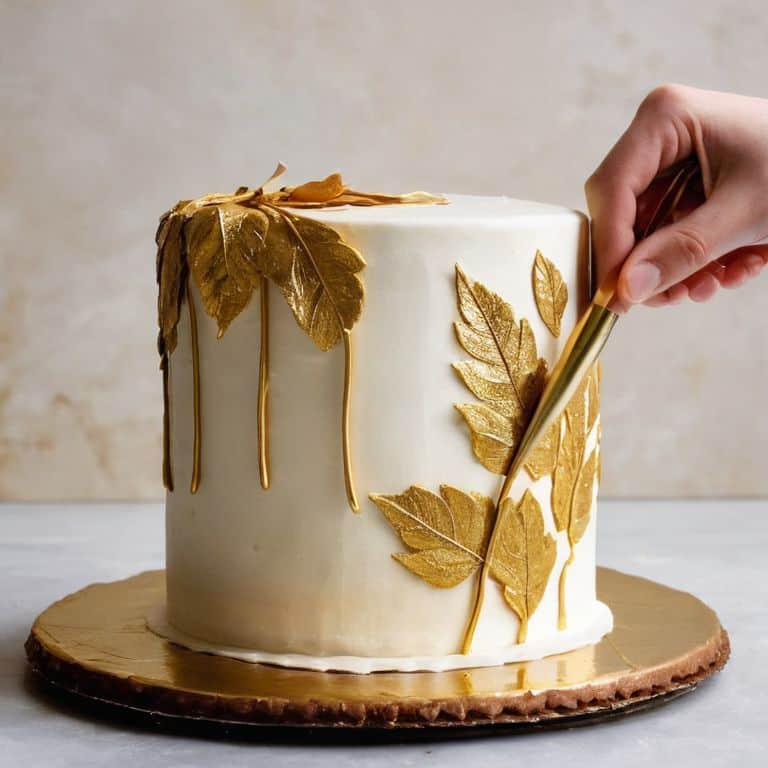
When it comes to gold leaf cake decorating techniques, I find that layering is key. By applying thin layers of gold leaf, you can achieve a stunning, multi-dimensional effect that adds depth and visual interest to your cake design. For a more intricate look, try combining edible gold leaf with other decorative elements, such as sugar flowers or delicate piping.
To take your gold leaf cake design to the next level, consider experimenting with different types of edible gold dust for cakes. From rose gold to 24-karat gold, the options are endless, and can add a unique touch to your creations. Remember to always follow edible gold leaf safety precautions when handling these products, and happy decorating!
Gilding the Dream With Gold Leaf Sheets
When working with gold leaf sheets, I love the sense of freedom that comes with transforming a simple cake into a lavish masterpiece. To start, gently cut your gold leaf sheets into manageable pieces, taking care not to touch the delicate metal with your fingers. Next, apply a thin layer of adhesive, such as piping gel or edible glue, to the area where you’d like to attach the gold leaf. This is where the magic happens – use a soft brush to gently place the gold leaf onto the cake, smoothing out any wrinkles or air bubbles as you go.
As you work, remember to handle the gold leaf with precision and patience, allowing each piece to adhere fully before moving on to the next. With a little practice, you’ll be amazed at how easily you can achieve a seamless, gilded finish that adds an unparalleled touch of sophistication to your creations.
Mastering Gold Leaf Cake Decorating Techniques
To truly master gold leaf cake decorating, it’s essential to practice patience and precision. I like to think of working with edible gold leaf as a meditative process, where every delicate touch and gentle brushstroke brings your design to life. As you gain confidence in handling the gold leaf, you can start to experiment with more intricate designs and patterns, from delicate florals to geometric motifs. Remember, the key to achieving a flawless finish lies in the preparation of your cake surface – a smooth, even layer of buttercream or fondant is crucial for the gold leaf to adhere seamlessly.
By mastering these techniques, you’ll be able to create show-stopping cakes that shimmer and shine, perfect for special occasions or simply to add a touch of luxury to any celebration. With every cake, you’ll find your skills and creativity growing, and the art of gold leaf decoration will become second nature to you.
Unlocking the Secrets of Edible Gold Leaf: 5 Essential Tips
- Start with the right tools: invest in a good quality brush and a gilding pad to help you handle the delicate gold leaf sheets
- Prepare your cake surface: ensure your cake is completely dry and crumb-free before applying the gold leaf to prevent it from tearing or flaking off
- Work in a draft-free environment: even the slightest breeze can cause the gold leaf to blow away, so find a quiet and still space to decorate
- Apply the gold leaf in thin layers: build up your design gradually, allowing each layer to set before adding more, to achieve a smooth and even finish
- Seal your masterpiece: once you’ve completed your gold leaf design, set it with a light dusting of confectioner’s sugar or a spritz of edible varnish to protect it and add a touch of luminosity
Golden Nuggets to Remember
I’ve learned that the key to working with edible gold leaf is to handle it gently and patiently, using the right tools to avoid tearing or creasing the delicate sheets
Mastering the art of applying gold leaf to cakes requires a combination of the right techniques, such as using a gilding brush or a foam brush, and the right materials, like a quality gold leaf and a suitable adhesive
By experimenting with different gold leaf patterns, designs, and combinations with other decorations, you can unlock a world of creative possibilities and turn your cakes into truly show-stopping masterpieces that shine with elegance and sophistication
Unlocking the Luxury of Edible Gold Leaf
As I always say, the art of working with edible gold leaf is not just about adding a touch of luxury, but about uncovering the hidden beauty in every detail, every curve, and every delicate petal of our creations.
Chloé Dubois
Unlocking the Magic of Edible Gold Leaf
As we conclude this journey through the world of edible gold leaf, I hope you’ve gained a deeper understanding of how to transform your cakes into stunning works of art. From the basics of applying gold leaf sheets to mastering advanced decorating techniques, we’ve covered it all. Remember, the key to achieving a luxurious finish lies in the details – the precision, patience, and practice that go into each delicate stroke. By following these steps and experimenting with different designs, you’ll be well on your way to creating cakes that shine with elegance and sophistication.
As you embark on your own edible gold leaf adventures, I encourage you to think outside the box and push the boundaries of what’s possible. Don’t be afraid to get creative and try new things – after all, that’s what makes cake decorating such a thrilling art form. With edible gold leaf, the possibilities are endless, and I have no doubt that you’ll uncover a world of beauty and wonder. So go ahead, take the leap, and let your cakes shine with the unmistakable allure of gold!
Frequently Asked Questions
What are the best types of cakes to use edible gold leaf on?
For me, the best cakes to adorn with edible gold leaf are those with smooth, velvety finishes, like buttercream or fondant. I love pairing gold leaf with rich, dark colors, like chocolate or red velvet, to create a stunning contrast. Vanilla or cream-colored cakes are also gorgeous, as they provide a clean canvas for the gold to shine.
How do I prevent edible gold leaf from flaking off or fading after application?
To prevent edible gold leaf from flaking off or fading, I seal it with a light dusting of confectioner’s sugar or a gentle spray of varnish. This helps lock it in place, ensuring your masterpiece stays radiant and intact. It’s a simple trick, but trust me, it makes all the difference!
Can I mix edible gold leaf with other decorations, such as sugar flowers or sprinkles, for a unique look?
Absolutely, I love mixing edible gold leaf with other decorations for a one-of-a-kind look. Try pairing it with delicate sugar flowers or sprinkles for a touch of whimsy. The key is to balance your design elements, so the gold leaf enhances your other decorations without overwhelming them. Experiment with different combinations to find your perfect blend of elegance and playfulness.