
As I sit amidst my watercolor paintings and half-finished cake designs, I often think about the myths surrounding how to decorate cookies with royal icing. Many believe it’s a tedious, impossible task, reserved for the most skilled bakers. But I’m here to tell you that’s just not true. With the right techniques and a bit of patience, anyone can turn their cookies into stunning works of art. I’ve spent years perfecting my craft, and I’m excited to share my knowledge with you.
In this article, I’ll guide you through the process of decorating cookies with royal icing, from preparing the perfect icing consistency to creating intricate designs. You’ll learn my secrets to achieving smooth finishes and tips for adding delicate details. Whether you’re a beginner or an experienced baker, you’ll find practical advice and inspiration to take your cookie decorating to the next level. So, let’s get started and unleash our creativity with royal icing!
Table of Contents
- Guide Overview: What You'll Need
- Step-by-Step Instructions
- Decorating Cookies With Royal Icing
- My Top 5 Secrets to Decorating Cookies with Royal Icing like a Pro
- Key Takeaways for Decorating Cookies with Royal Icing
- The Art of Royal Icing
- Bringing Your Cookie Creations to Life
- Frequently Asked Questions
Guide Overview: What You'll Need

Total Time: 2 hours 30 minutes
Estimated Cost: $10 – $30
Difficulty Level: Intermediate
Tools Required
- Piping Bags (variety of sizes)
- Piping Tips (round, star, and leaf tips)
- Cookie Turntable (optional)
- Wax Paper (for practicing piping)
- Measuring Cups (for measuring ingredients)
- Electric Mixer (for mixing royal icing)
Supplies & Materials
- Royal Icing Mix
- Powdered Sugar (for dusting workspace)
- Food Coloring (gel or liquid)
- Cookies (sugar cookies or other varieties)
- Water (for thinning royal icing)
- Parchment Paper (for lining cookie sheets)
Step-by-Step Instructions
- 1. To start decorating your cookies with royal icing, begin by preparing your workspace. This means laying out all your tools and ingredients within easy reach, including your royal icing, piping bags, tips, and of course, your beautifully baked cookies. I always find that a clean and organized workspace helps me stay focused and creative throughout the decorating process.
- 2. Next, you’ll need to prepare your royal icing. If you’ve made it from scratch, ensure it’s at room temperature and give it a good stir. If it’s too thick, you can thin it out with a little water, but be cautious not to add too much, as this can make the icing too runny. The ideal consistency for piping is when the icing holds its shape but still flows smoothly off a spoon.
- 3. Now, it’s time to color your royal icing, if desired. This is where you can get really creative and match your cookies to any theme or occasion. Use high-quality food coloring gels or pastes for the best results, as they provide vibrant colors without thinning out the icing. Remember, a little goes a long way, so start with a small amount and mix well before adding more.
- 4. With your icing ready, it’s time to fill your piping bags. Cut the tip off the piping bag, insert a piping tip if you’re using one, and fill the bag about 2/3 full with icing. Twist the top of the bag to close it and apply gentle pressure to push the icing towards the tip. I find that using a turntable or a non-stick surface under my cookies helps me spin them around easily to access all sides.
- 5. To create borders or outlines, hold the piping bag at a 90-degree angle to the cookie and gently squeeze out the icing. Move the bag in a steady, continuous motion to create smooth lines. Practice makes perfect, so don’t worry if your first few attempts don’t turn out exactly as you hoped. The key is to maintain consistent pressure and movement.
- 6. For more intricate designs, such as flowers or leaves, you’ll want to use a smaller piping tip. These allow for finer details and can really elevate your designs. Remember to keep your piping bag at room temperature, as cold icing can be difficult to work with, especially for detailed work.
- 7. Once you’ve piped your designs onto the cookies, allow the royal icing to set completely. This can take anywhere from 30 minutes to an hour, depending on the humidity and thickness of the icing. It’s essential to be patient during this step, as handling the cookies too soon can smudge your beautiful designs.
- 8. Finally, to add an extra layer of protection and shine to your decorated cookies, you can apply a thin layer of confectioner’s glaze or piping gel. This step is optional but can really make your cookies stand out. Apply the glaze with a small brush, making sure to cover the entire surface evenly. Let it dry completely before serving or storing your cookies.
Decorating Cookies With Royal Icing
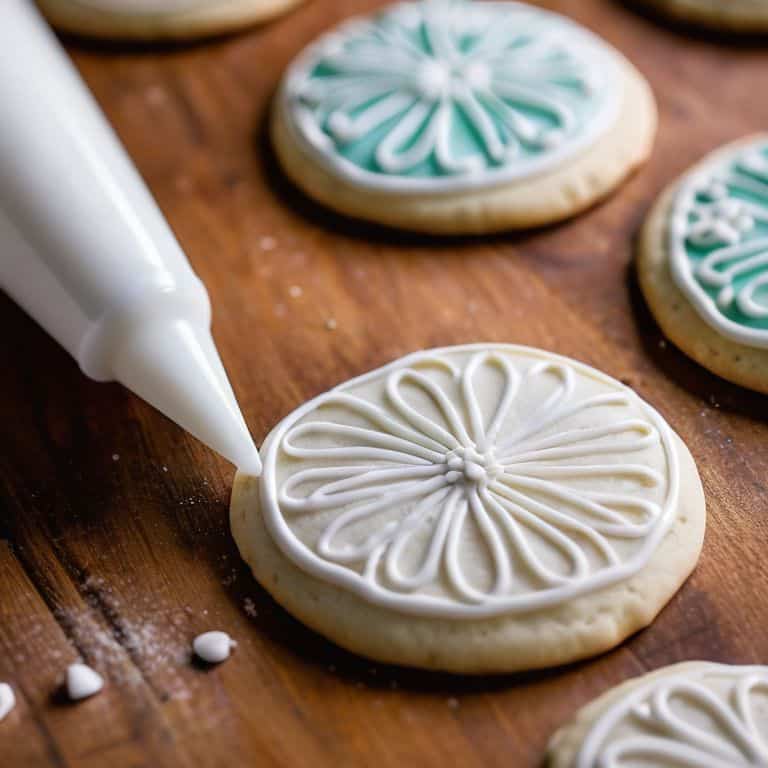
As I delve into the world of royal icing, I’m reminded of the importance of piping bag tips and tricks. The right technique can make all the difference in achieving smooth, even lines and delicate details. When working with royal icing, it’s essential to understand the concept of consistency, as it directly affects the overall appearance of your design. For beginners, I recommend starting with a simple royal icing recipe for beginners to get a feel for the medium.
When it comes to decorating cookies with royal icing, wet on wet cookie decorating methods can be a game-changer. This technique involves layering wet royal icing on top of wet royal icing, allowing for seamless blending and subtle color transitions. To achieve this effect, focus on maintaining a consistent royal icing consistency for flooding, which will enable you to create intricate designs with ease.
For a fun and creative twist, try exploring cookie decorating techniques for kids. These methods often involve simple, intuitive steps that can be adapted to various themes and designs. Whether you’re decorating cookies for a holiday or special occasion, cookie decoration ideas for holidays can provide endless inspiration. By experimenting with different techniques and designs, you’ll uncover the magic of royal icing and take your cookie decorating skills to the next level.
Piping Bag Tips for Kids
When it comes to decorating cookies with royal icing, I just love seeing kids get creative with piping bags. To make it easier for them, I recommend using larger piping tips and bags with easier grip handles. This way, they can focus on making sweet designs rather than struggling with the equipment. You can also fill the piping bags with a simpler, thicker royal icing consistency, making it easier for little hands to squeeze out.
I’ve found that practicing with plain paper before moving to cookies helps build confidence and fine motor skills. It’s also a great way to encourage experimentation with different patterns and designs, making the experience fun and engaging for kids. With a little patience and guidance, they’ll be decorating like pros in no time, and you’ll have a wonderful time watching them unleash their creativity.
Royal Icing Recipe for Beginners
To get started with decorating cookies, you’ll need a solid royal icing recipe. I swear by a simple combination of powdered sugar, meringue powder, and water. The key is to achieve the perfect consistency – not too thin, not too thick. For beginners, I recommend starting with a small batch to ensure you get the hang of it. My go-to recipe includes 1 cup of powdered sugar, 2 tablespoons of meringue powder, and 2-3 tablespoons of water. Mix these ingredients until you get a smooth, pliable icing that’s perfect for piping and decorating.
Remember, the ratio of powdered sugar to liquid is crucial, so don’t be afraid to adjust as you go. If you’re new to royal icing, it’s better to start with a thicker consistency and gradually add more water until you reach your desired flow. Trust me, practice makes perfect, and soon you’ll be whipping up royal icing like a pro!
My Top 5 Secrets to Decorating Cookies with Royal Icing like a Pro
- Let your royal icing rest: After preparing your royal icing, give it some time to relax and firm up – this will make it so much easier to work with, trust me!
- Choose the right piping tip: From round tips for outlining to star tips for creating beautiful textures, selecting the right tool for the job can make all the difference in your designs
- Start with simple designs: Don’t feel like you need to create a masterpiece on your first try – begin with basic shapes and patterns, and gradually build up to more intricate designs as you gain confidence
- Experiment with color: Royal icing is the perfect medium for playing with color and creating unique, ombre effects – don’t be afraid to get creative and try out new combinations
- Practice, practice, practice: As with any skill, decorating cookies with royal icing takes time and practice to master – don’t get discouraged if your first attempts don’t turn out as planned, just keep at it and you’ll soon be creating sweet masterpieces
Key Takeaways for Decorating Cookies with Royal Icing
Mastering the art of royal icing is all about experimenting with different consistencies and techniques to achieve the desired design, from smooth floods to intricate details
Choosing the right piping bag and tip can make all the difference in your royal icing journey, especially for beginners or when working with kids, as it allows for better control and creativity
With a little patience and practice, anyone can turn simple cookies into stunning works of art using royal icing, making it a fun and rewarding activity for both beginners and experienced decorators alike
The Art of Royal Icing
As I always say, the true magic of decorating cookies with royal icing lies not in the tools or the techniques, but in the gentle touch and the joyful spirit you bring to the process – it’s where precision meets passion, and sweetness meets art.
Chloé Dubois
Bringing Your Cookie Creations to Life

As we’ve explored the world of decorating cookies with royal icing, I hope you’ve discovered that with a few simple tools and techniques, you can turn any cookie into a masterpiece. From the royal icing recipe that provides the perfect consistency for piping, to the tips for handling a piping bag that make the process enjoyable even for kids, we’ve covered the essentials to get you started on your decorating journey. Remember, practice makes perfect, so don’t be discouraged if your early attempts don’t turn out exactly as you hoped – the process is just as valuable as the end result.
Now, as you embark on your own cookie decorating adventures, I want to leave you with a final thought: the art of decorating is a journey, not a destination. It’s about the joy of creation, the satisfaction of seeing your ideas come to life, and the pleasure of sharing something beautiful and delicious with others. So, don’t be afraid to experiment, to try new things, and to make mistakes – they are all part of the process that will help you grow as a decorator and find your own unique style.
Frequently Asked Questions
What are some common mistakes to avoid when working with royal icing for cookie decorating?
When working with royal icing, I’ve found that common mistakes include overmixing, which leads to a too-stiff consistency, and under-thinning, making it difficult to pipe smoothly. Also, be mindful of temperature and humidity, as they can affect the icing’s texture and set time.
How do I achieve a smooth, even finish with royal icing on my cookies?
To achieve a smooth finish, I always make sure to sift my royal icing thoroughly and use a turntable to spin the cookie as I work. This helps me maintain even coverage and prevents any air pockets from forming. It’s all about patience and gentle, sweeping motions with your piping bag!
Can I color royal icing with natural ingredients, such as beet juice or turmeric, for a more unique look?
I just adore experimenting with natural ingredients to create unique hues. Yes, you can definitely color royal icing with beet juice or turmeric for a stunning, one-of-a-kind look. Simply substitute a small amount of water in the recipe with the natural dye, and adjust to achieve your desired shade. Isn’t it wonderful to add an extra touch of personality to your cookies?