I still remember the first time I attempted a recipe for the perfect chocolate drip – it was a disaster. The chocolate was too thick, the cake was too dry, and the whole thing looked like a hot mess. But what really frustrated me was the plethora of recipes online that promised perfection, yet failed to deliver. The truth is, there’s no one-size-fits-all secret to a flawless chocolate drip. It’s all about understanding the nuances of chocolate and how it interacts with your cake.
As someone who’s spent years perfecting their craft, I’m excited to share my honest, experience-based advice on how to achieve a truly sublime a recipe for the perfect chocolate drip. In this article, I’ll walk you through the steps I take to create a show-stopping chocolate drip, from preparing the perfect cake to mastering the art of chocolate tempering. My goal is to empower you with the knowledge and confidence to create your own stunning desserts, without relying on gimmicks or overcomplicated techniques. By the end of this journey, you’ll be equipped with the skills to turn any cake into a masterpiece, and I just can’t wait to see what you create.
Table of Contents
- Recipe Instructions
- Mastering a Recipe for Perfect Chocolate Drip
- Elevating Desserts Chocolate Drip Decoration Ideas and Best Practices
- Unlocking Smooth Chocolate Glaze With Temperature Control
- Elevating Your Chocolate Drip Game: 5 Essential Tips
- Bringing It All Together: 3 Essential Takeaways for the Perfect Chocolate Drip
- The Harmony of Chocolate and Art
- Bringing it all Together: The Perfect Chocolate Drip
- Frequently Asked Questions
Recipe Details
Ingredients
- 1 cup dark chocolate chips (at least 70% cocoa)
- 1/2 cup heavy cream (chilled)
- 1 tablespoon unsalted butter (at room temperature)
- 1 teaspoon vanilla extract (optional)
Tools & Supplies
- Double boiler or heatproof bowl
- Whisk
- Measuring cups and spoons
- Piping bag or spoon for drizzling
Recipe Instructions
Step 1
First, let’s start with the basics: to achieve the perfect chocolate drip, we need to prepare our cake. I like to use a simple vanilla or mocha cake recipe, but feel free to get creative with your favorite flavors. Once your cake is completely cooled, it’s time to move on to the fun part – decorating.
Step 2
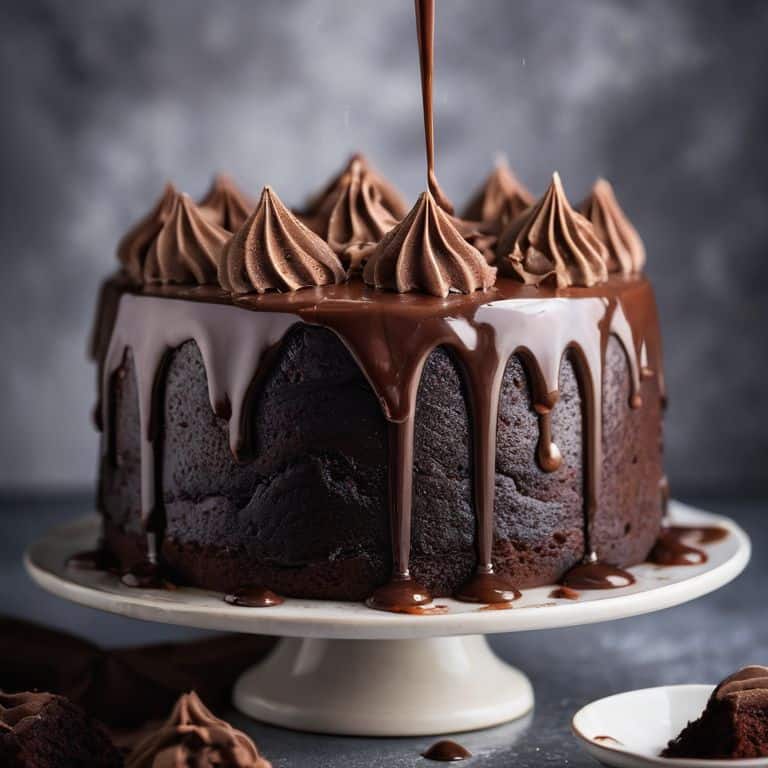
To create the chocolate drip effect, we’ll need to make a chocolate glaze. In a double boiler or a heatproof bowl set over a pot of simmering water, melt 1 cup of dark or semisweet chocolate chips. I adore using high-quality chocolate for the best flavor and texture. Stir occasionally until the chocolate is smooth and melted.
Step 3
While the chocolate is melting, prepare your drip station. Place your cooled cake on a turntable or a cake stand, and get your spatula, spoon, or piping bag ready. I like to use a piping bag with a small round tip for more control over the drip, but a spoon will also do the trick.
Step 4
Once the chocolate is melted and smooth, remove it from the heat and let it cool slightly. We want the chocolate to be still fluid but not too runny, so it’s essential to test the consistency before drizzling it over the cake. If it’s too thin, let it cool for a few more minutes.
Step 5
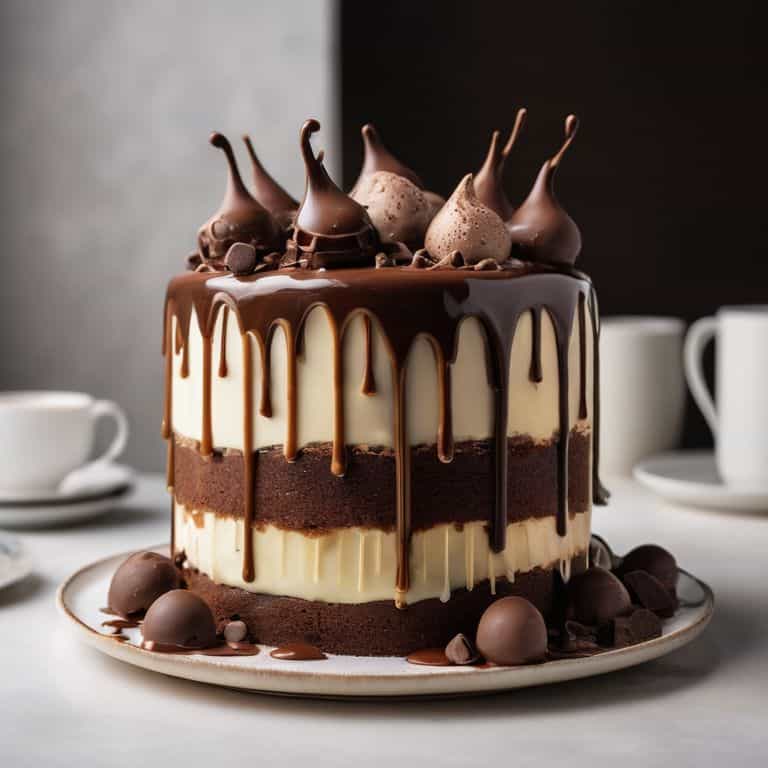
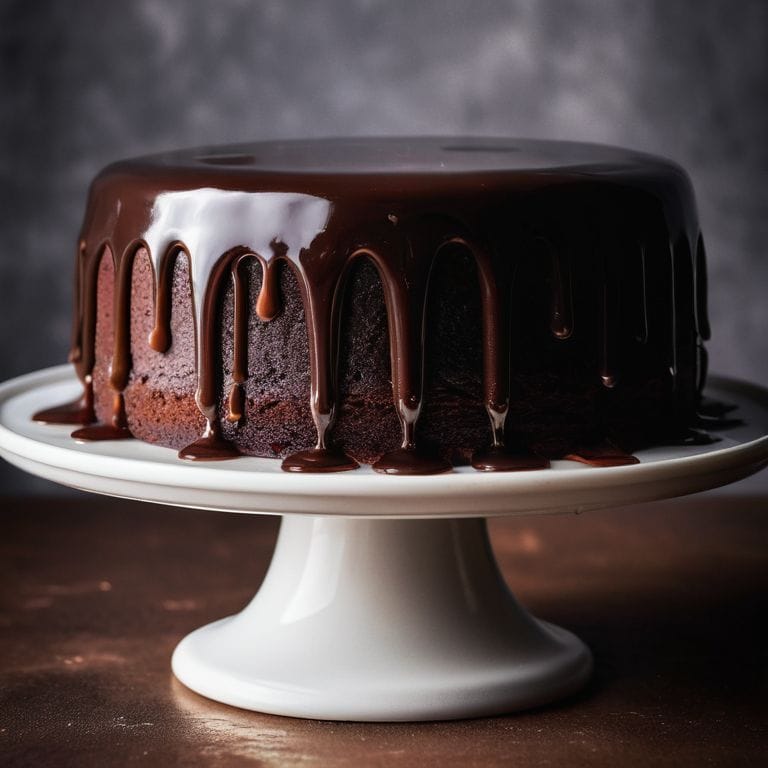
Now it’s time for the magic to happen – drizzling the chocolate glaze over the cake to create the chocolate drip effect. Start by drizzling a small amount of chocolate over the top of the cake, allowing it to flow down the sides naturally. You can use your spatula or spoon to guide the chocolate and create a more dramatic effect, or simply let it drip freely for a more organic look.
Step 6
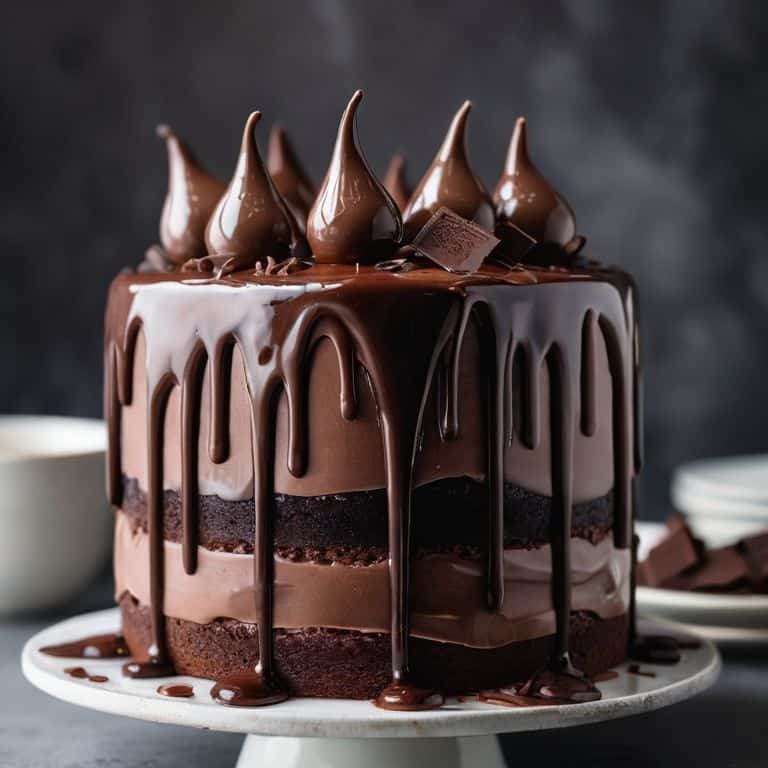
To add an extra touch of elegance to your cake, consider adding fresh flowers or greenery. I love using edible flowers like violas or pansies, but make sure they’re safe to eat and free of pesticides. Gently place your chosen decorations on top of the cake, and voilà – your masterpiece is complete.
Mastering a Recipe for Perfect Chocolate Drip
As I delve into the world of chocolate drip cakes, I’m reminded of the importance of temperature control for chocolate dripping. It’s a crucial element that can make or break the smoothness of the glaze. I’ve found that using high-quality chocolate, such as dark or milk chocolate with a high cocoa content, helps to achieve a rich and velvety texture. When it comes to chocolate ganache recipe for cakes, I always opt for a simple yet effective approach, combining melted chocolate with heavy cream to create a decadent and smooth glaze.
To take your chocolate drip cake to the next level, consider experimenting with different chocolate drip decoration ideas for desserts. You can add fresh fruits, nuts, or even edible flowers to create a unique and visually stunning design. I’ve also found that using a variety of chocolate types, such as white, milk, or dark chocolate, can add depth and complexity to the overall design. When working with chocolate, it’s essential to be mindful of common mistakes in chocolate drip technique, such as overheating or overcooling the chocolate, which can result in an uneven or grainy texture.
By mastering the art of chocolate dripping, you’ll be able to create show-stopping desserts that are sure to impress. Remember to have fun and experiment with different techniques, such as how to achieve smooth chocolate glaze, to find what works best for you. With practice and patience, you’ll be able to create stunning chocolate drip cakes that are almost too beautiful to eat. Almost!
Elevating Desserts Chocolate Drip Decoration Ideas and Best Practices
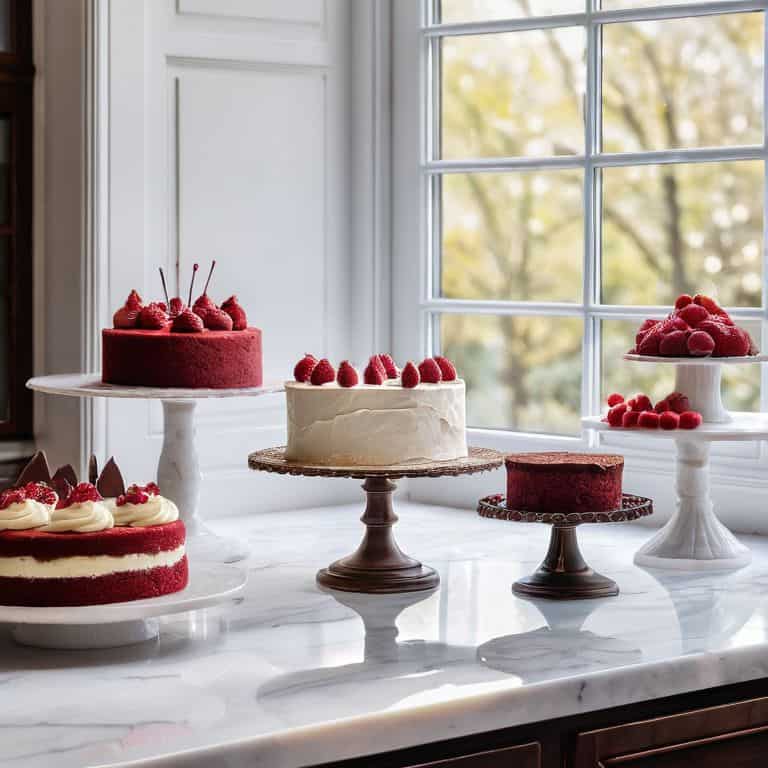
Now that we’ve mastered the perfect chocolate drip, let’s talk about the fun part – decorating! I just love how a beautifully executed drip can elevate a dessert from simple to show-stopping. To take your bakes to the next level, try experimenting with different decoration ideas, like adding fresh flowers or edible gold leaf to your design. When it comes to best practices, remember that less is often more – a simple, smooth drip can be just as stunning as an intricate design.
As you get creative with your decorations, don’t forget to consider the overall aesthetic you want to achieve. Think about the colors, textures, and shapes that will complement your chocolate drip, and have fun with the process!
Unlocking Smooth Chocolate Glaze With Temperature Control
To achieve a silky smooth chocolate glaze, temperature control is key. I like to think of it as the secret ingredient that elevates my chocolate drip cakes to masterpiece status. By heating the chocolate to just the right temperature, you’ll be able to create a glaze that’s not only smooth, but also perfectly pourable.
I aim for a temperature between 105°F and 115°F, which allows the chocolate to flow effortlessly off my spatula and onto the cake. Any hotter, and the chocolate can become too thin, losing its luxurious texture. By finding this sweet spot, you’ll be able to create a glaze that’s both visually stunning and indulgently delicious.
Elevating Your Chocolate Drip Game: 5 Essential Tips
- Use high-quality chocolate for the best flavor and texture, as it will make a significant difference in the final result of your chocolate drip
- Temper your chocolate correctly to achieve a smooth, glossy finish that will make your desserts stand out
- Experiment with different viscosities of chocolate to find the perfect flow for your drip design, from thin and delicate to thick and dramatic
- Don’t overheat your chocolate, as it can cause it to seize up and lose its silky texture, leading to an unappealing finish
- Practice makes perfect – don’t be discouraged if your first few attempts at a chocolate drip don’t turn out as expected, keep trying and you’ll soon find your rhythm and style
Bringing It All Together: 3 Essential Takeaways for the Perfect Chocolate Drip
To achieve a sublime chocolate drip, it’s crucial to master temperature control, as it directly affects the smoothness and consistency of the glaze, making it the foundation of a visually stunning dessert
Elevating your bakes to masterpiece status involves not just the perfect drip but also thoughtful decoration – consider balancing the richness of chocolate with fresh elements or contrasting textures to create a harmonious visual experience
Practice makes perfect, especially when it comes to the delicate art of drizzling chocolate – don’t be discouraged by initial attempts, and remember, the key to a flawless finish lies in patience, the right tools, and a keen eye for detail
The Harmony of Chocolate and Art
A perfect chocolate drip is not just about the recipe, but about the dance of temperatures, the whisper of pours, and the patience of a craftsman – it’s where science meets art, and every drizzle tells a story.
Chloé Dubois
Bringing it all Together: The Perfect Chocolate Drip
As we conclude our journey to creating the perfect chocolate drip, let’s recap the essential elements that make this recipe truly special. From the importance of temperature control in achieving a smooth chocolate glaze, to the creative possibilities offered by various decoration ideas and best practices, each step has been designed to help you unlock your full potential as a cake artist. By mastering these techniques, you’ll be well on your way to crafting desserts that are not only delicious but also visually stunning.
So, the next time you’re in the kitchen, remember that the art of cake decorating is all about experimentation and having fun. Don’t be afraid to try new things and make mistakes – they’re all part of the creative process. As you drizzle that perfect chocolate drip onto your latest masterpiece, take a step back and admire your handiwork. You’ve earned it, and I have no doubt that your bakes will continue to inspire and delight all who taste them, one exquisite detail at a time.
Frequently Asked Questions
What is the ideal temperature for melting chocolate to achieve a smooth drip?
For a sublime chocolate drip, I swear by melting my chocolate to around 105°F to 115°F. This temperature range allows for a smooth, velvety glaze that’s just perfect for drizzling. Any higher, and you risk seizing the chocolate; any lower, and it won’t flow beautifully. Trust me, this sweet spot makes all the difference!
How do I prevent the chocolate drip from becoming too thick or too thin?
To achieve the perfect consistency, I recommend checking the chocolate drip’s temperature and adjusting the amount of heavy cream or chocolate accordingly. If it’s too thick, warm it up slightly; if it’s too thin, let it cool for a minute or two. This balance is key to a stunning, velvety smooth drip.
Can I color the chocolate drip with food coloring or other additives to match my cake's theme?
Absolutely, friends! You can definitely add a pop of color to your chocolate drip with food coloring. I recommend using high-quality gel or paste food colorings for the most vibrant results. Start with a small amount and adjust to achieve your desired hue. Remember, a little goes a long way, so add it gradually to avoid over-saturating your chocolate.